Zendesk
BotDojo can integrate your ChatBot into your Zendesk web chat widget. Following are the steps to set up Zendesk conversation bot:
-
Go to your Zendesk account https://your-subdomain.zendesk.com
-
Navigate to Settings > Admin Center
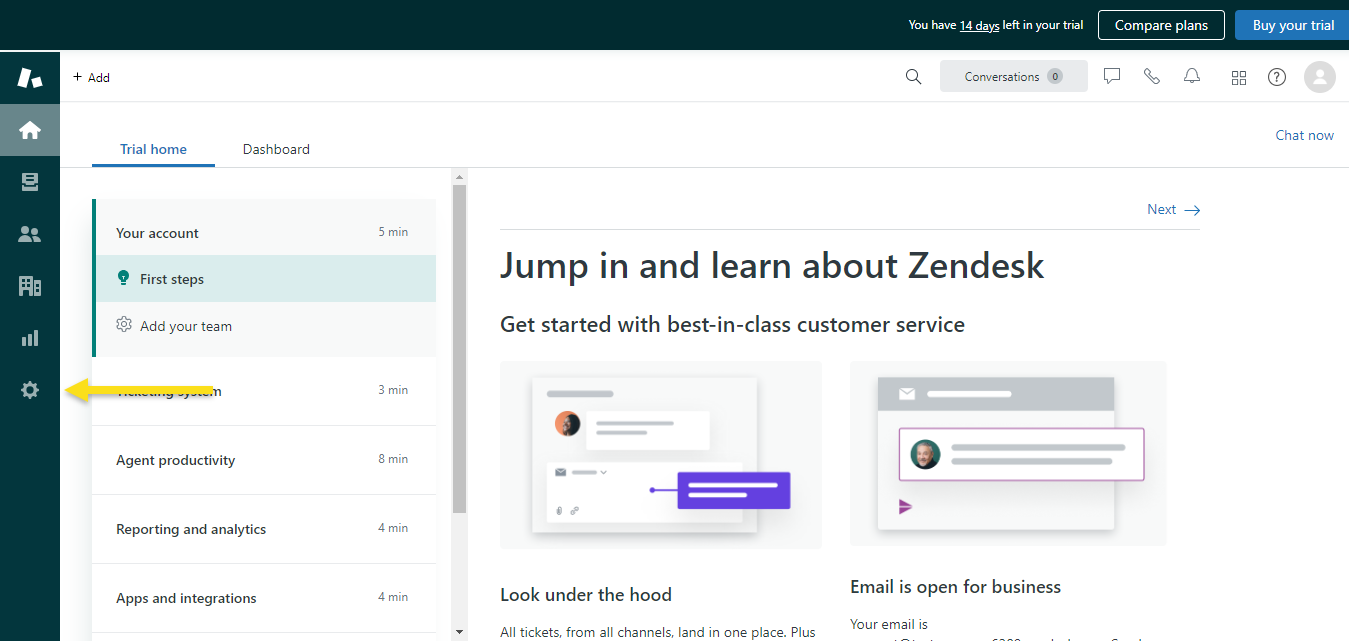
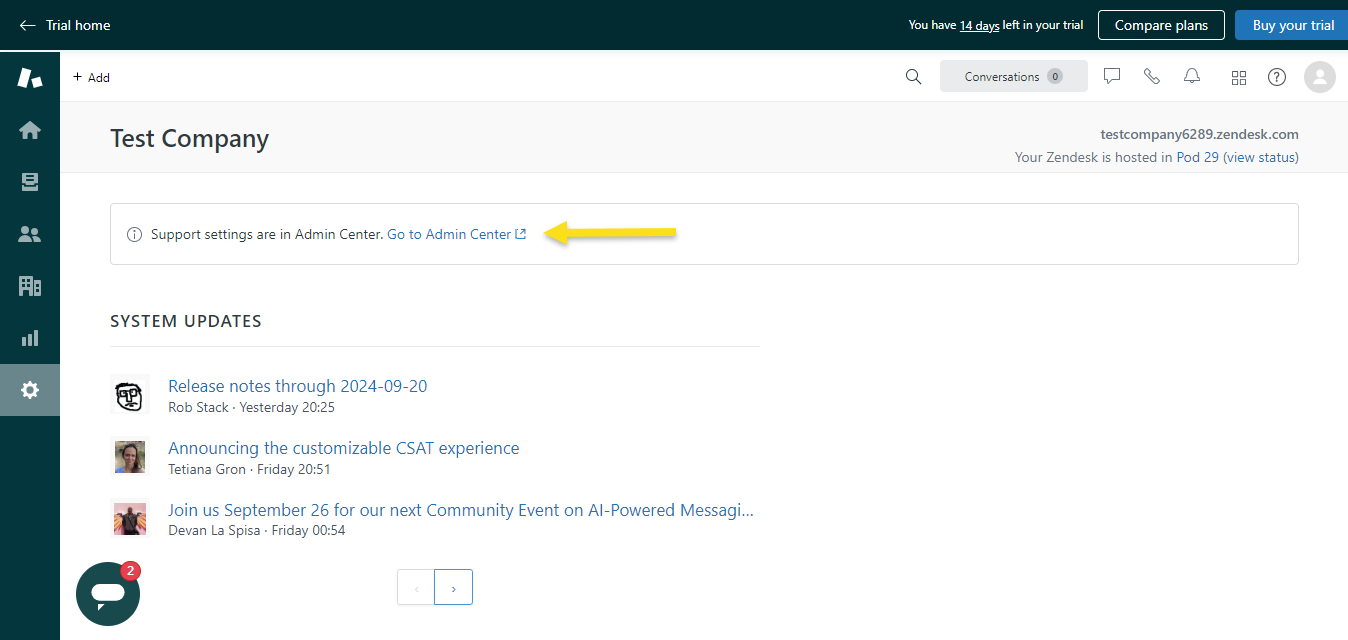
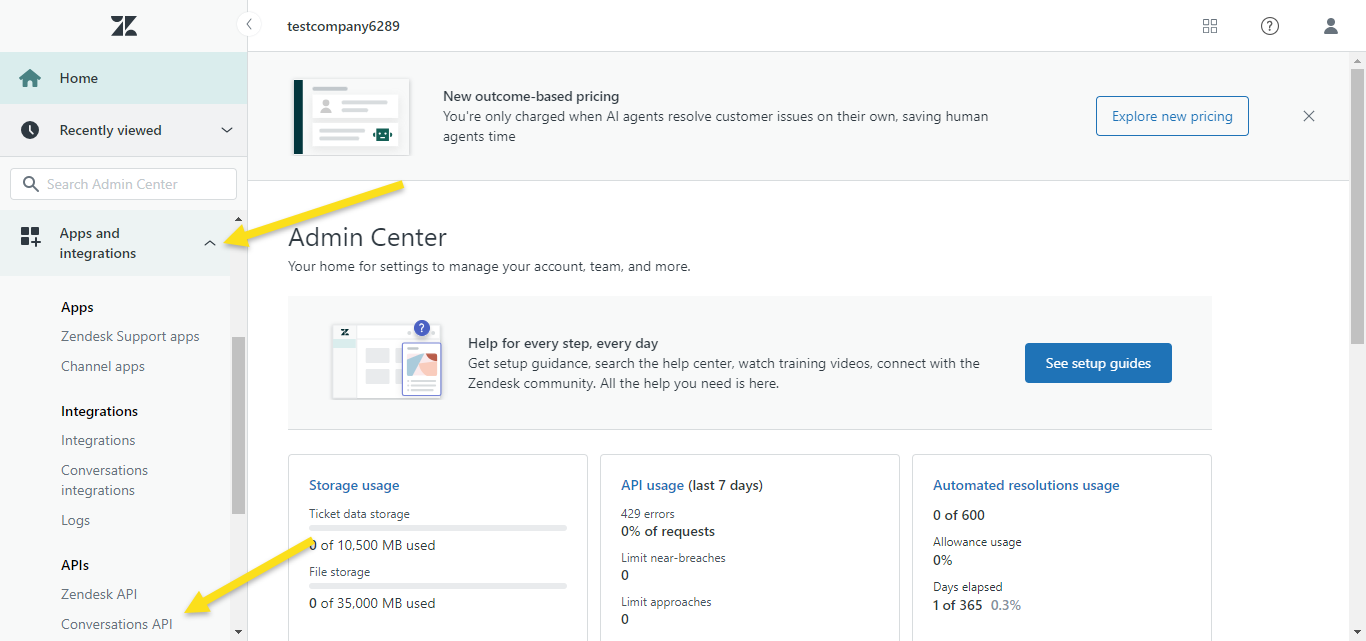
- Go to Apps and Integrations > Conversations API
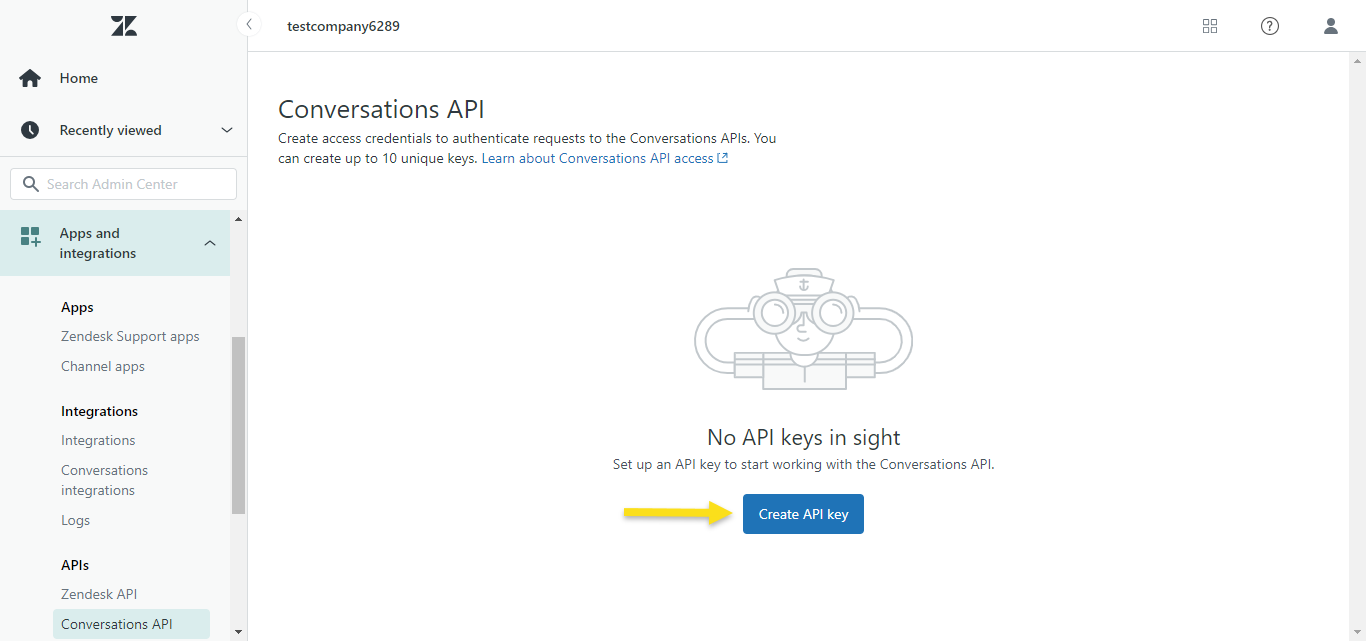
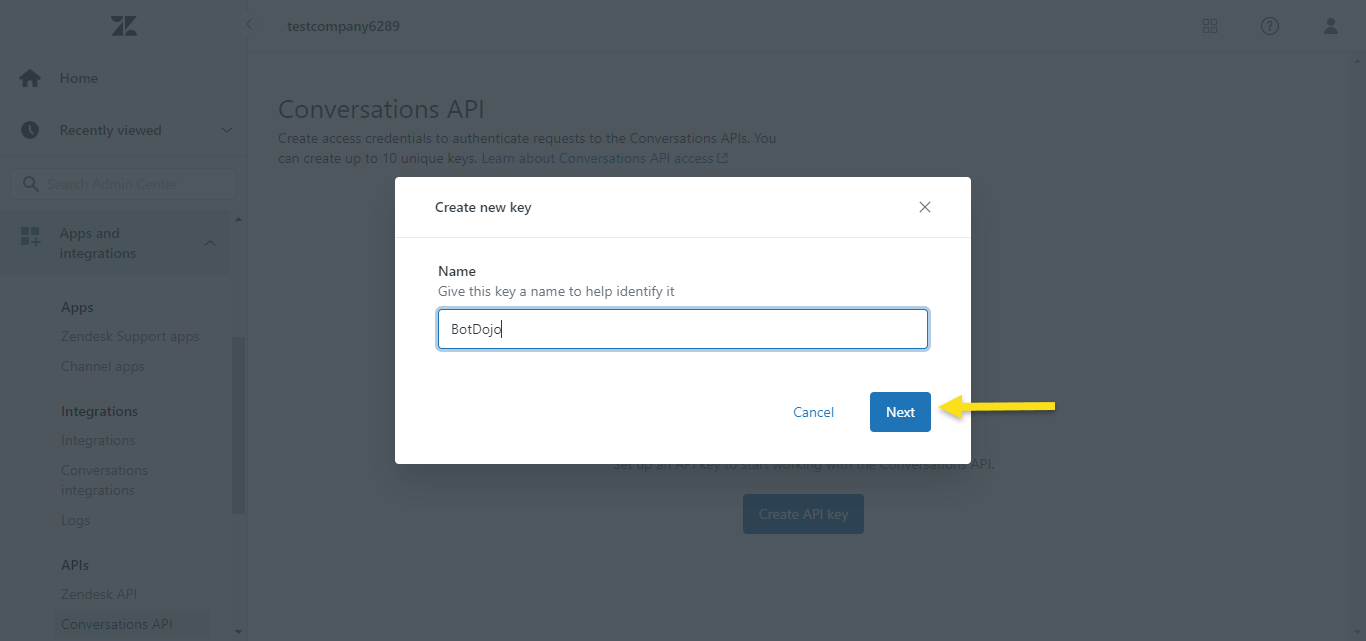
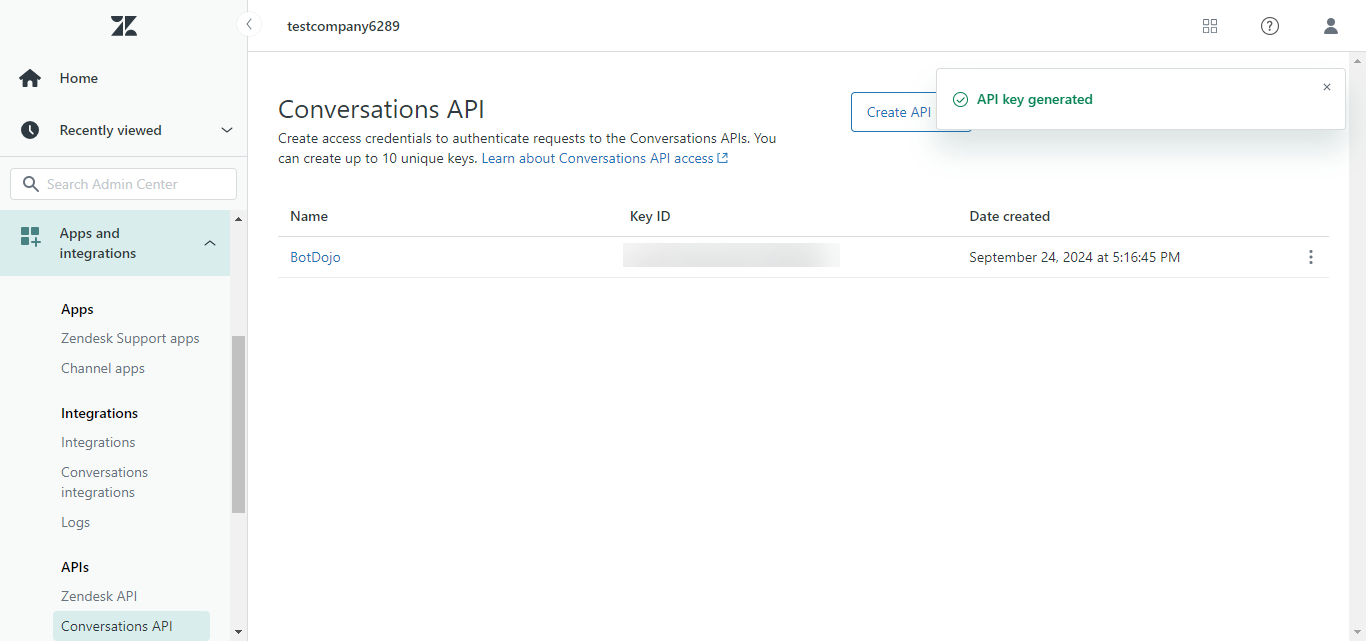
- Create a new API key
- Give a name for the API key and click Next.
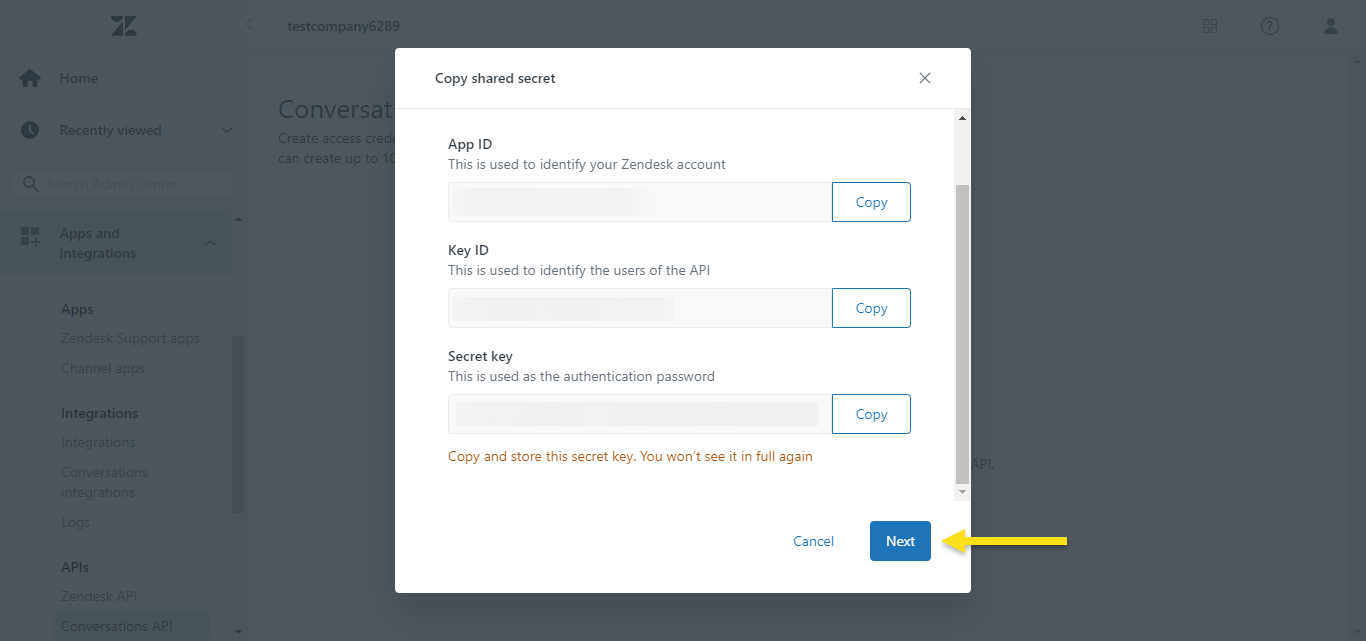
- Copy all the three values i.e. App ID, Key ID and Secret Key and click Next.
-
Now go to your BotDojo account
-
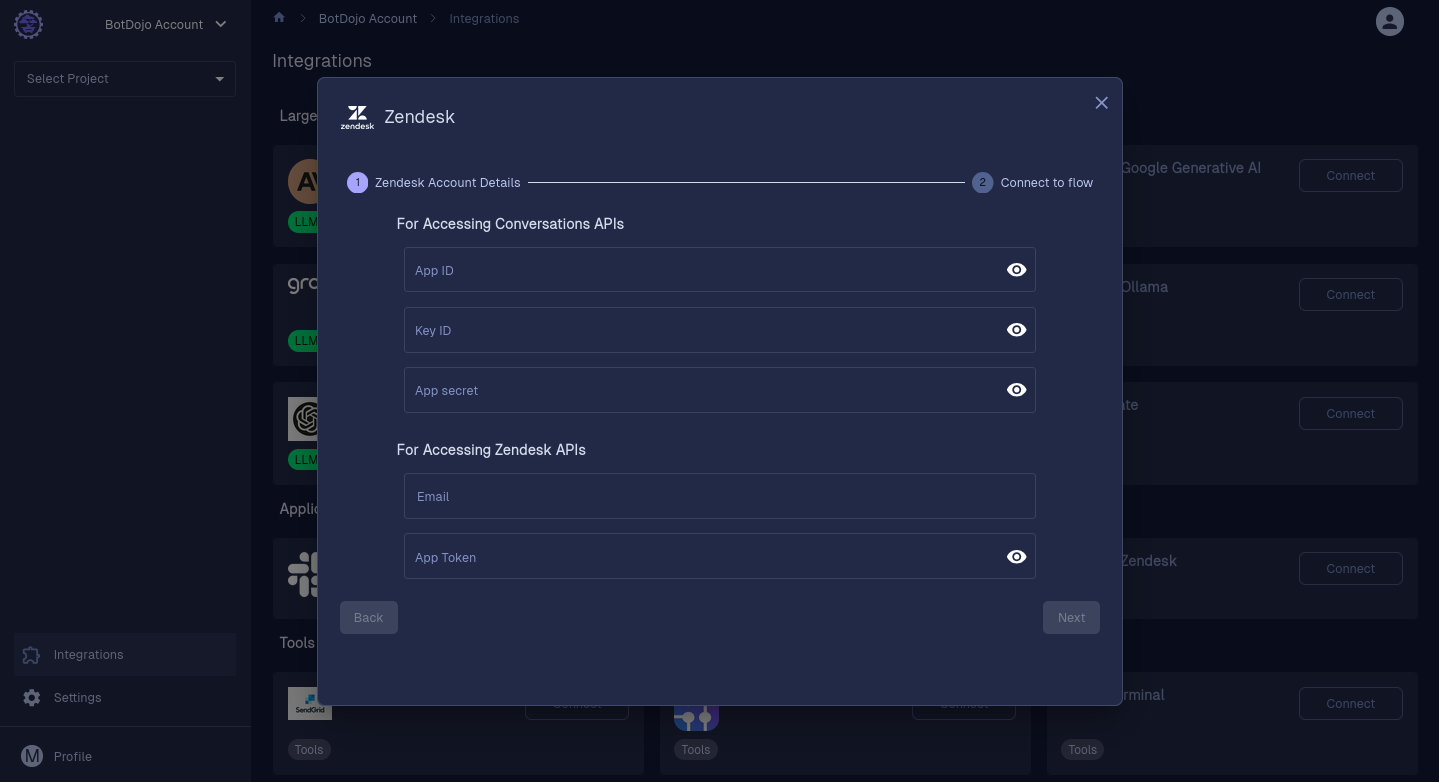
Navigate to Integrations page. Select Connect Zendesk.
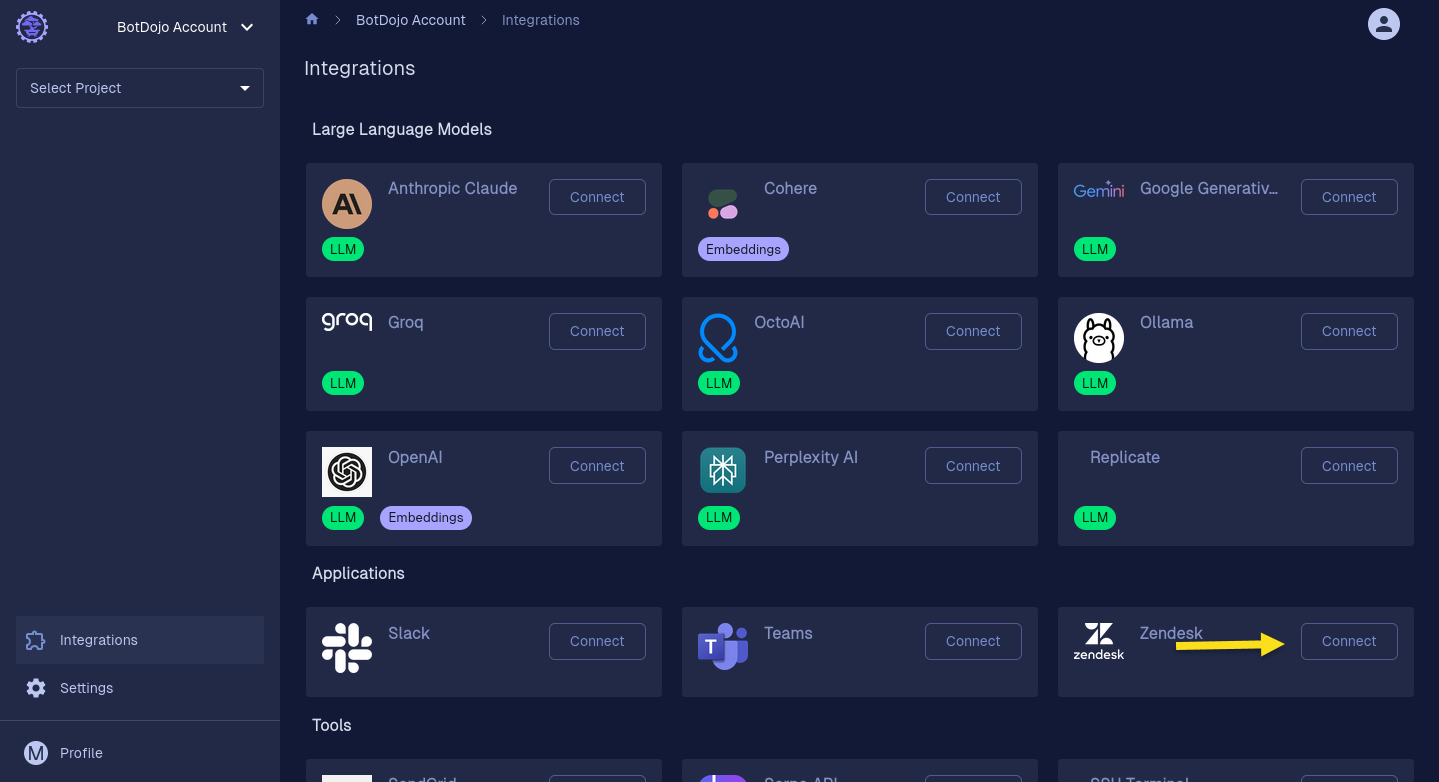
- Paste the App ID, Key ID and Secret Key.
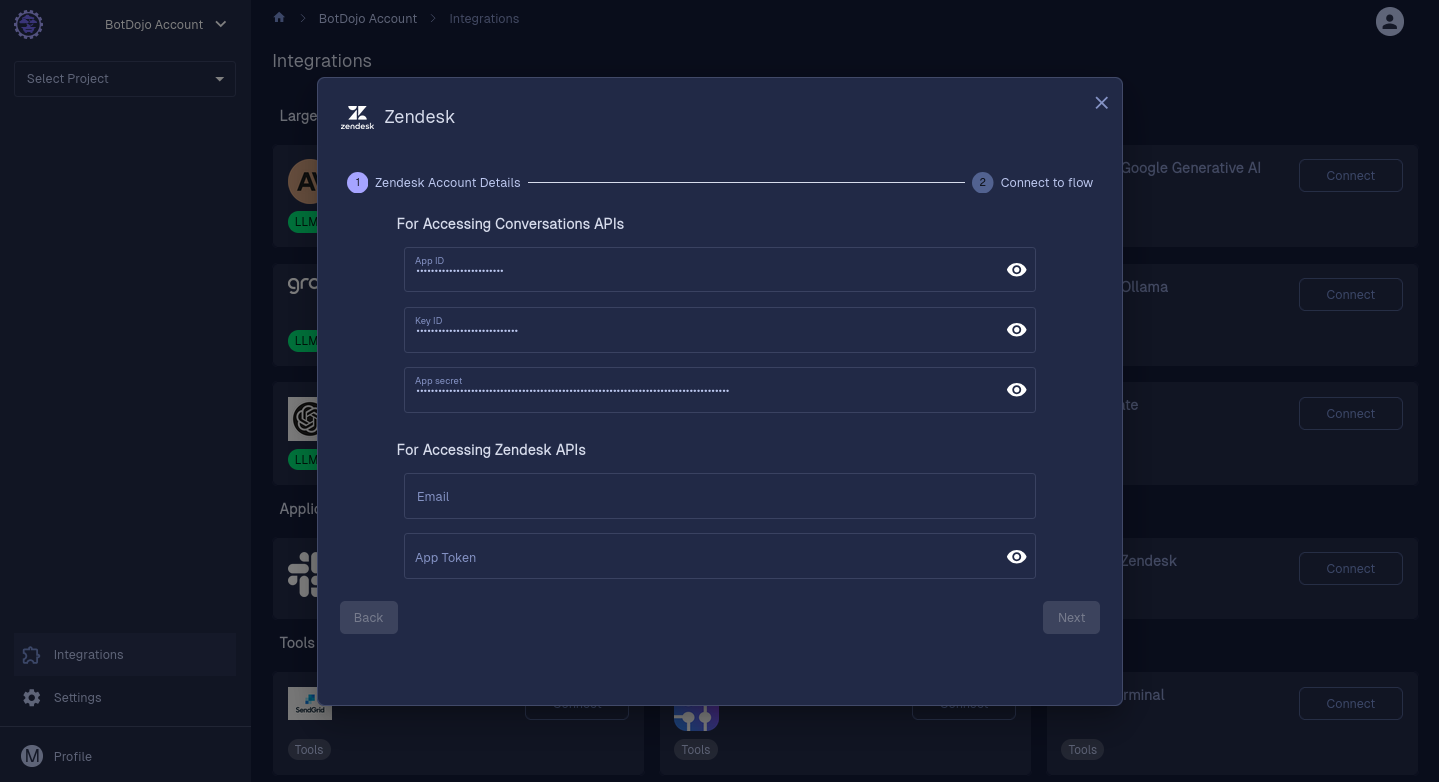
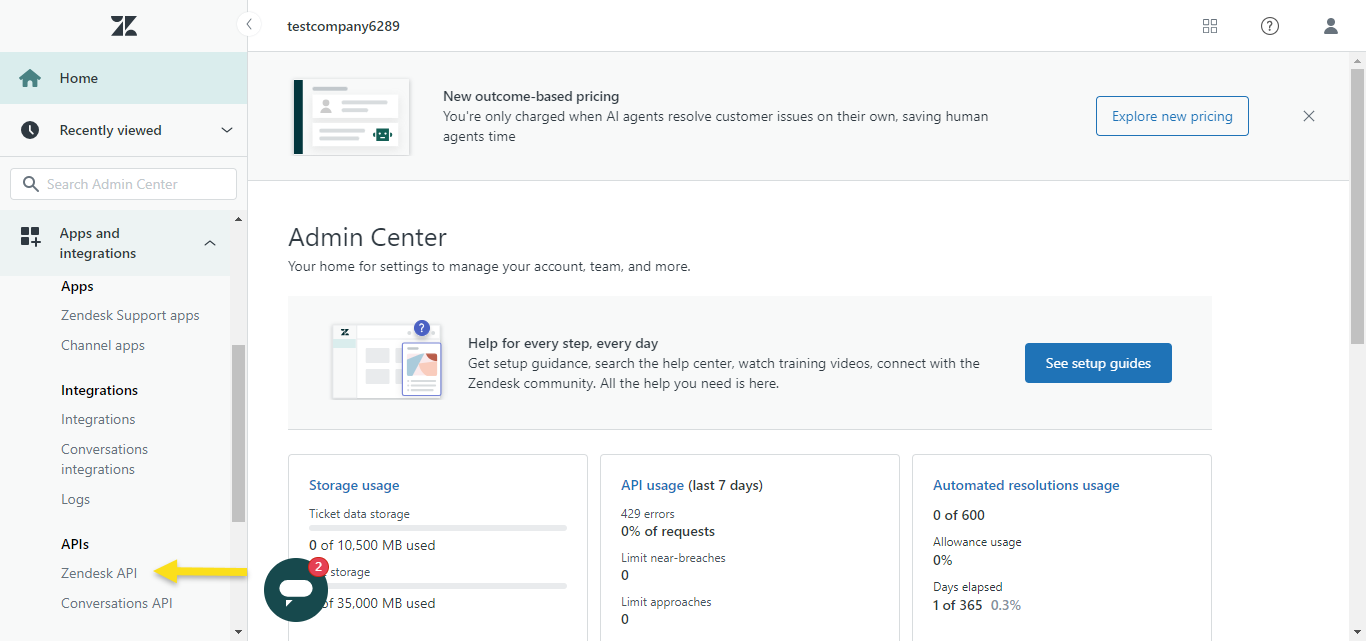
- Navigate back to your Zendesk Admin Center > Apps and Integrations > Zendesk API
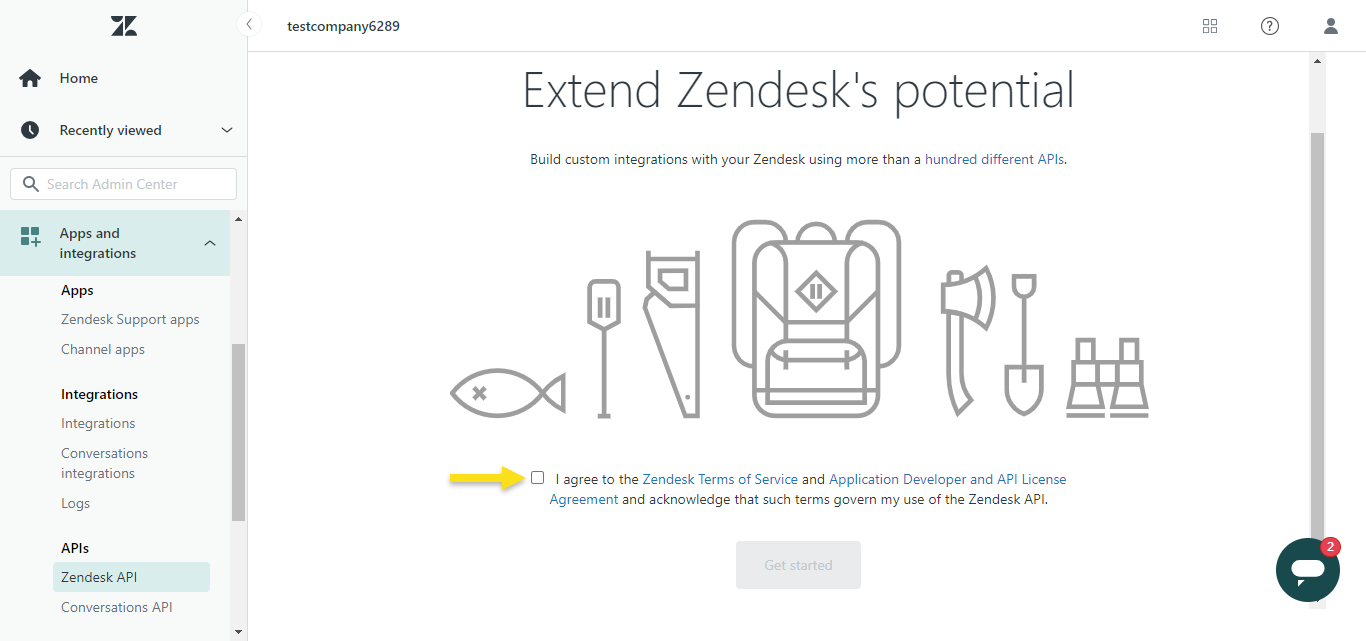
- If necessary, read the guidelines and accept the agreement.
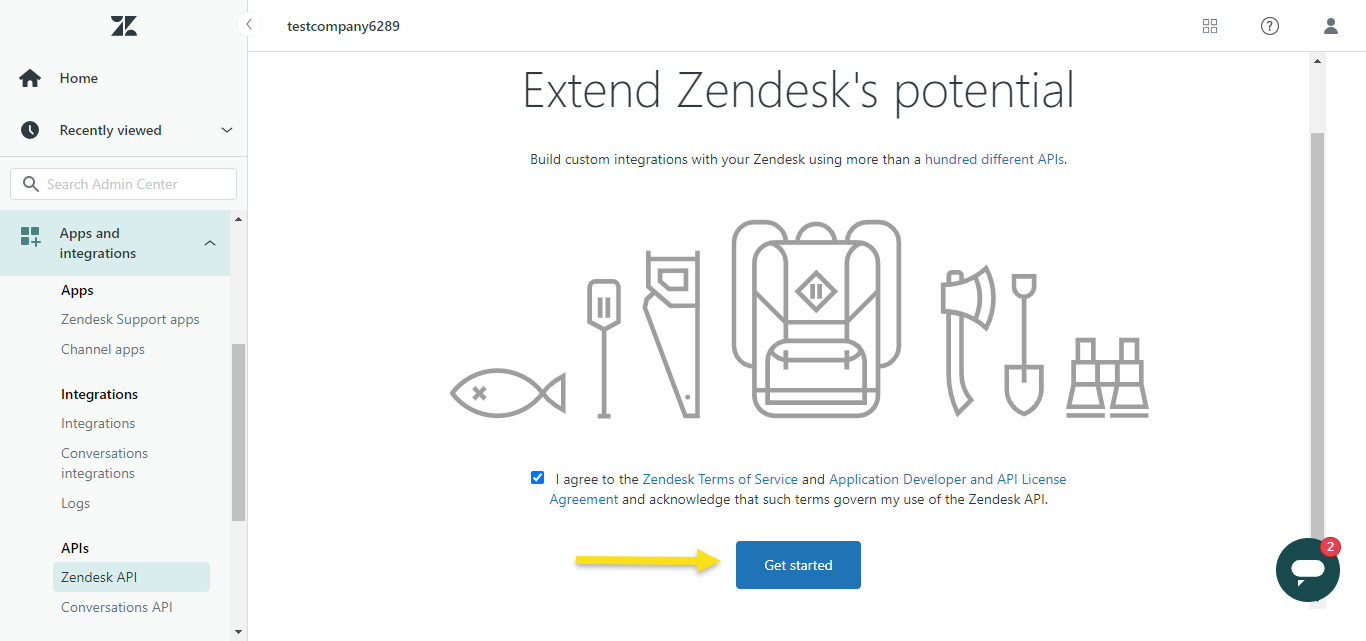
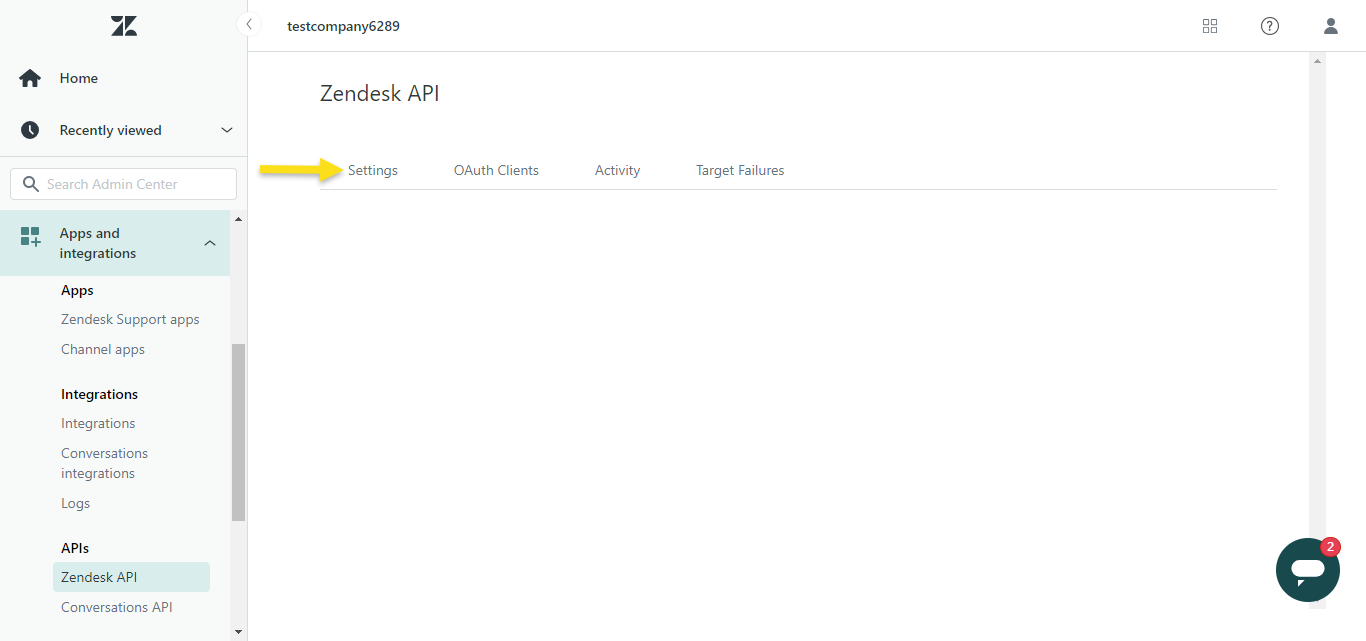
- Click Settings.
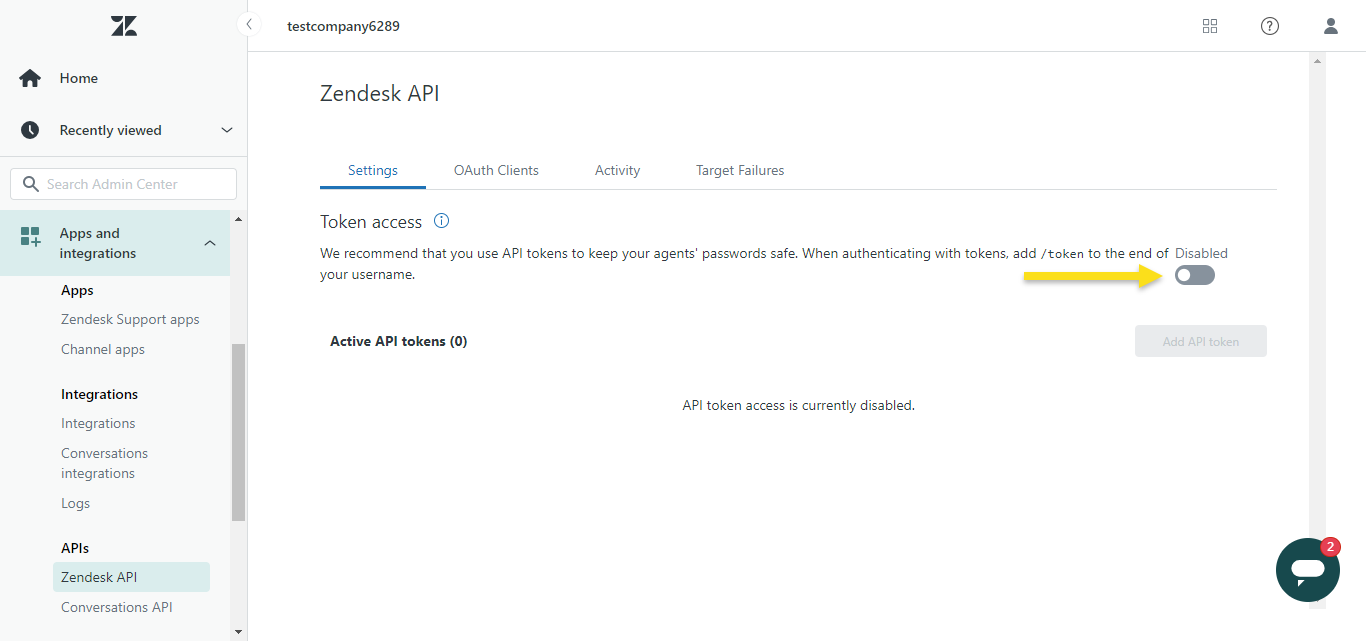
- Enable Token access.
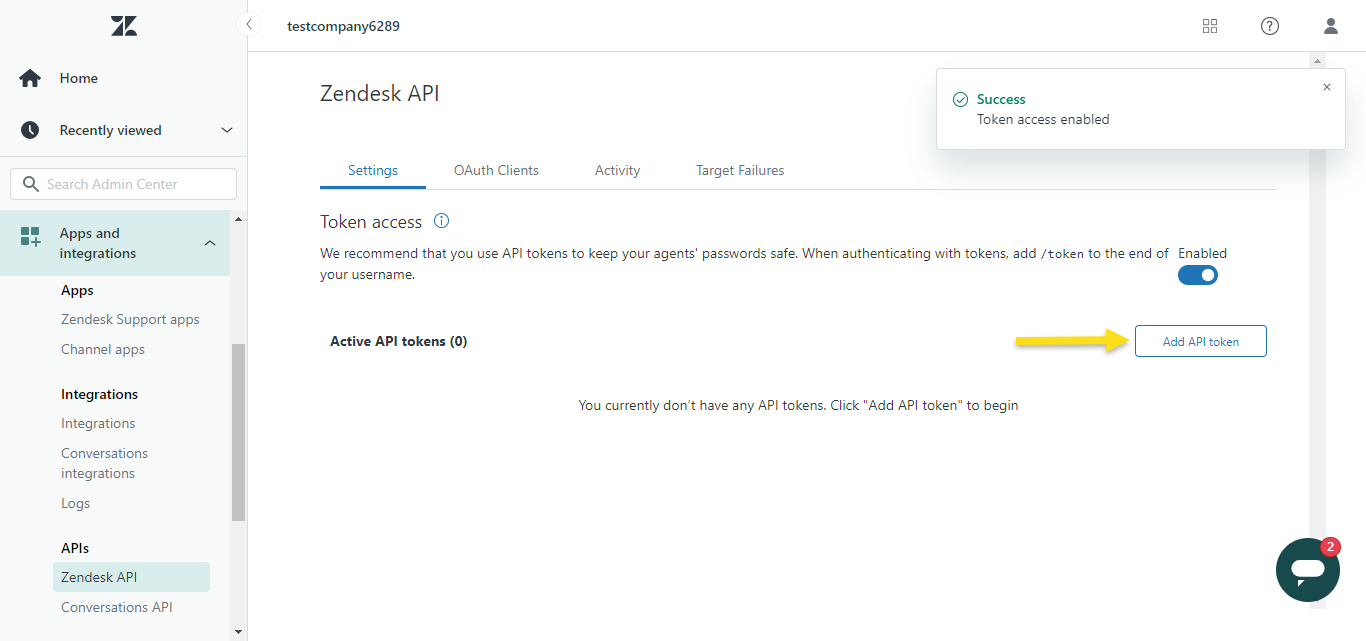
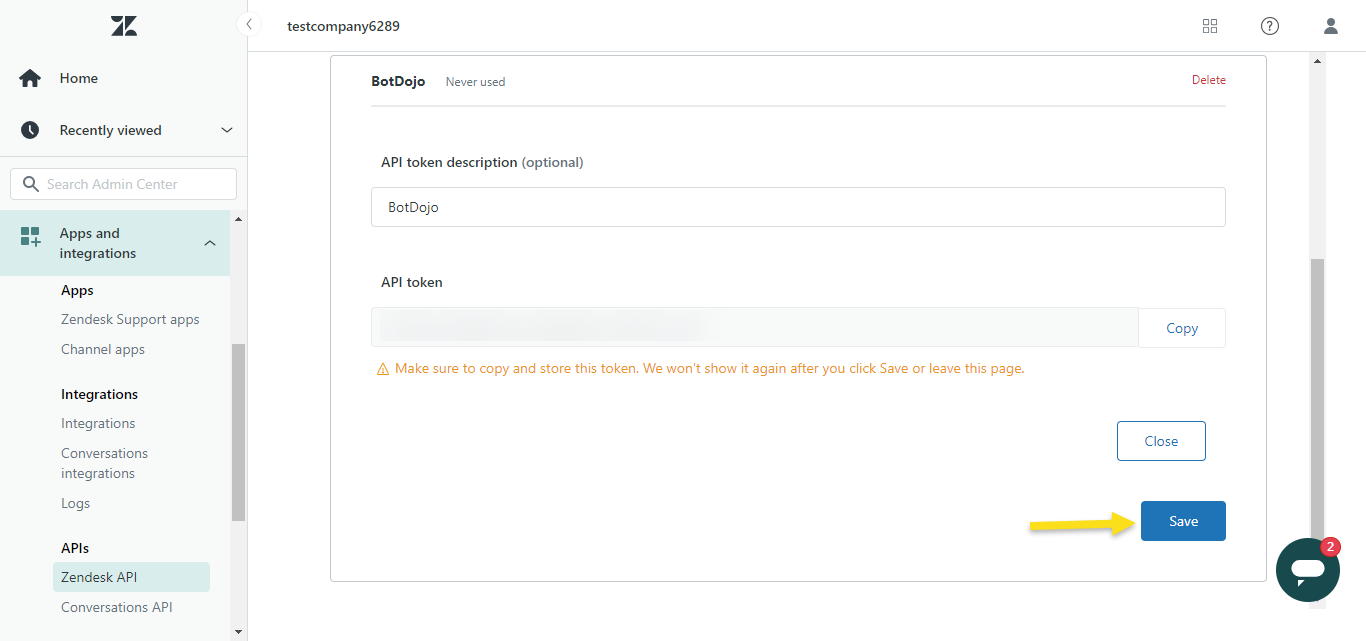
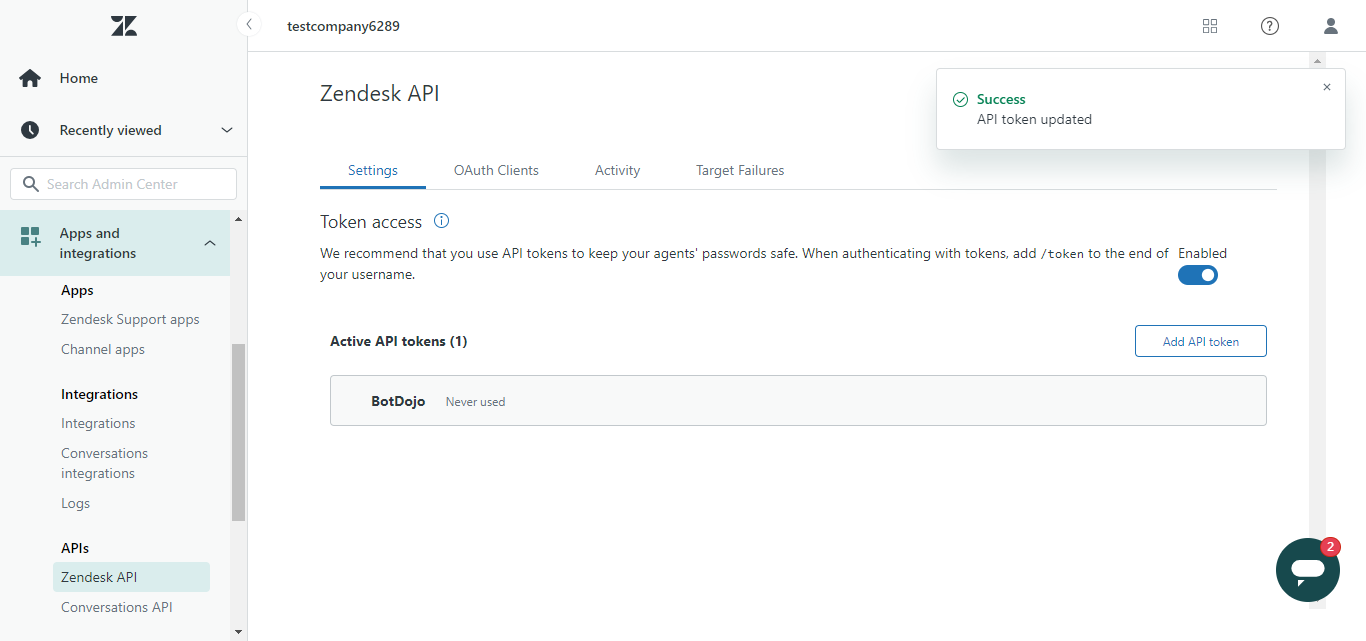
- Add a new API token. Give an API token description, copy the token, and click Save.
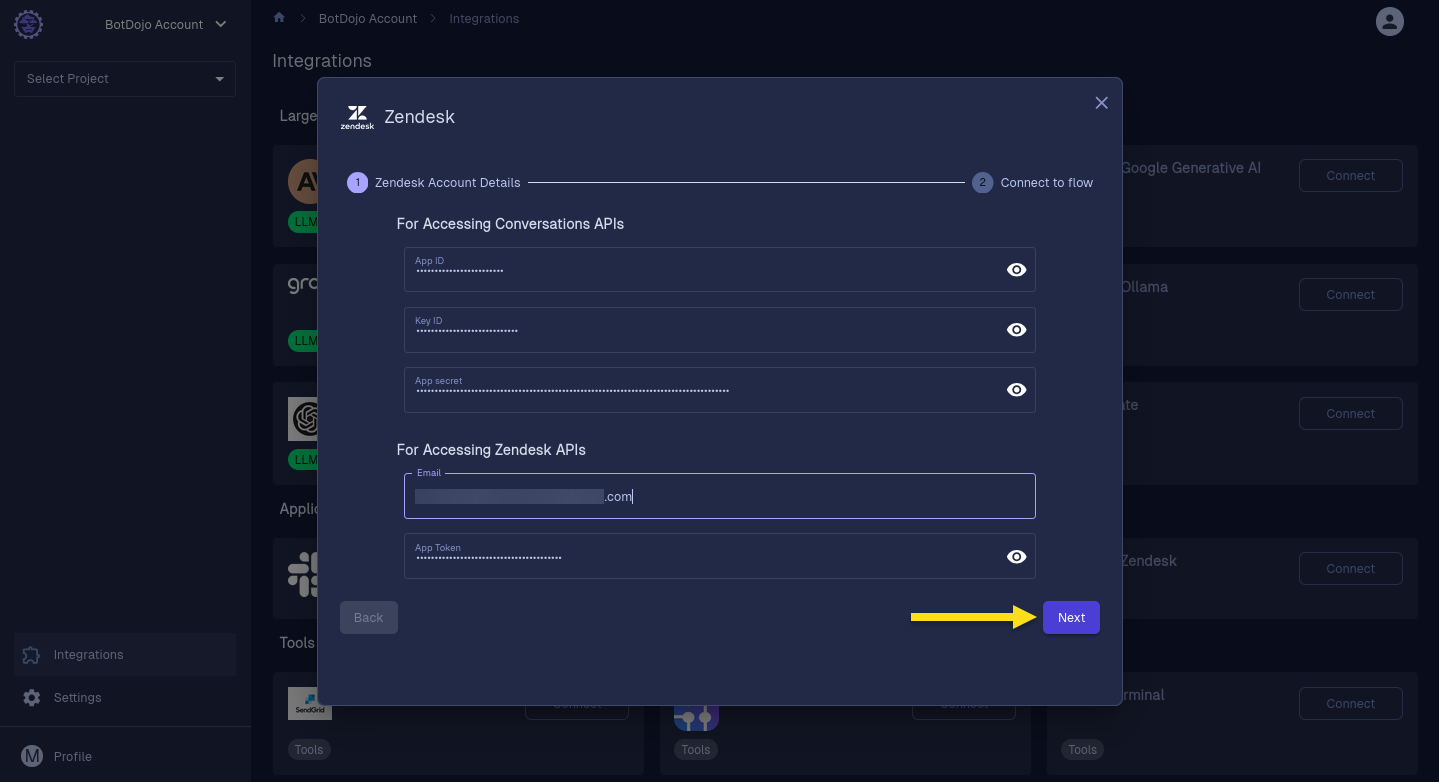
- Now navigate back to your BotDojo account's Zendesk Connection Modal. Enter your Zendesk email address, paste the API token and click Next.
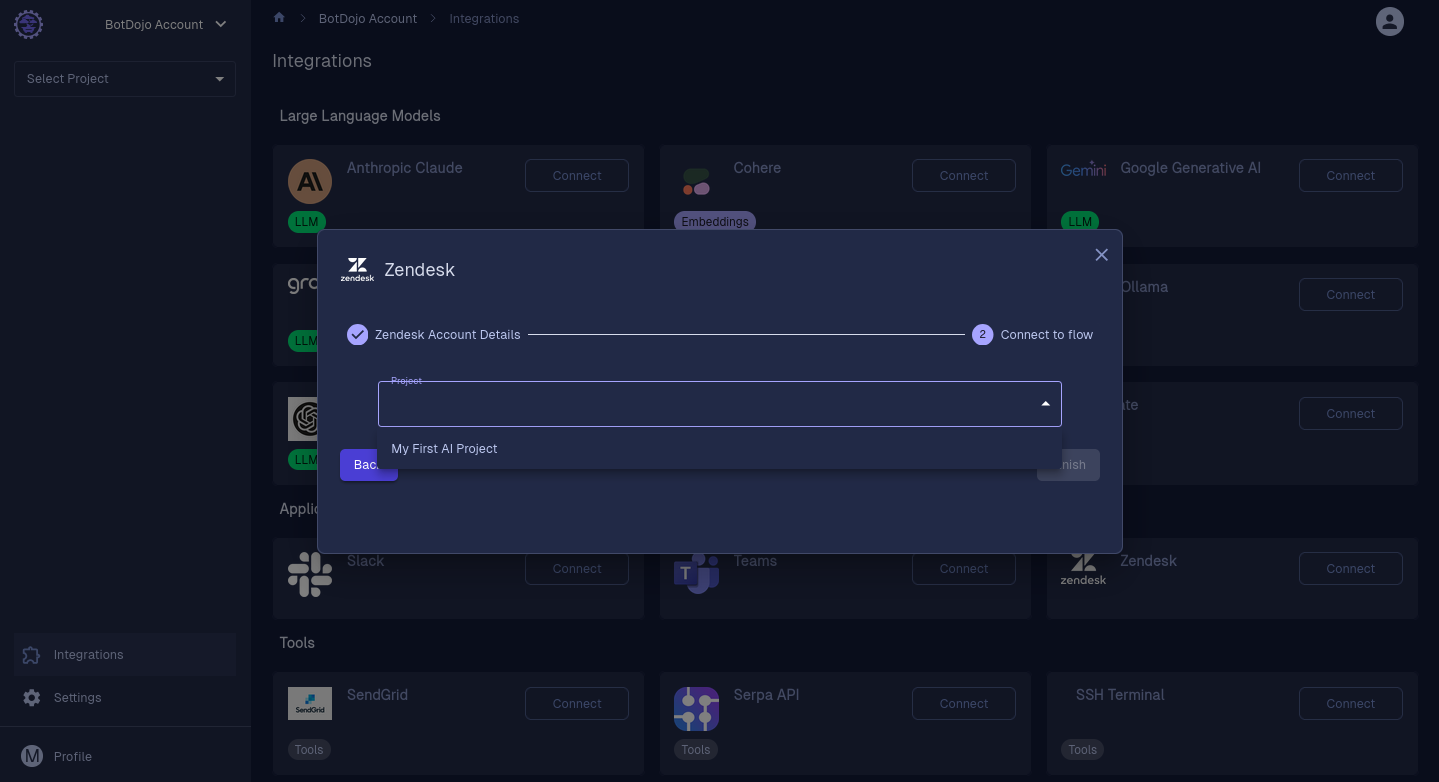
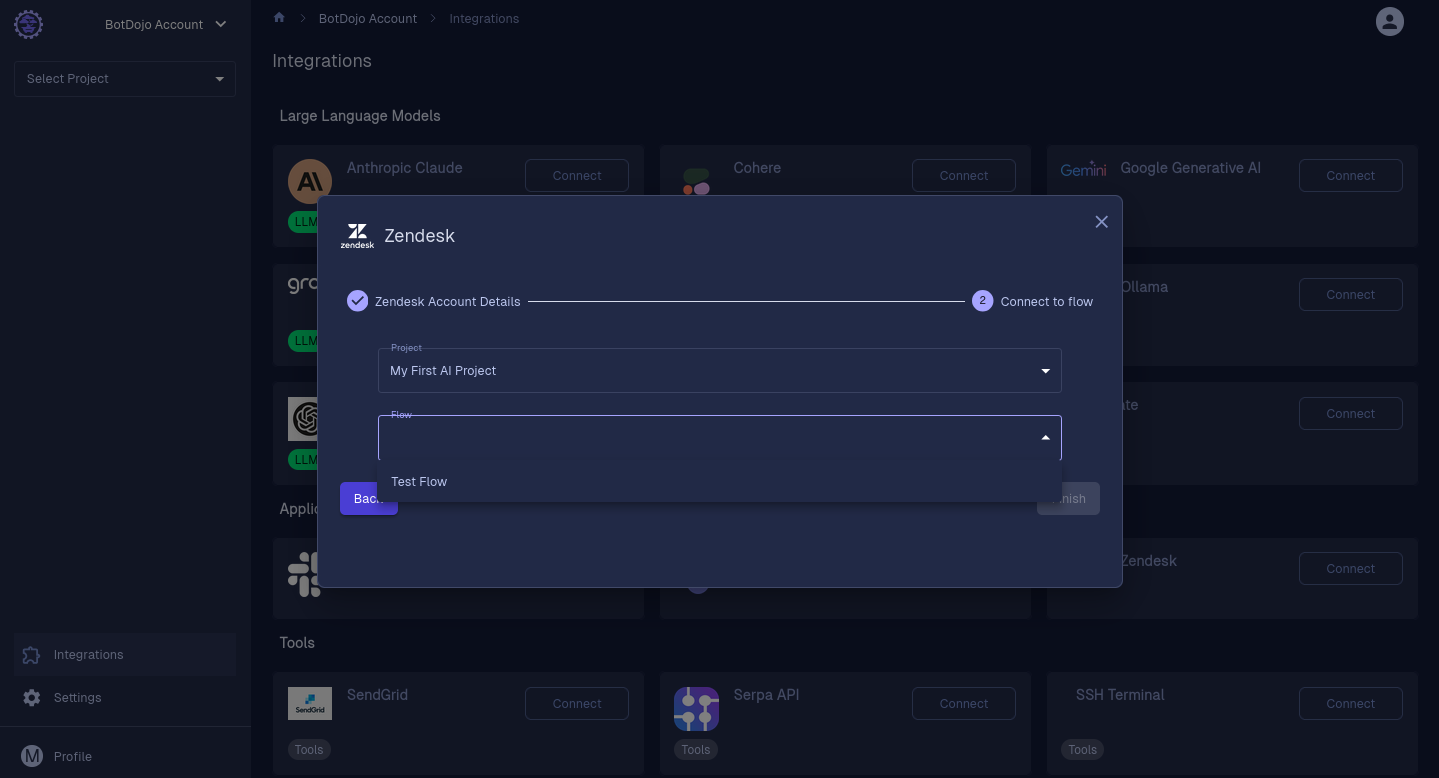
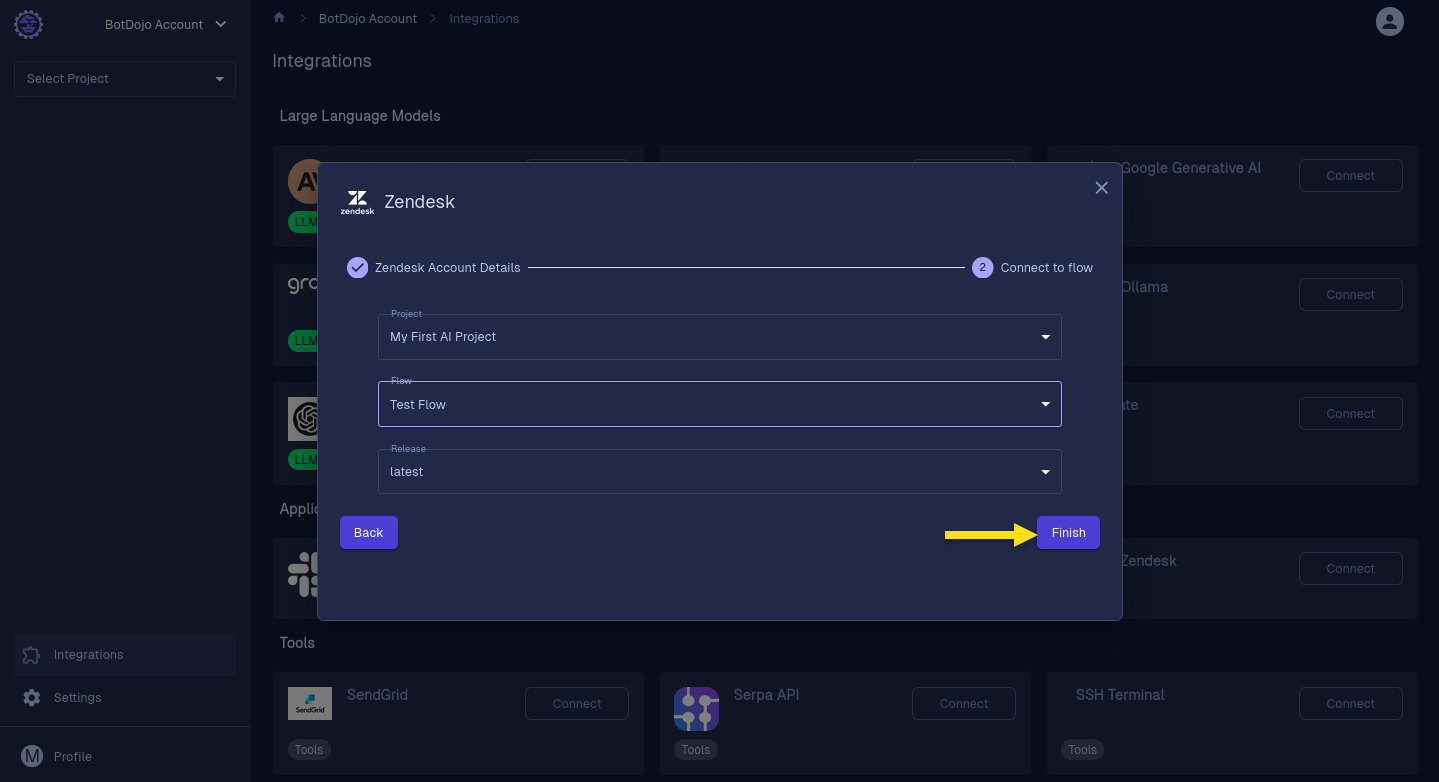
- Select your BotDojo project, flow and flow version that will power your Zendesk chatbot and click Finish.
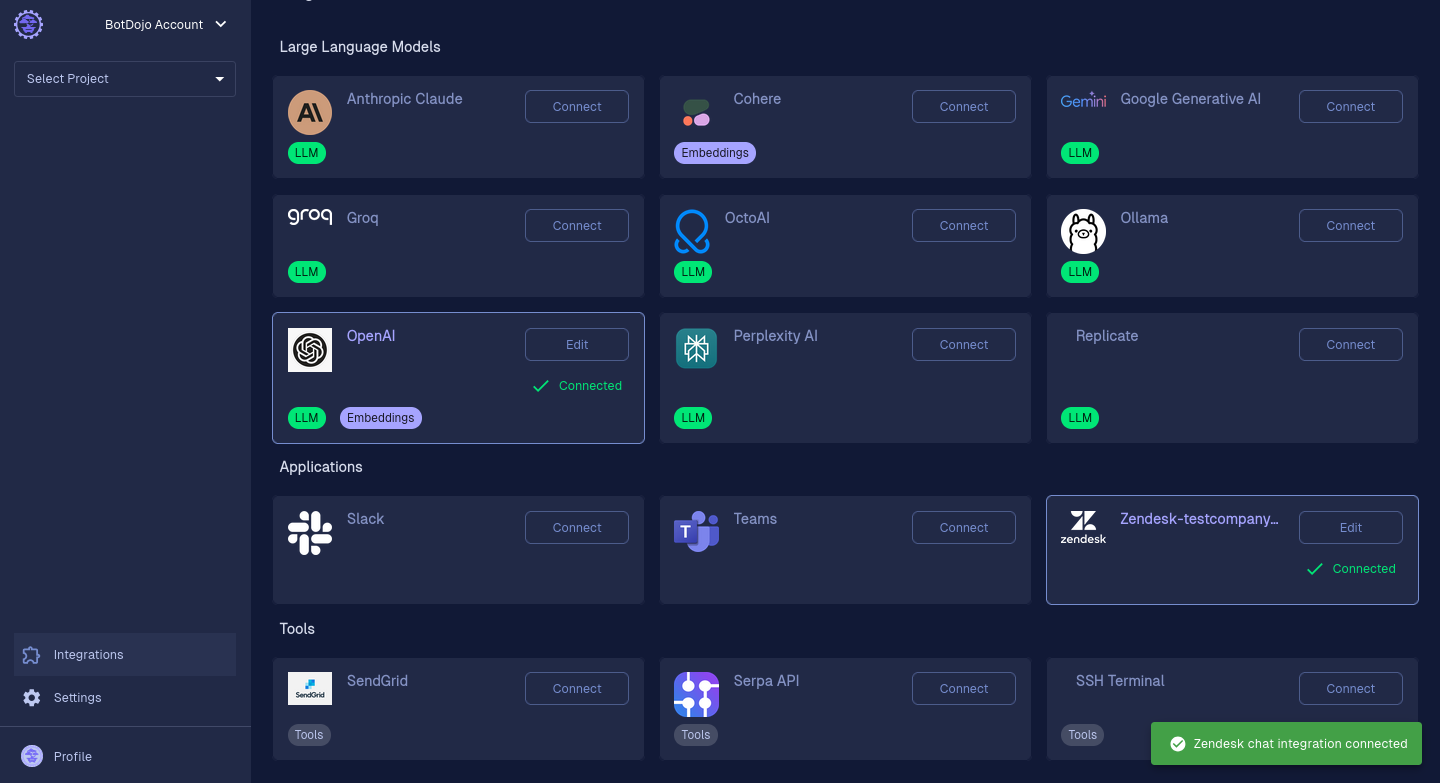
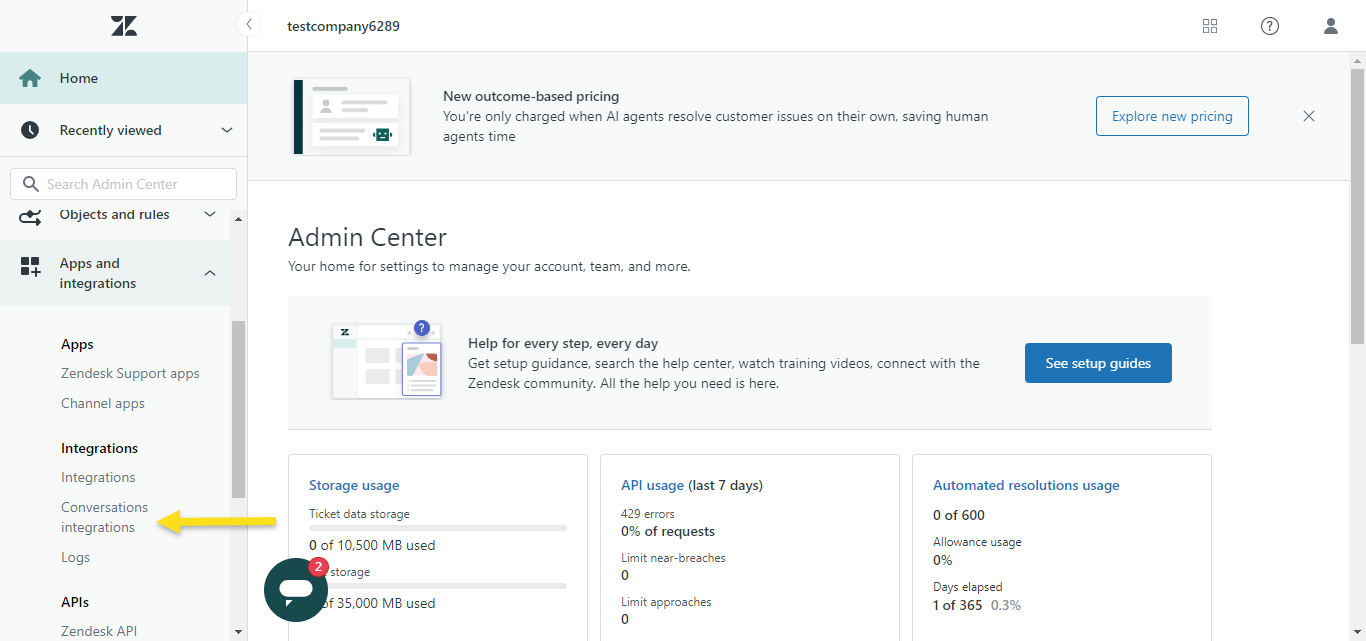
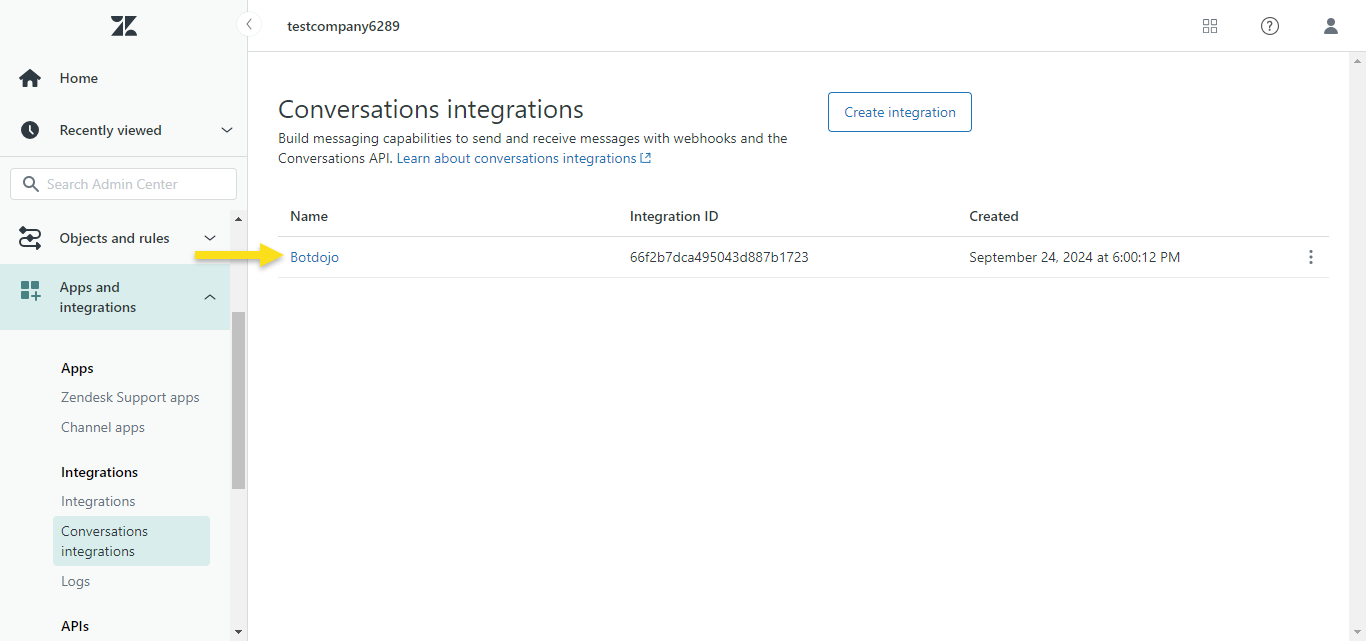
- Congratulations, you've created your BotDojo integration in your Zendesk portal. You can verify you've installed BotDojo by navigating to the Zendesk Admin Center > Apps and Integrations > Conversation integrations. The newly created BotDojo integration will be listed there. This integration will serve as the first point of contact for your customers whenever they start a conversation in the live chat widget.
Testing the bot
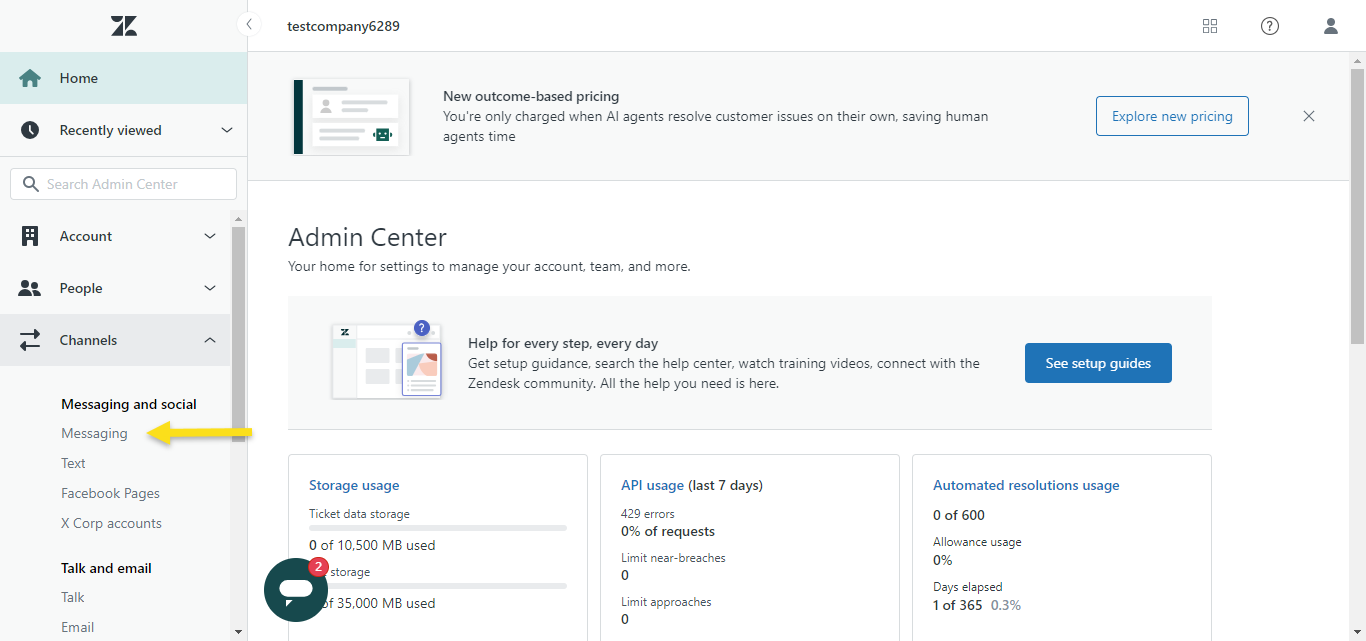
- Go to Zendesk Admin Center > Channels > Messaging
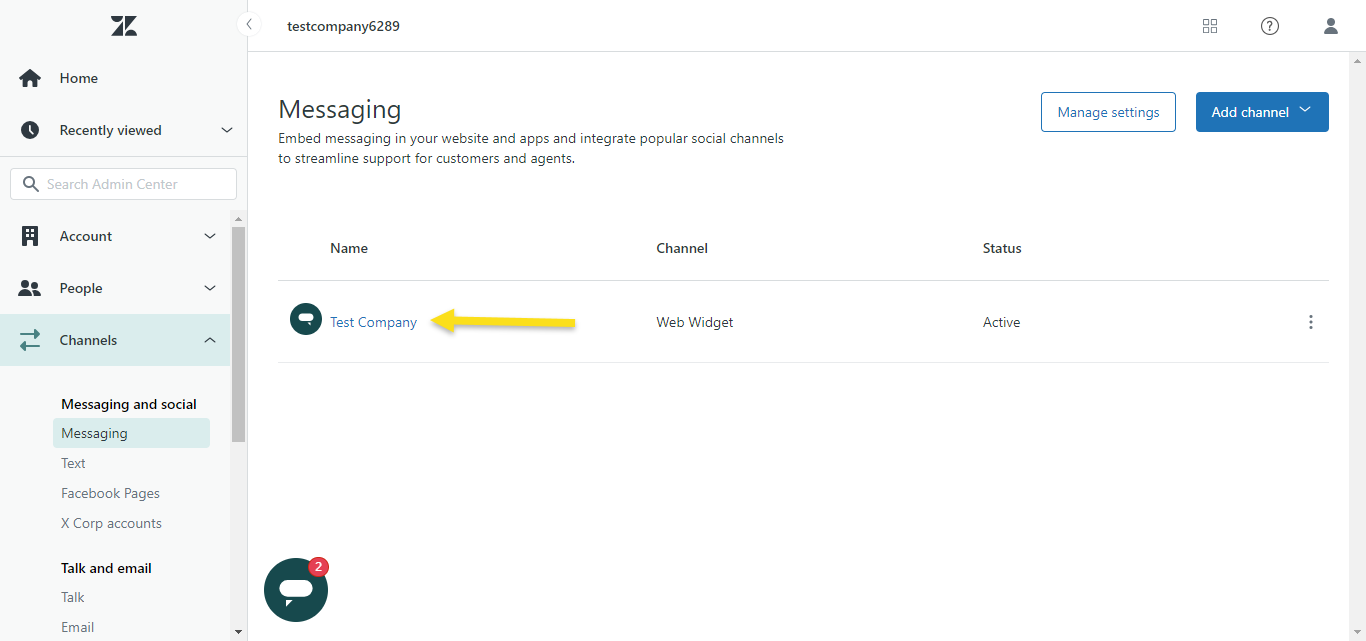
- Click on BotDojo.
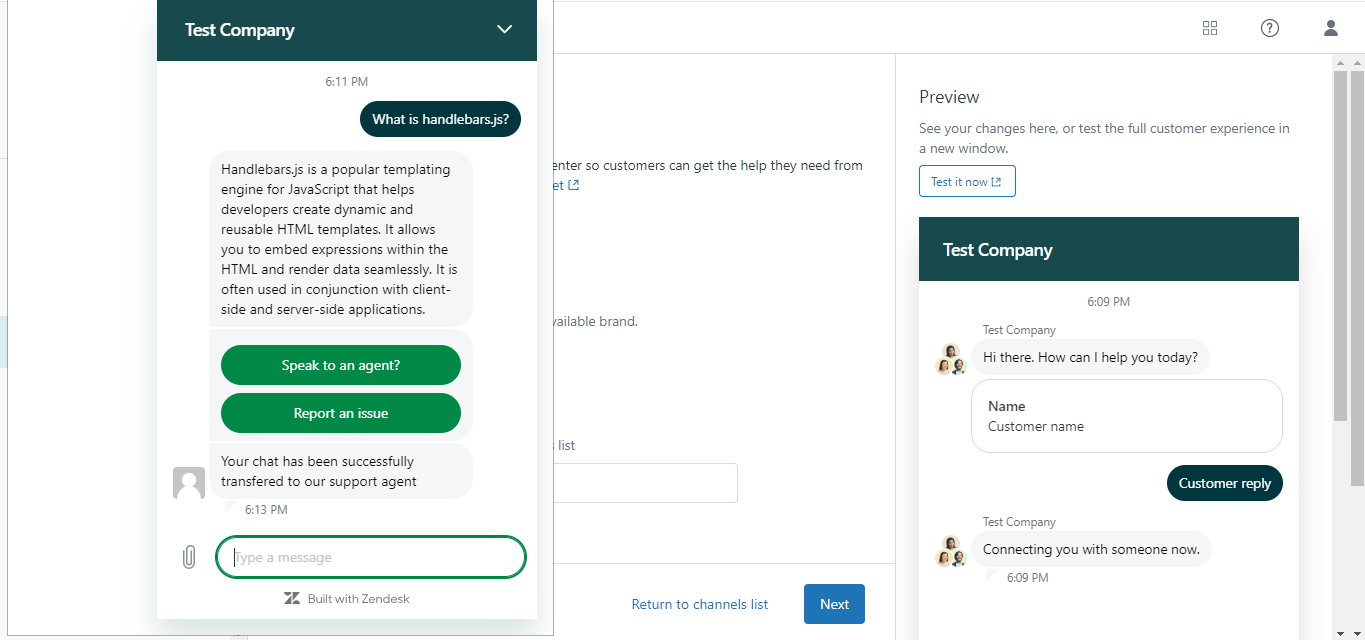
- Click Test it now button. This would open up a Zendesk simulator where you can test the bot.
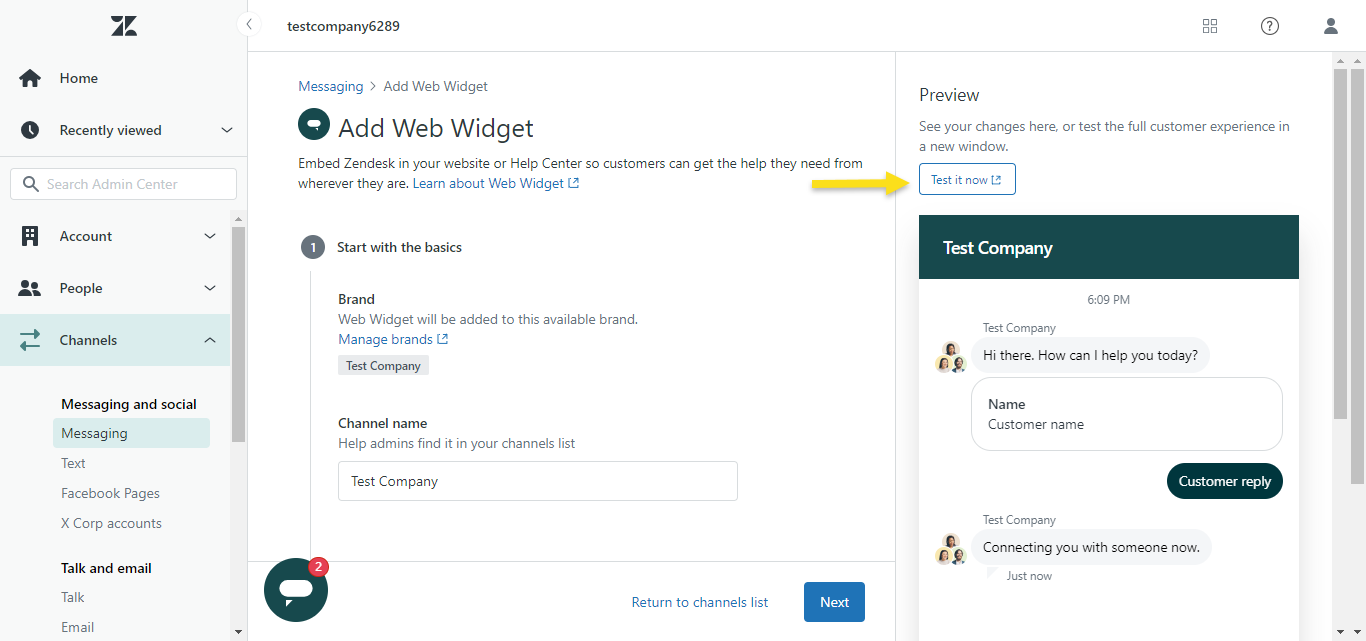
- To chat with your bot, send a message in the chat widget. All conversations in the chat widget will be in the same session, so you can ask follow-up questions, and if Memory is enabled, your flow will use the context of the conversation when responding.
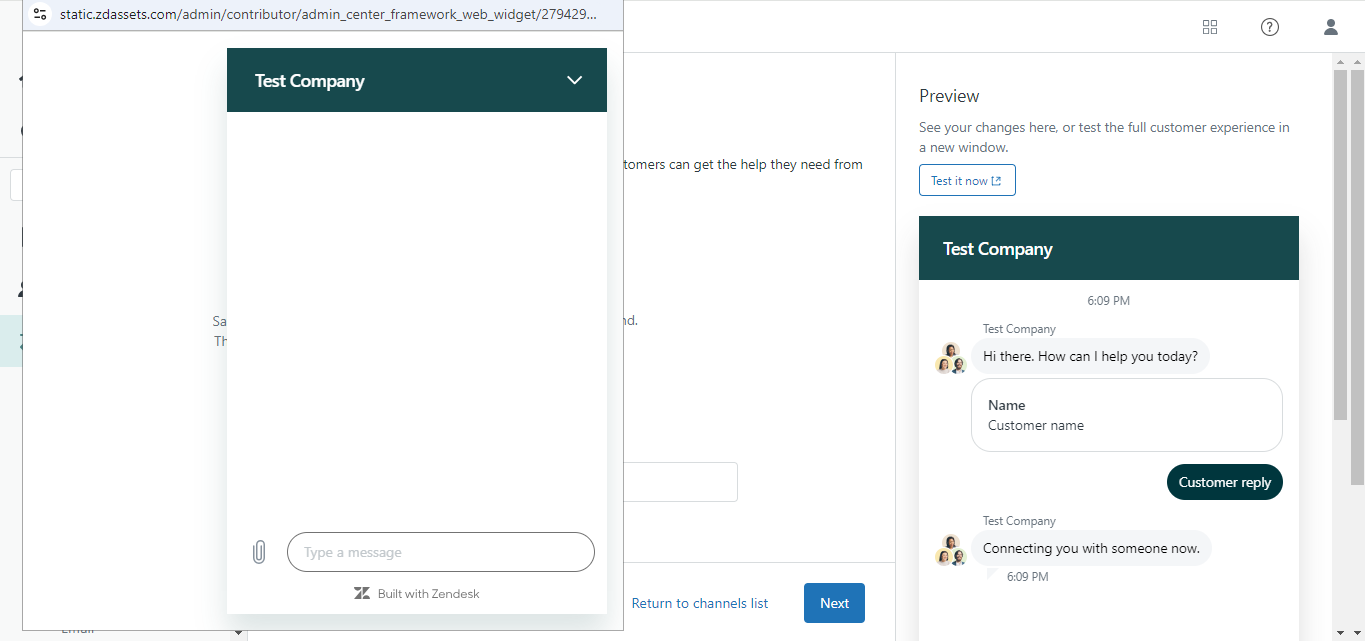
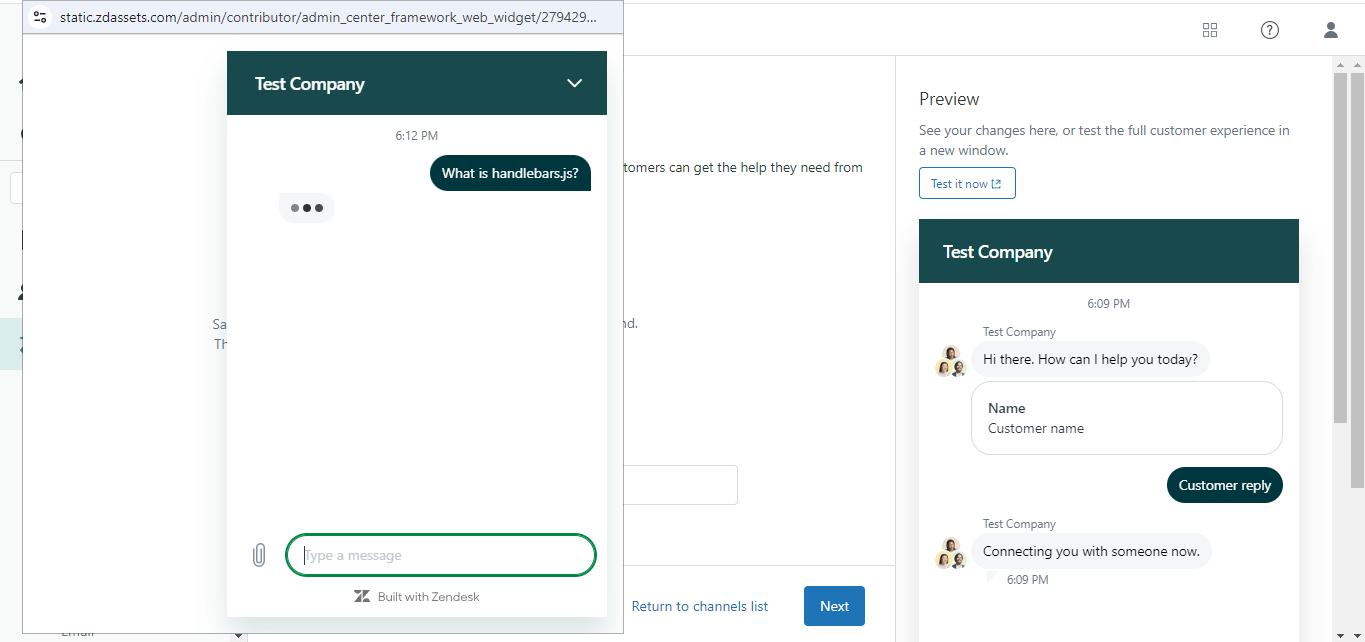
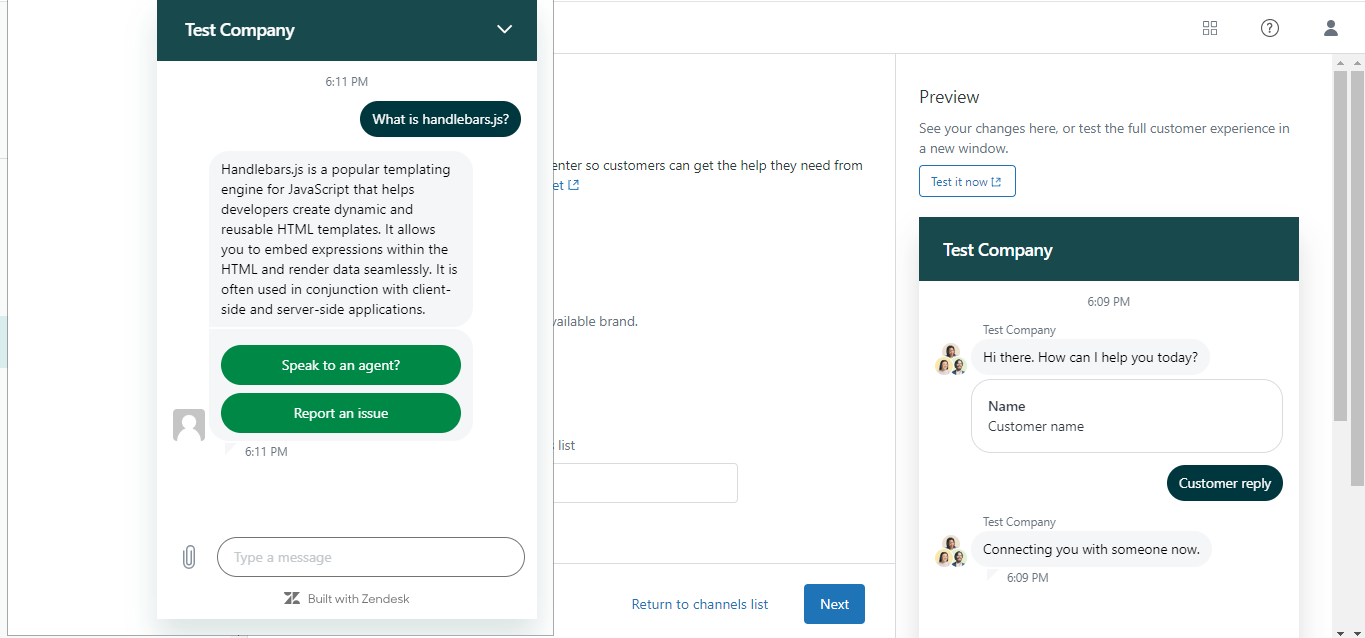
- In order to transfer the control of the current conversation to a live agent at any point during the chat, click Speak to an Agent button.
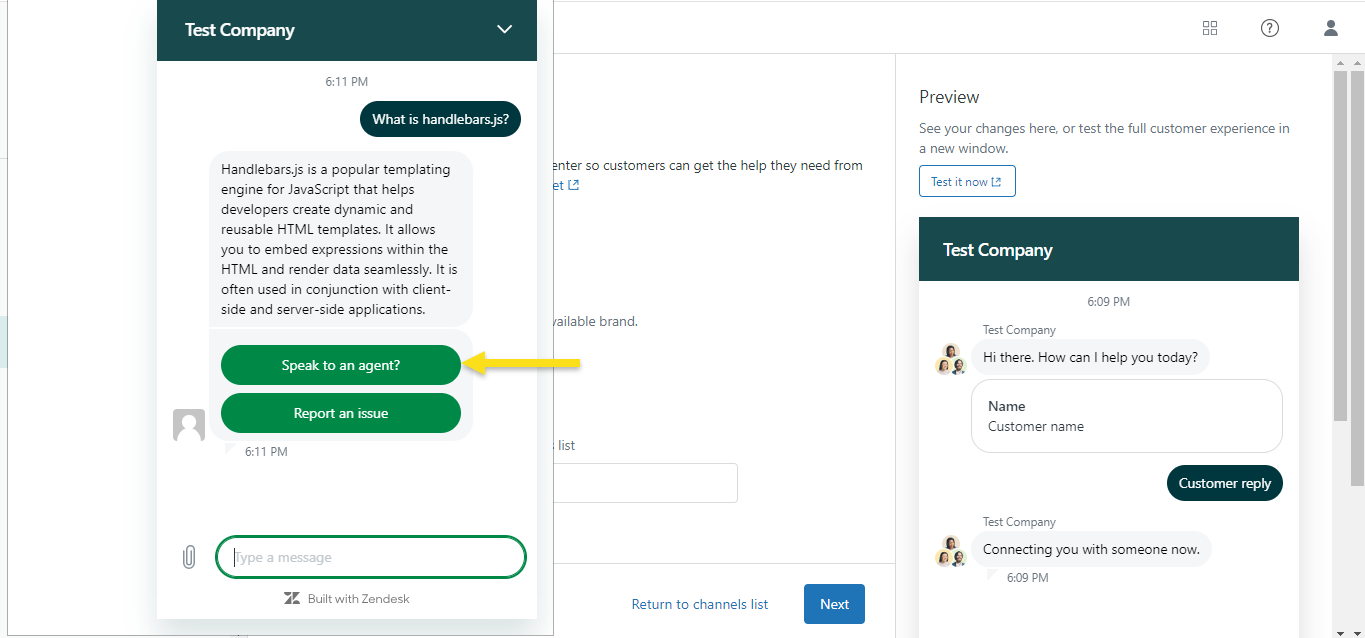
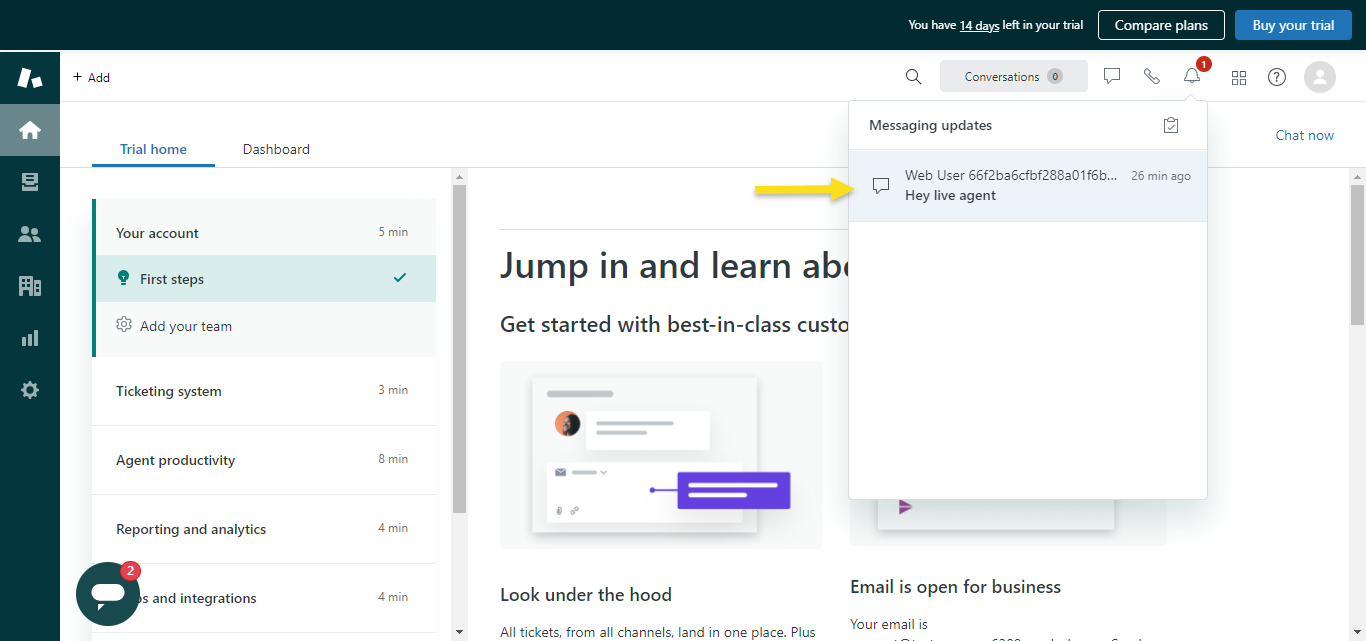
- Once the Speak to an Agent button is clicked, all the messages sent by the user will be received in your Agent Workspace instead of the BotDojo integration.
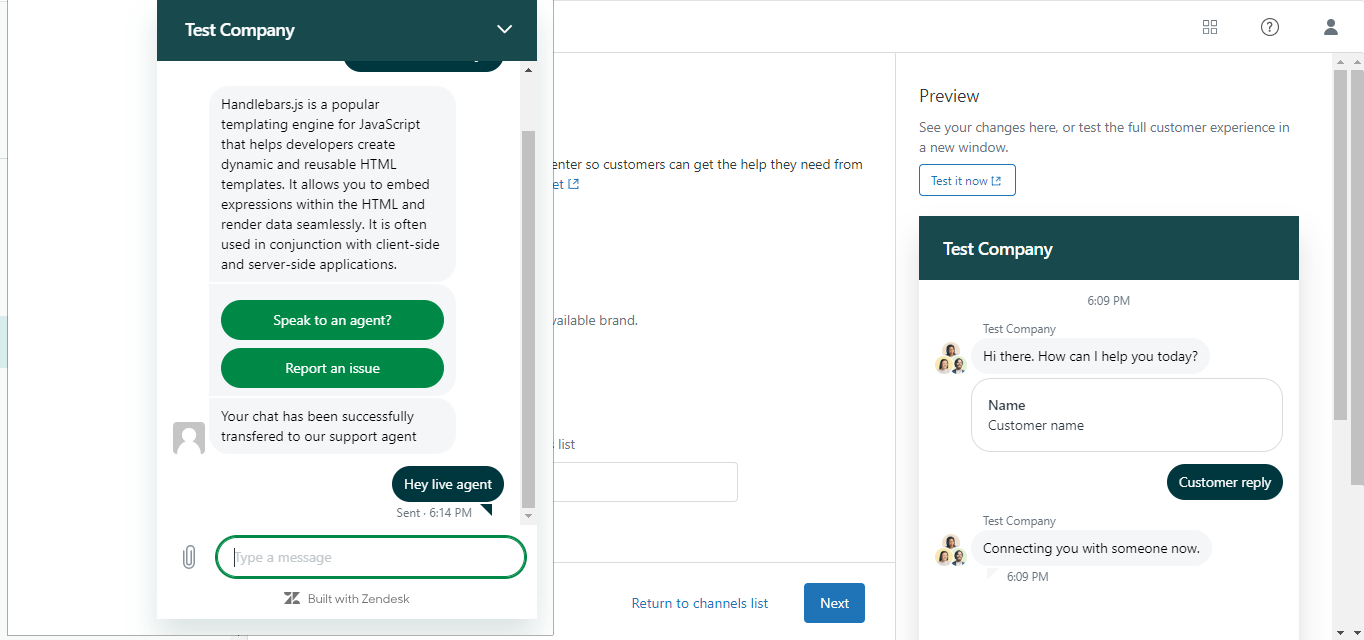
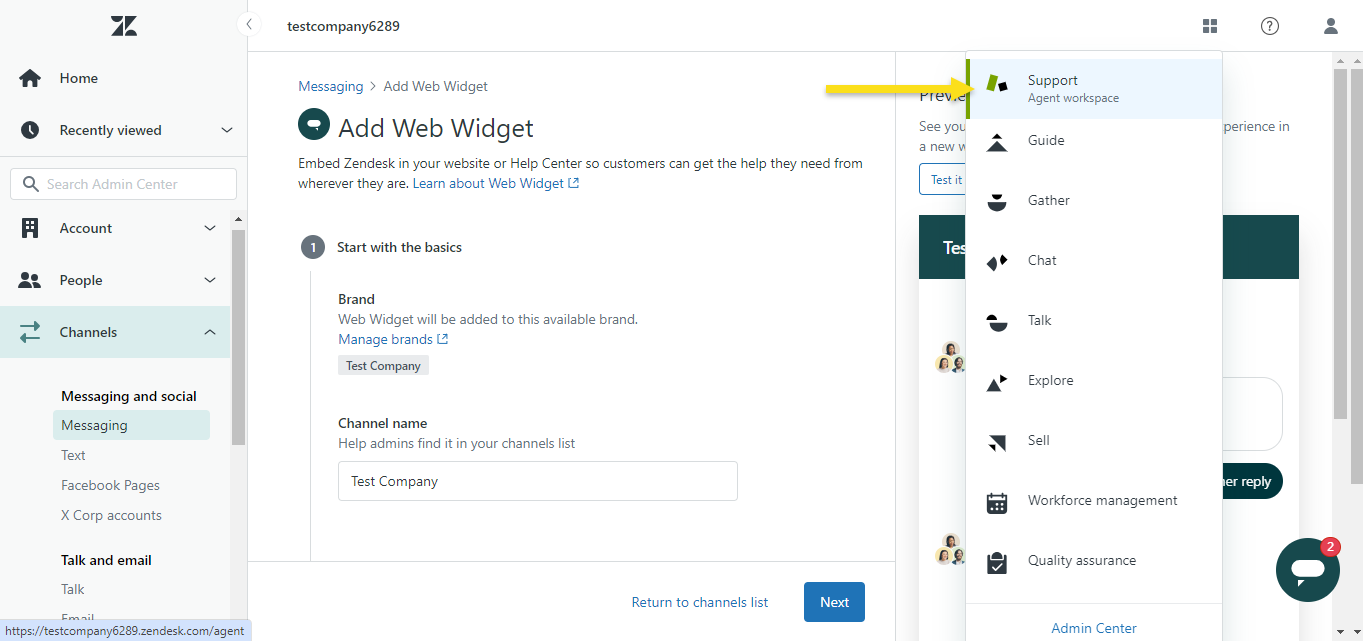
- In order to view the messages on your Agent workspace, go to Zendesk Products > Support
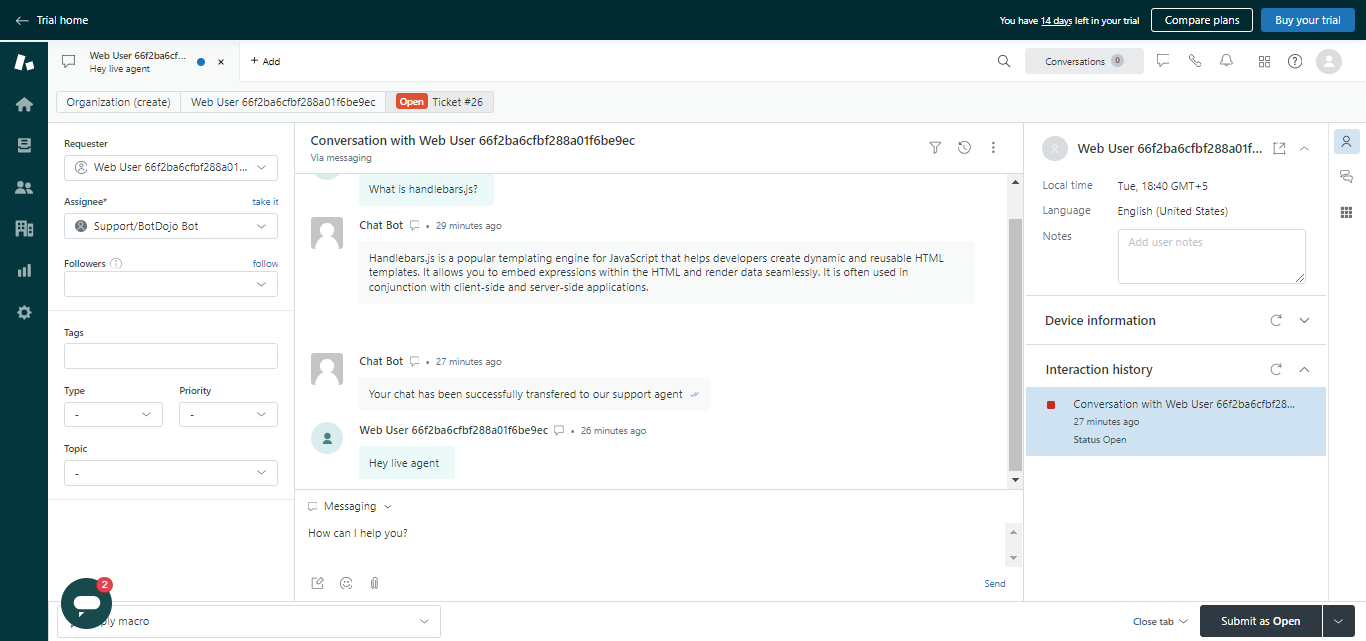
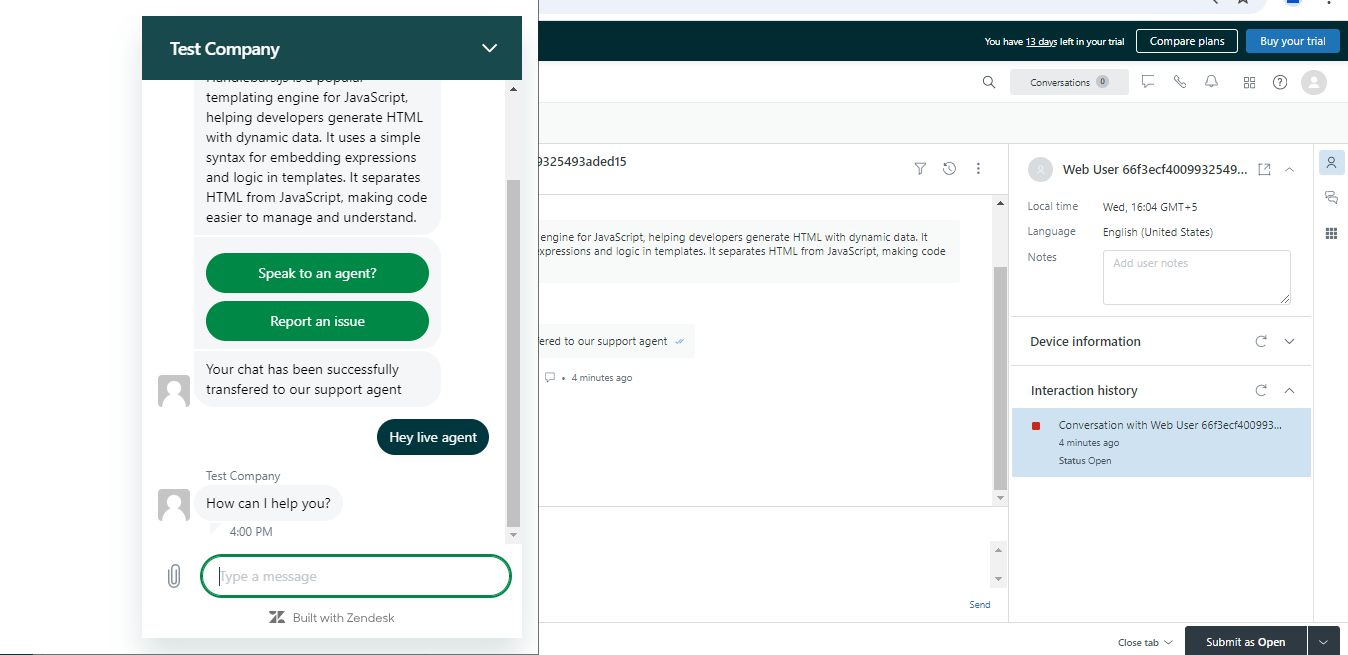
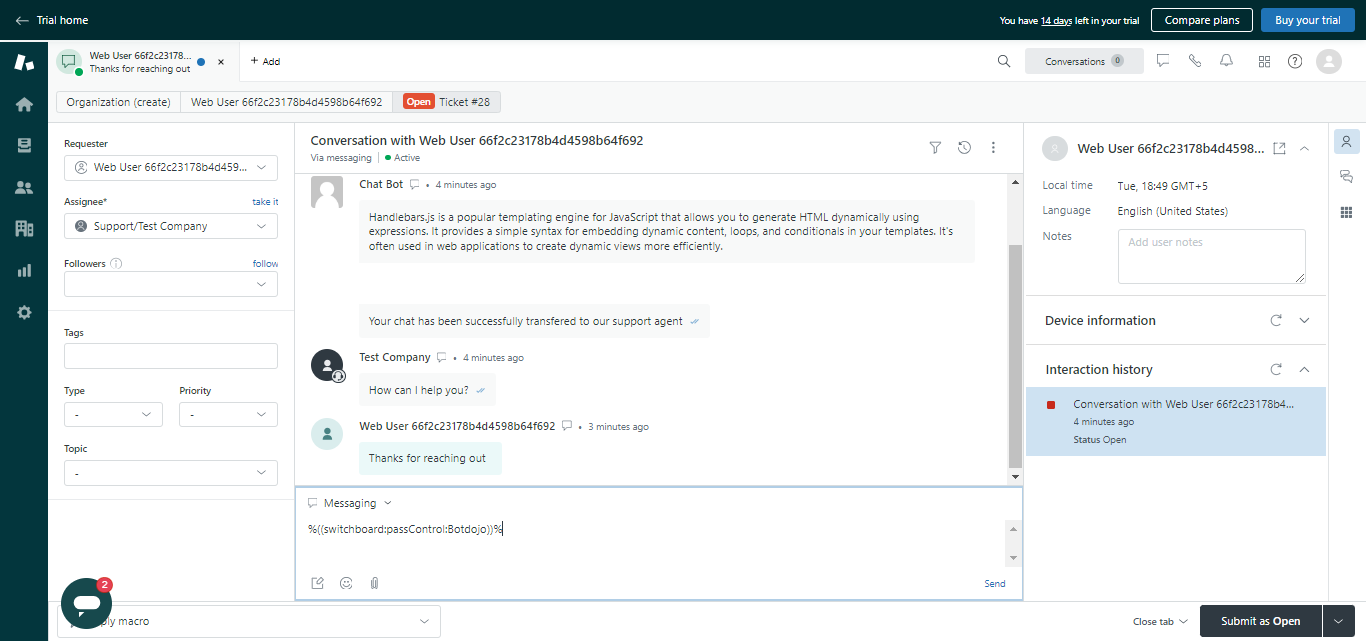
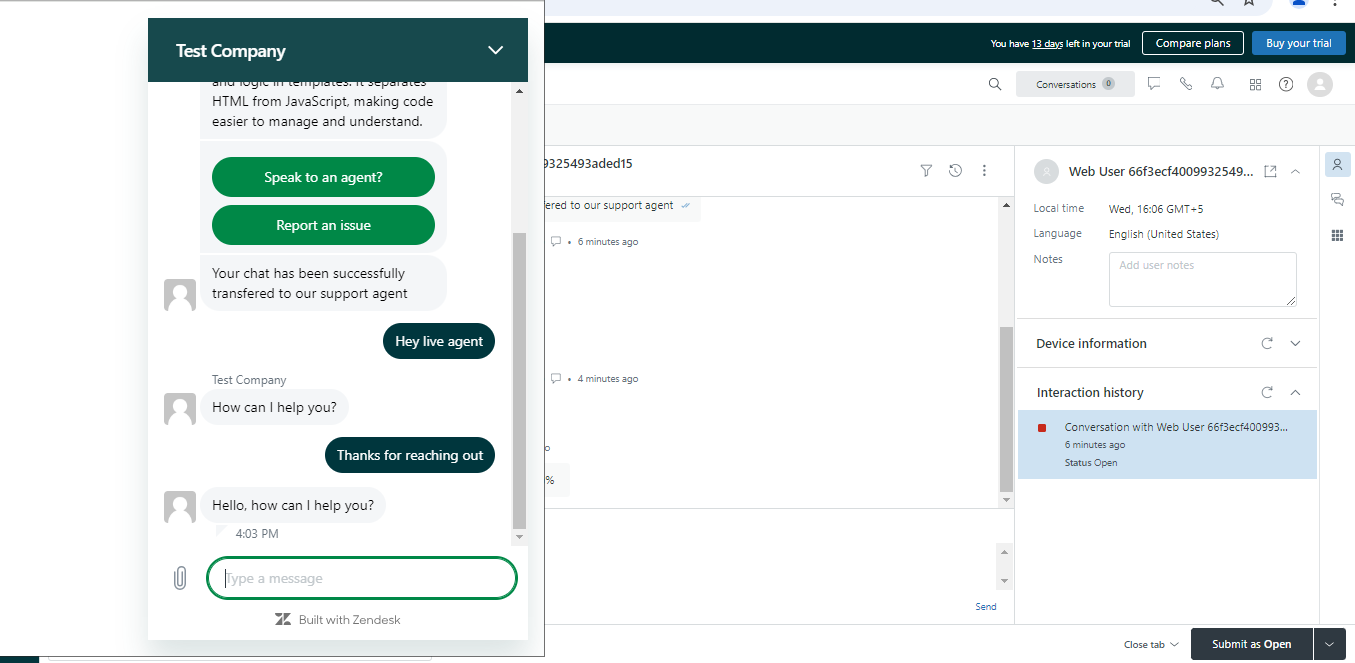
- In order to pass the control of conversation back to the bot, send the below given command in the chat from your Agent workspace window
%((switchboard:passControl:Botdojo))%Now the subsequent messages will be received at the BotDojo integration instead of the Agent workspace.
Creating a new ticket on Zendesk
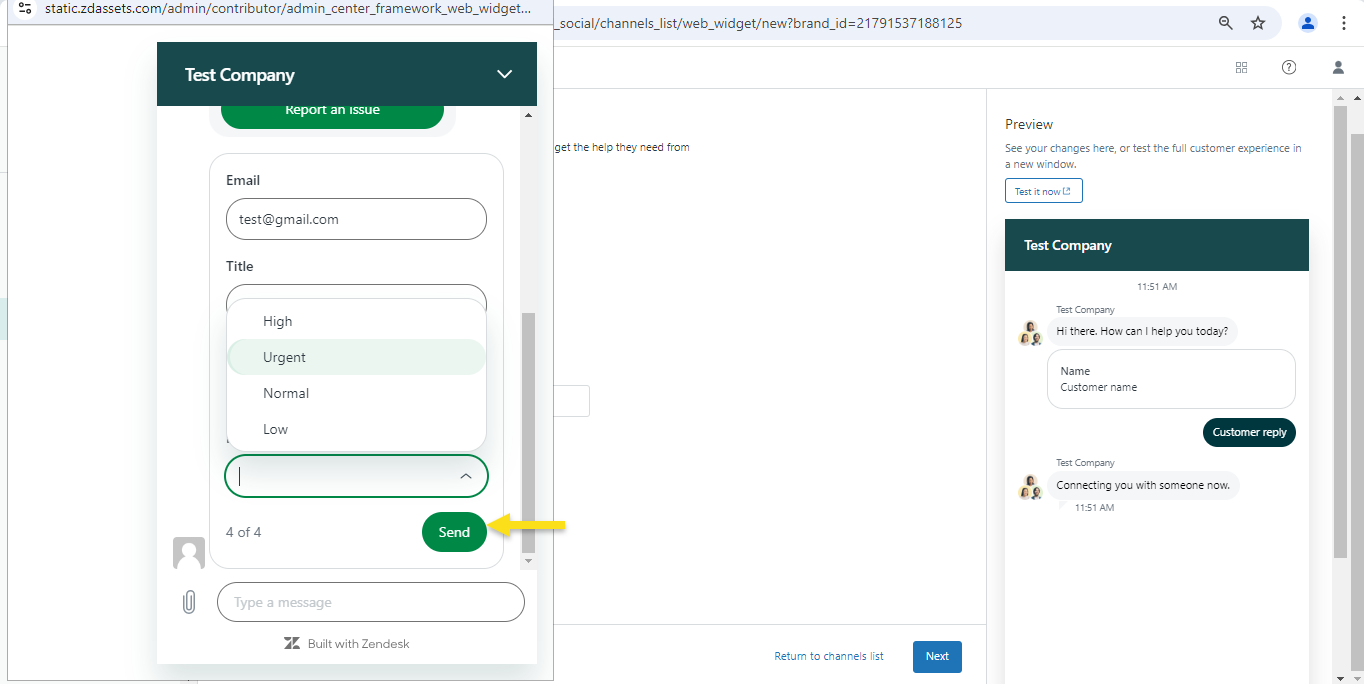
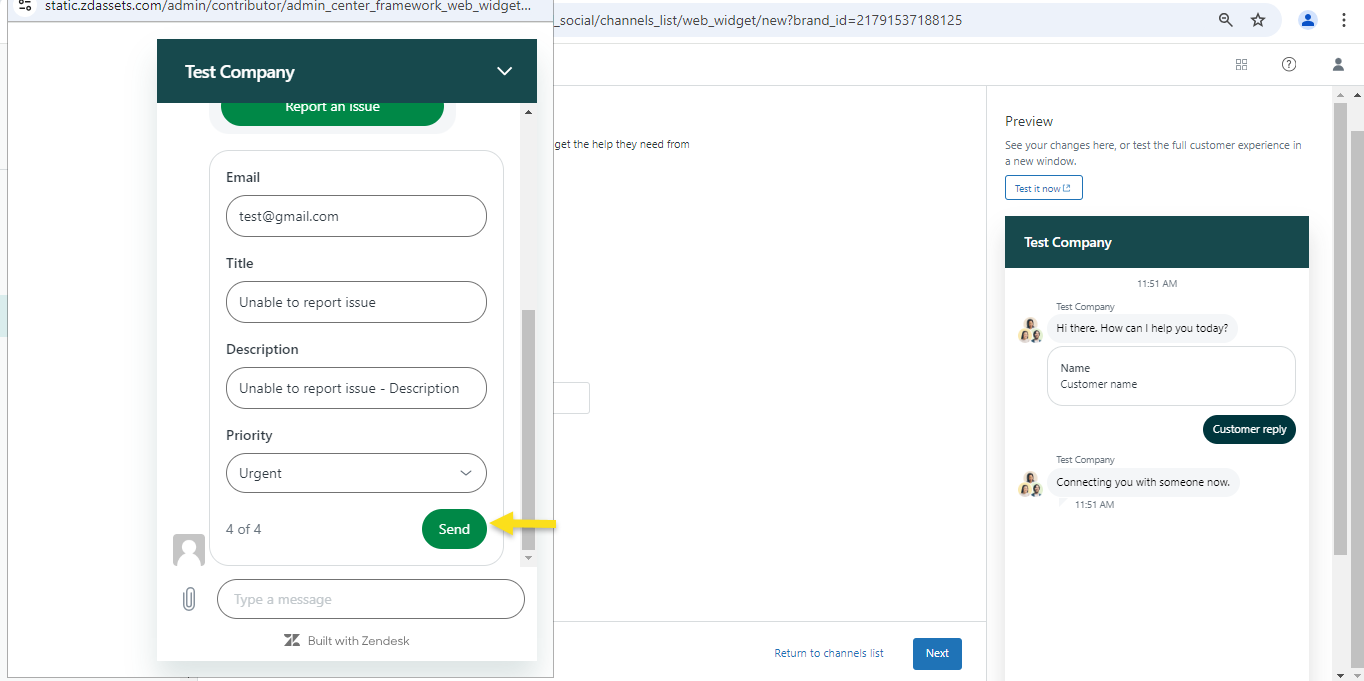
- The user can also create a ticket for it's issue on Zendesk. Click the Report an Issue button.
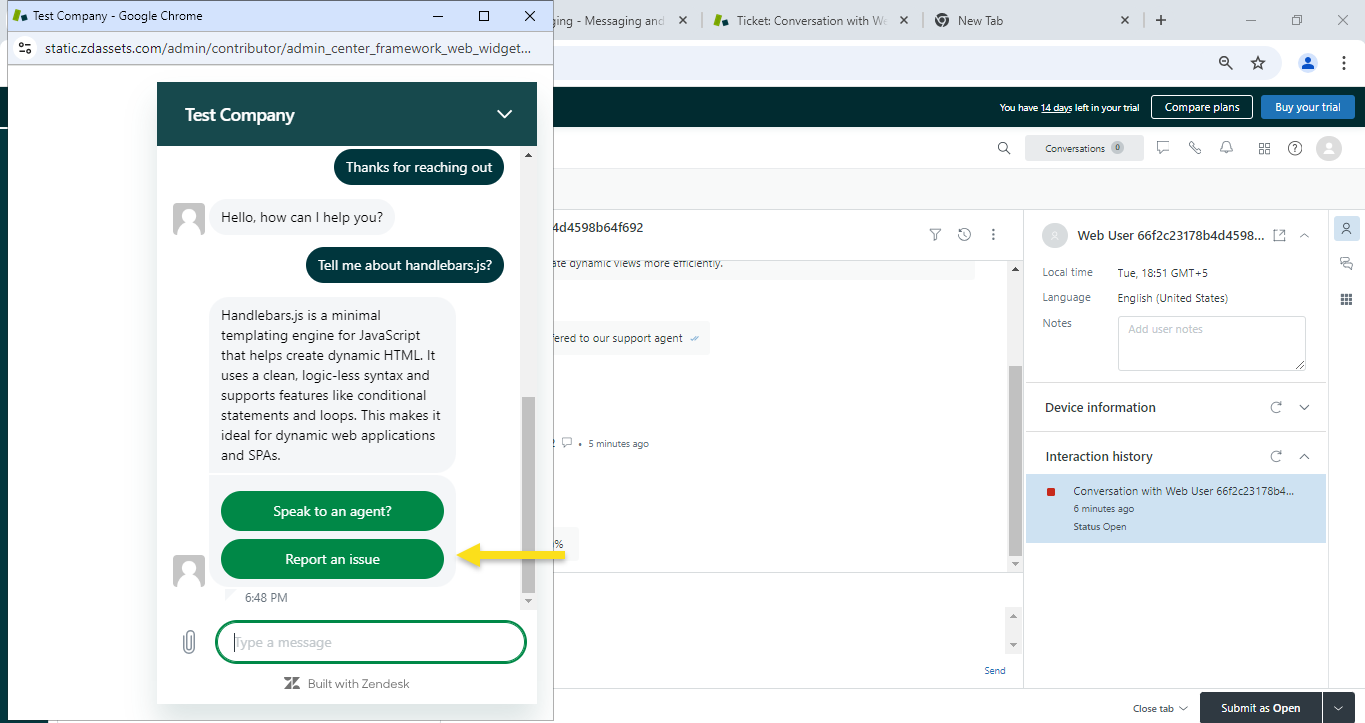
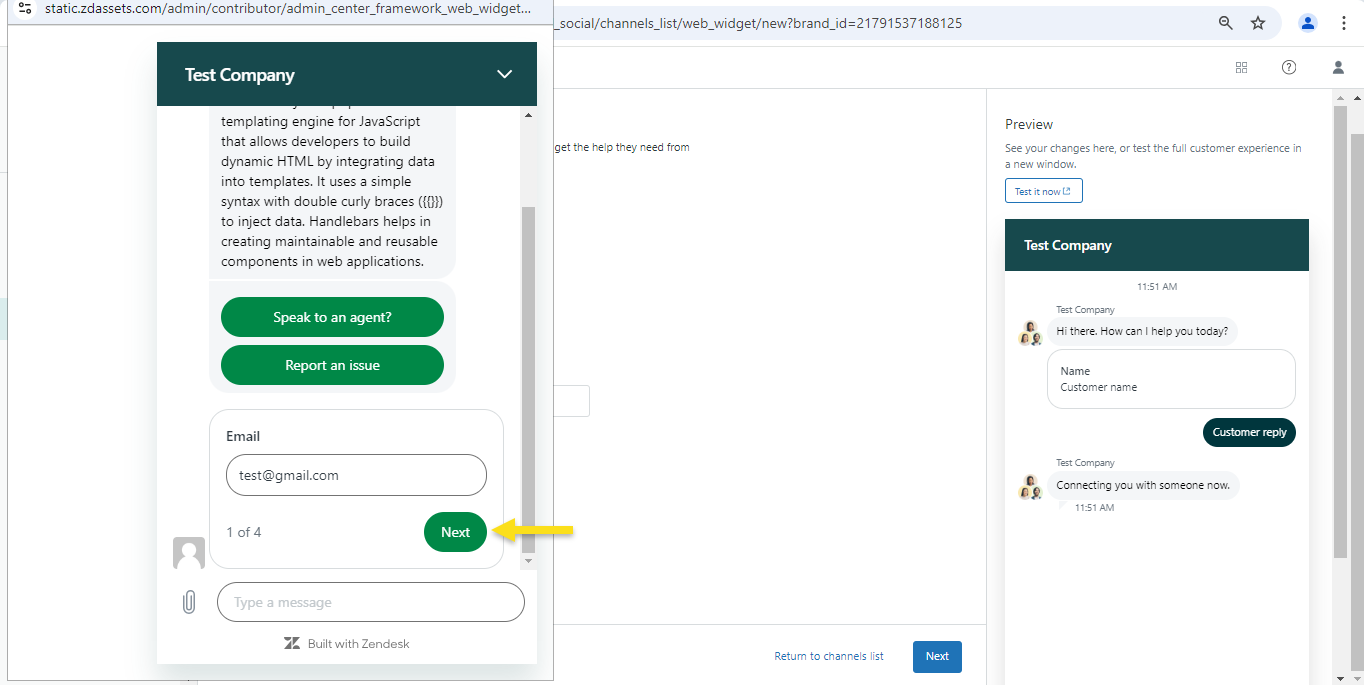
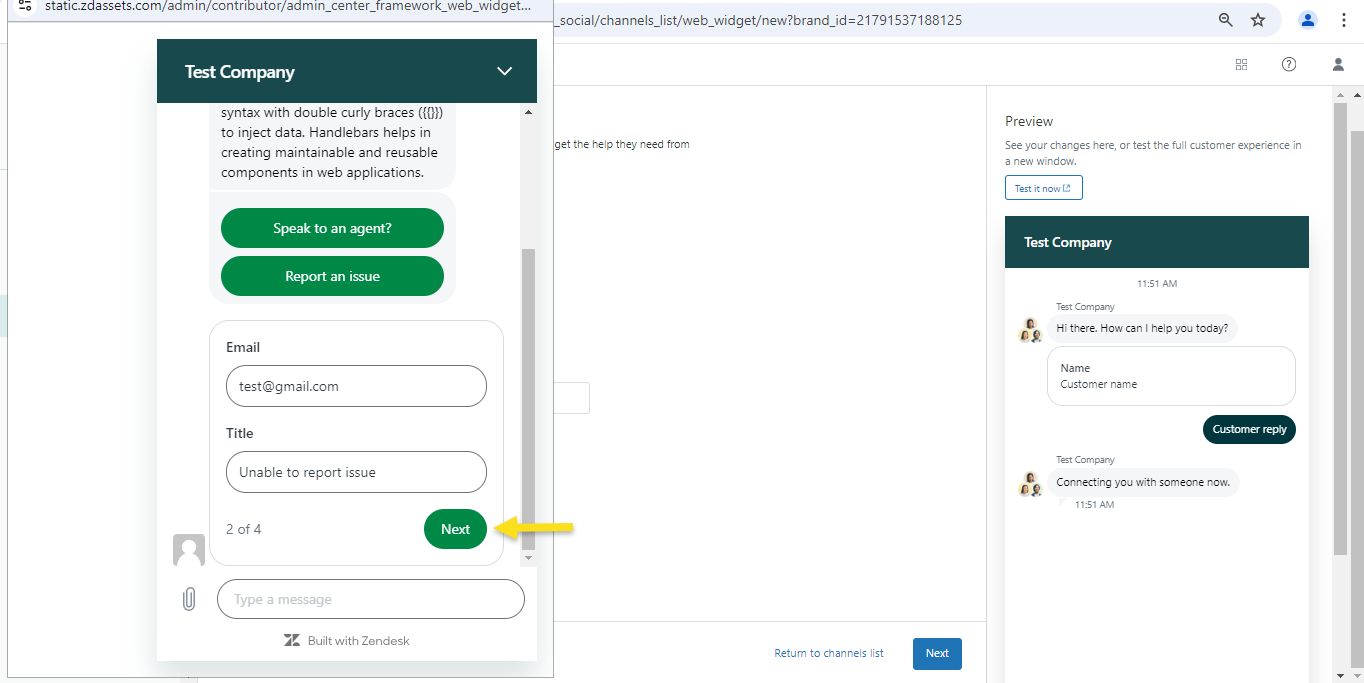
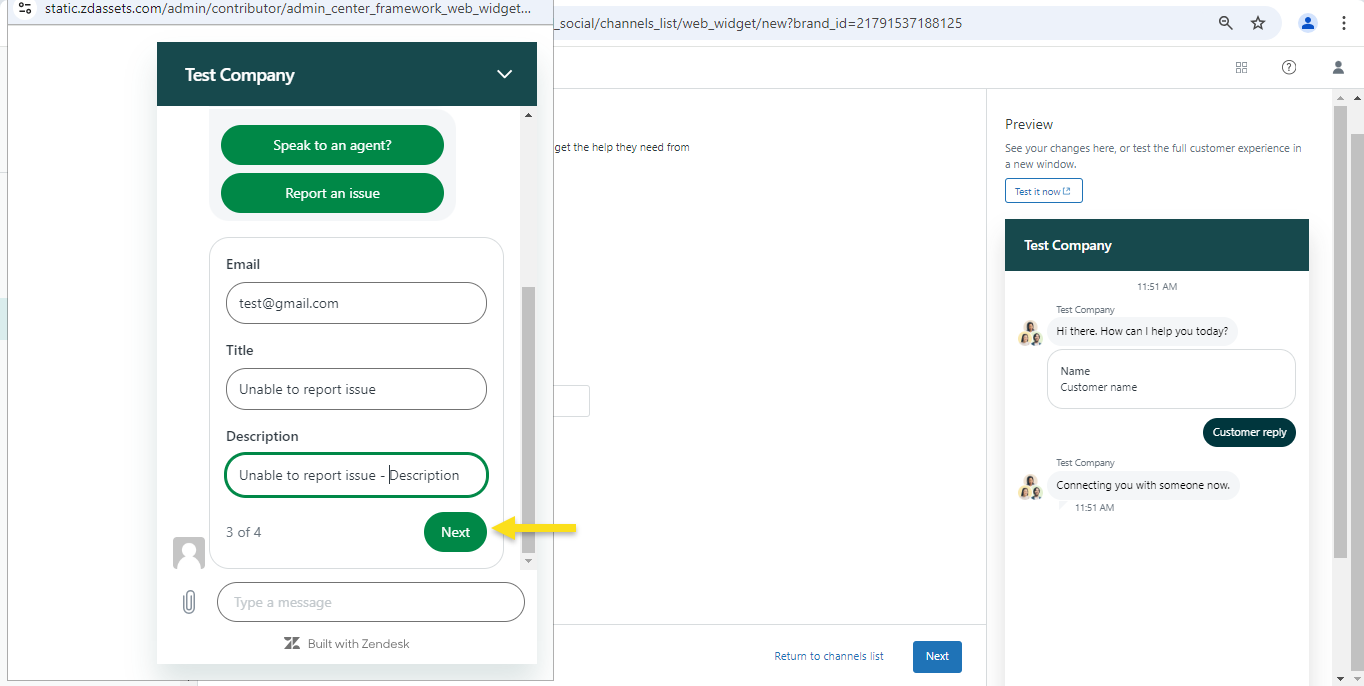
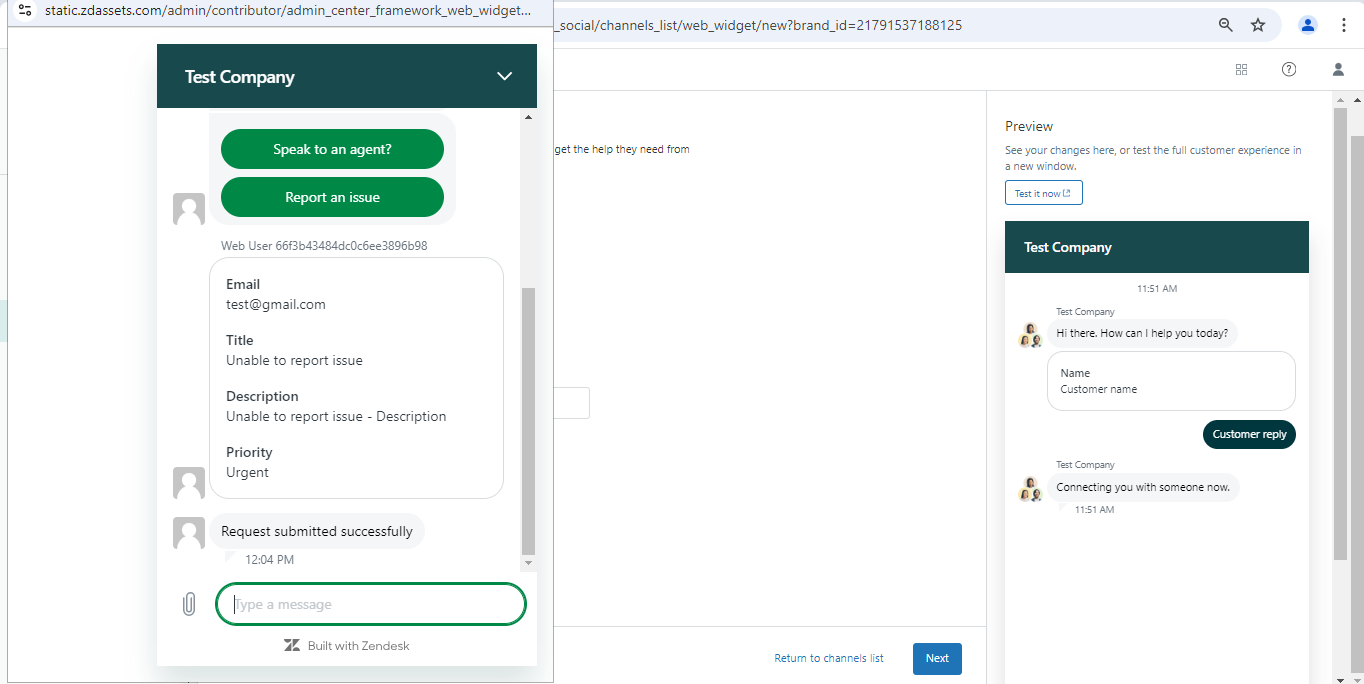
- The user can provide their email address, issue title, description, and set the ticket priority based on the severity of the issue. Upon clicking Send, a new ticket will be created in Zendesk. The user will receive a confirmation email confirming the issue has been successfully reported. Their email address will be associated with the ticket, and all future communications regarding the ticket will use this email.
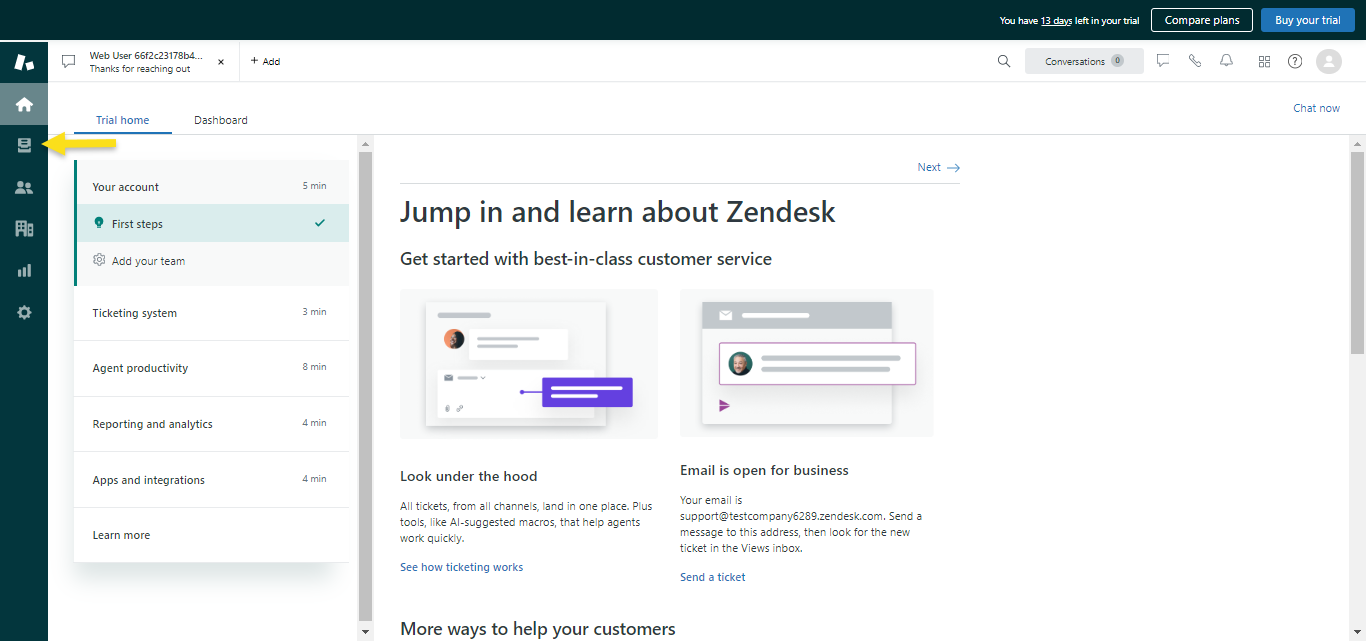
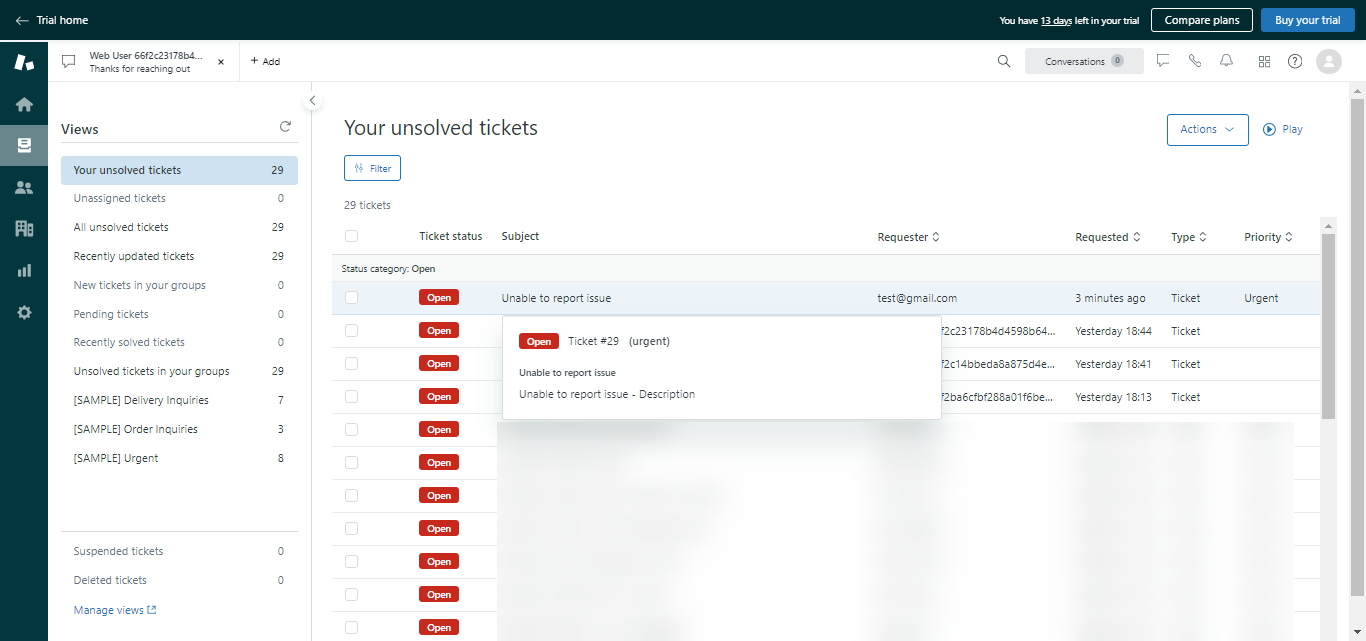
- In order to view the newly created ticket, go to Agent workspace > Views
Remove Integration
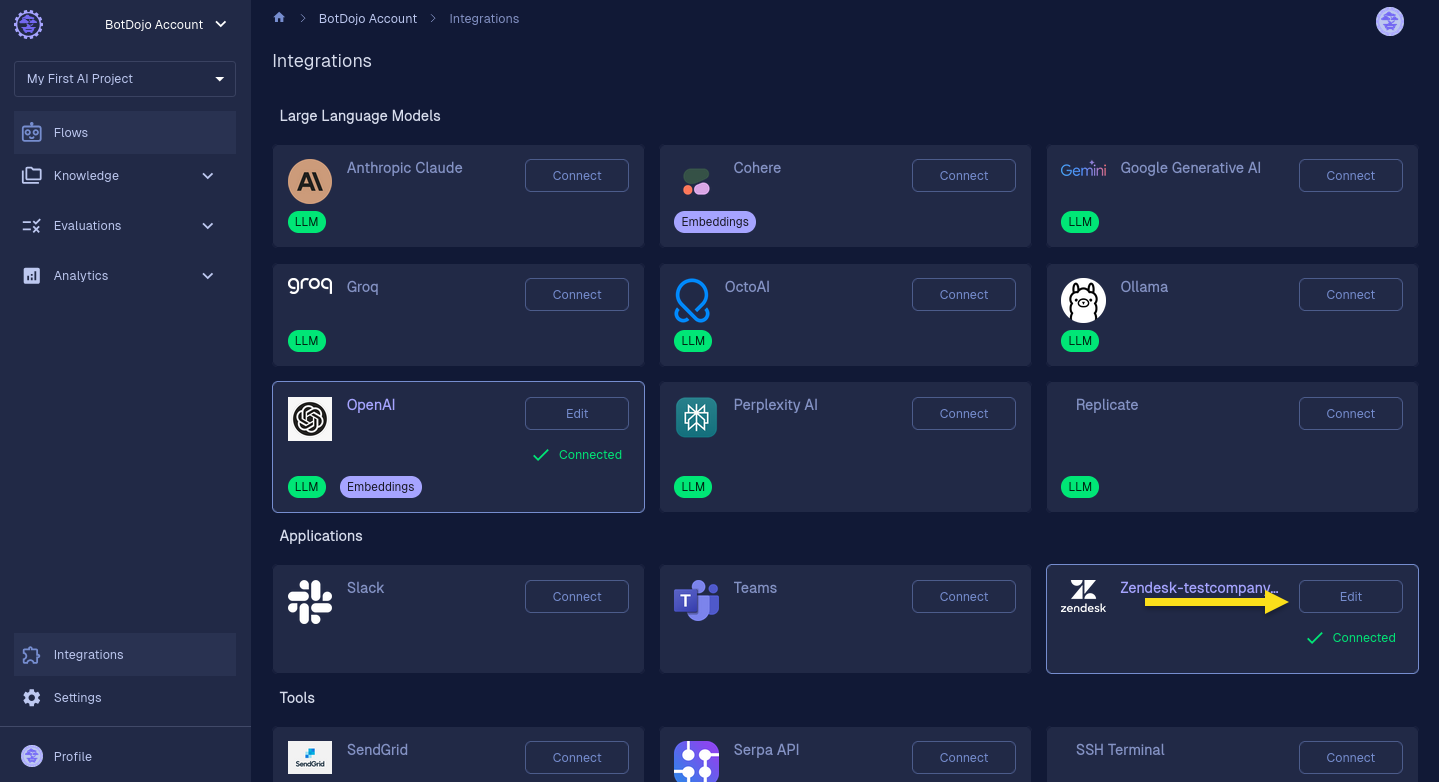
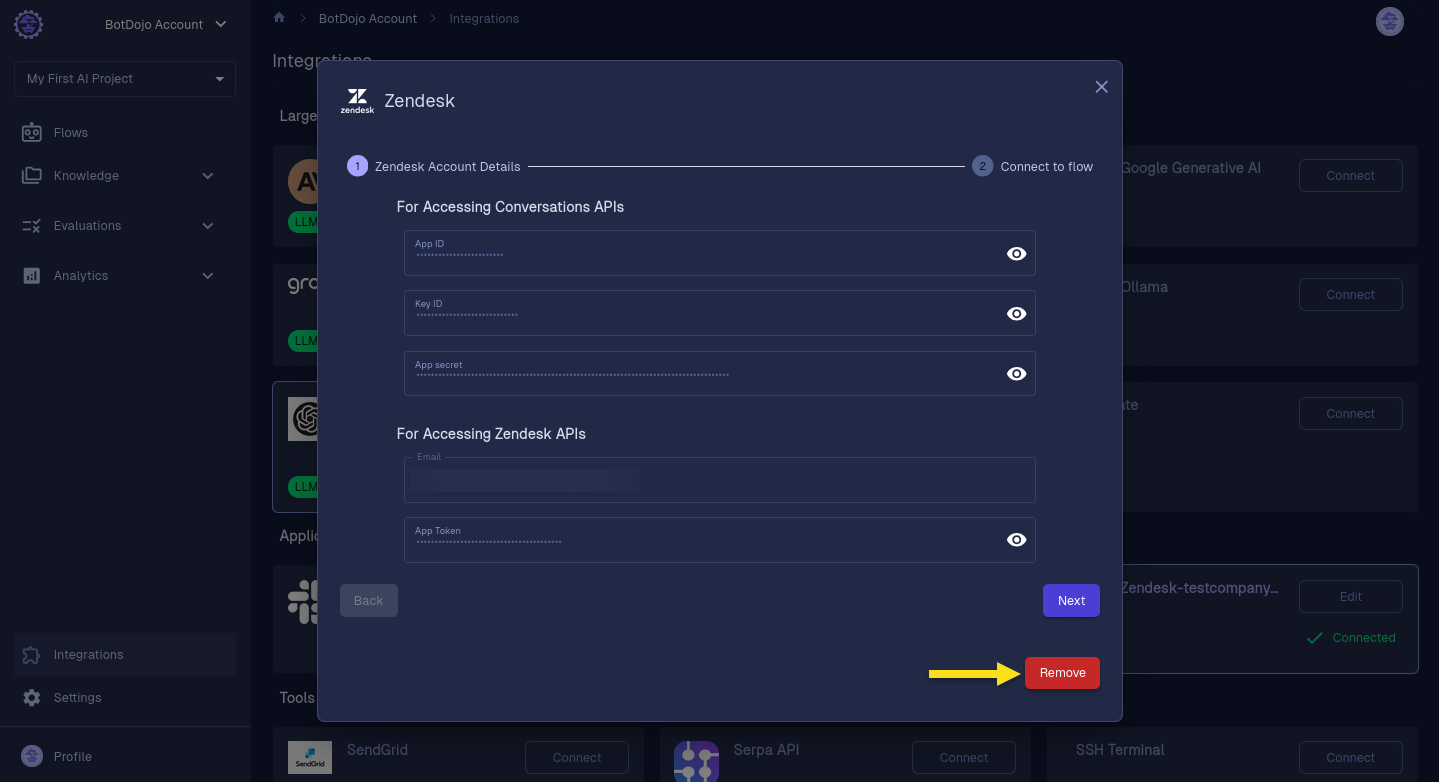
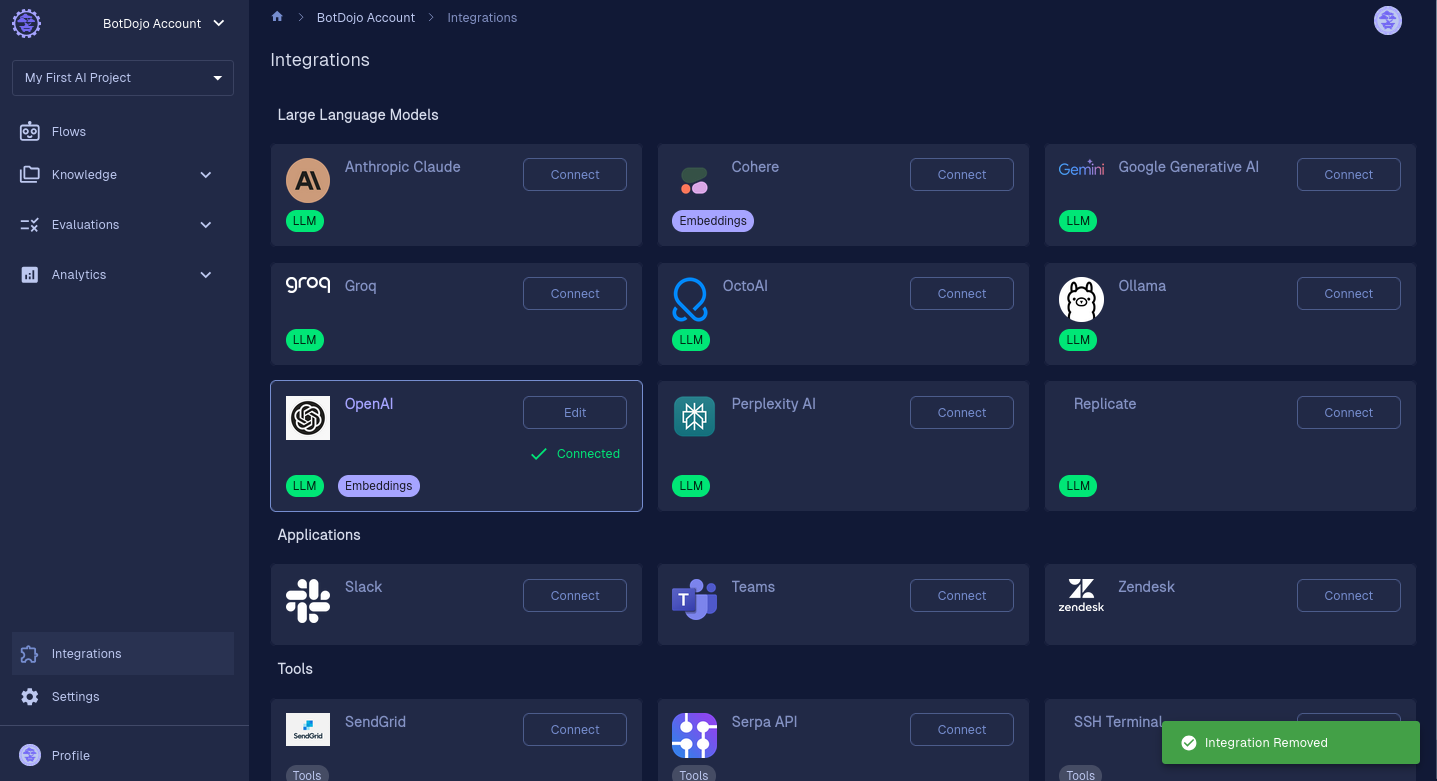
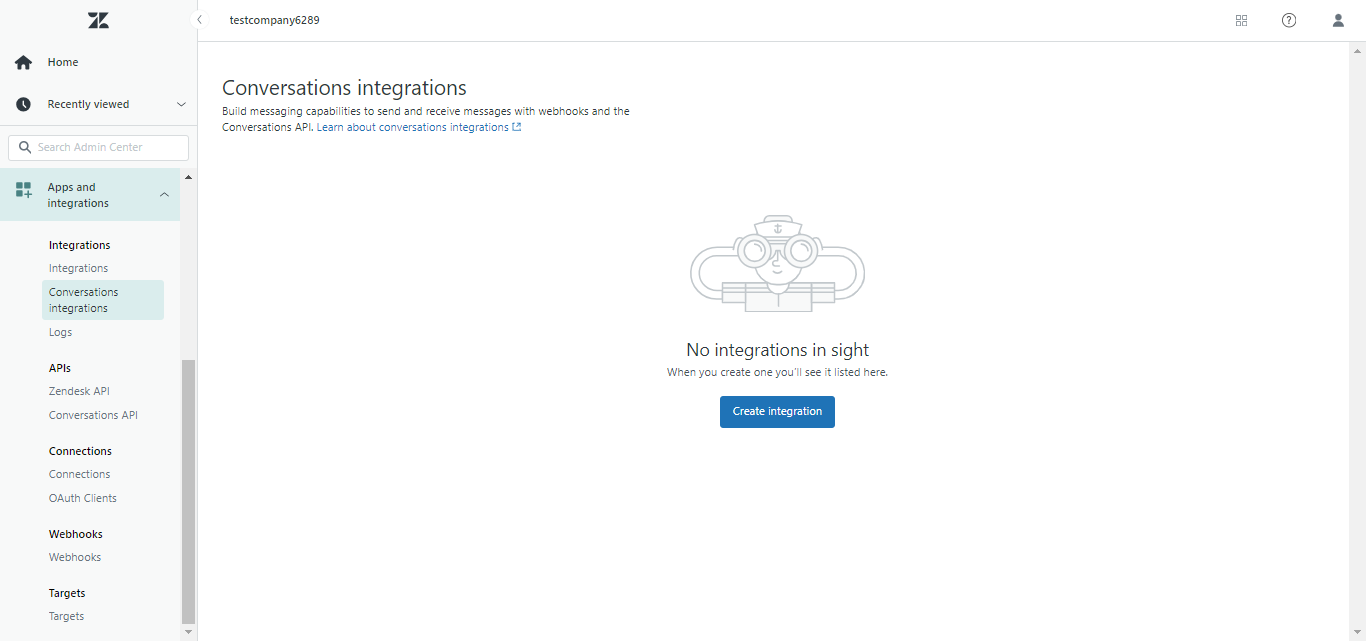
- To remove the BotDojo integration from Zendesk, navigate to your BotDojo account and go to the Integrations page. Find the Zendesk integration, select Edit, and click the Remove button. Afterward, go to the Zendesk Admin Center > Apps and Integrations > Conversation integrations, and the BotDojo integration will no longer appear.
