Scheduled Runs
Introduction
The Scheduled Run feature allows you to automate the execution of your flows based on your preferred timing. This functionality is extremely useful when you want your flow to run at regular intervals without manual intervention, saving you time and ensuring consistency in your workflow.
With this feature, you can set the flow to trigger at specified intervals such as daily, weekly, or monthly, or even create a custom schedule that suits your specific needs.
Steps to Schedule a Flow
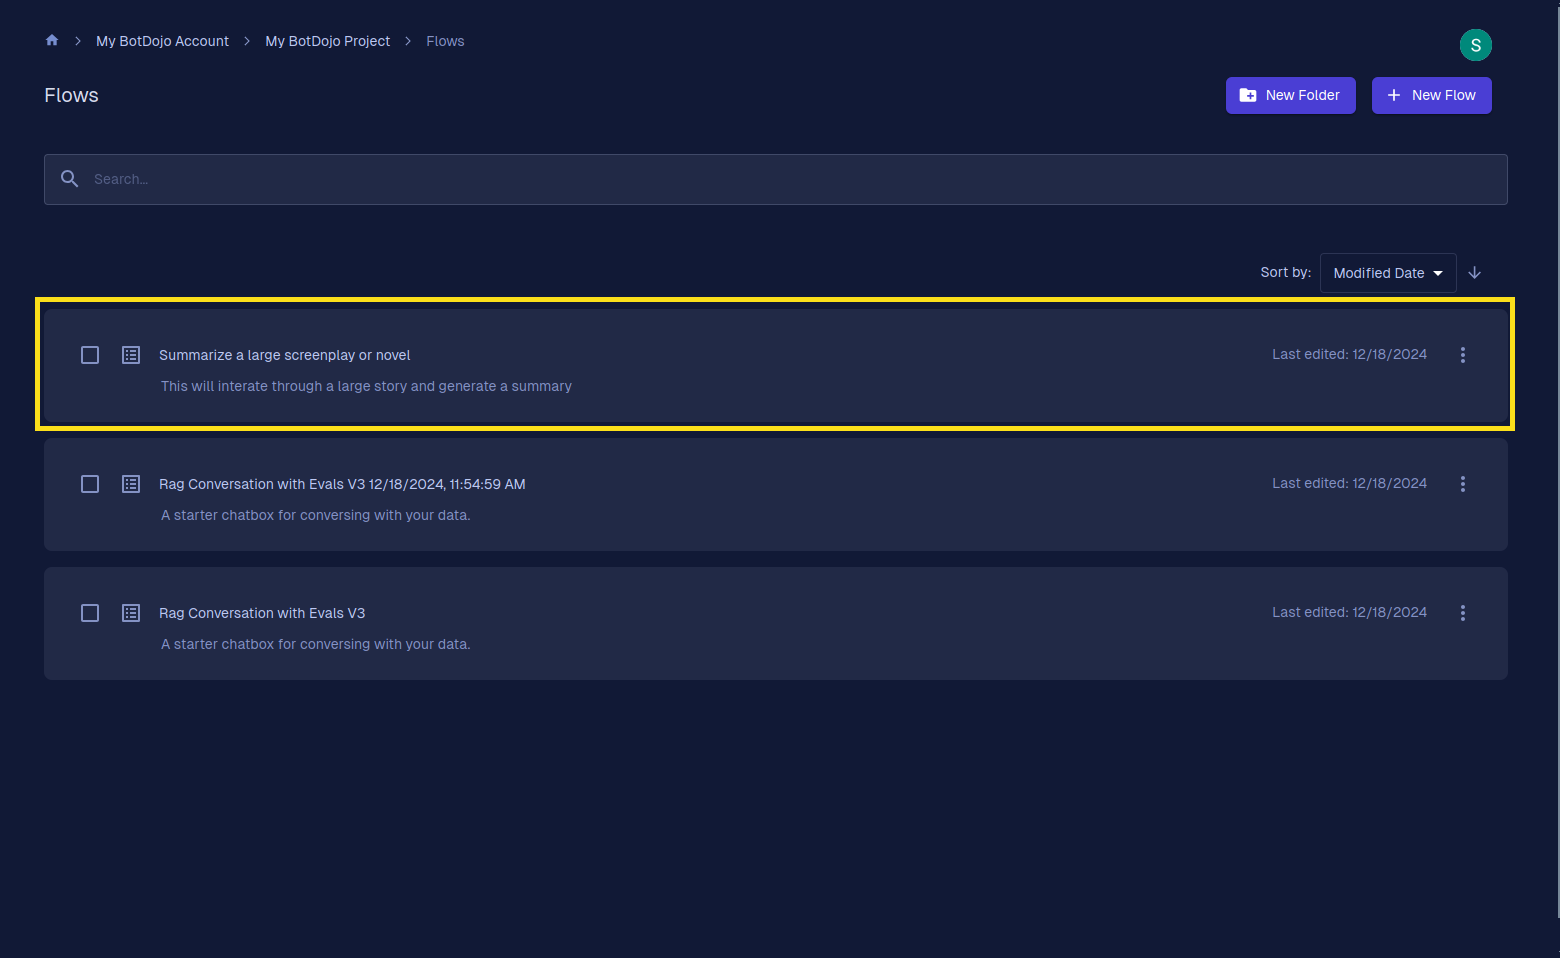
1. Navigate to the Flows Screen
Start by going to the Flows screen. This is where all your flows are listed. Open the flow you want to schedule
2. Open the Flow Builder
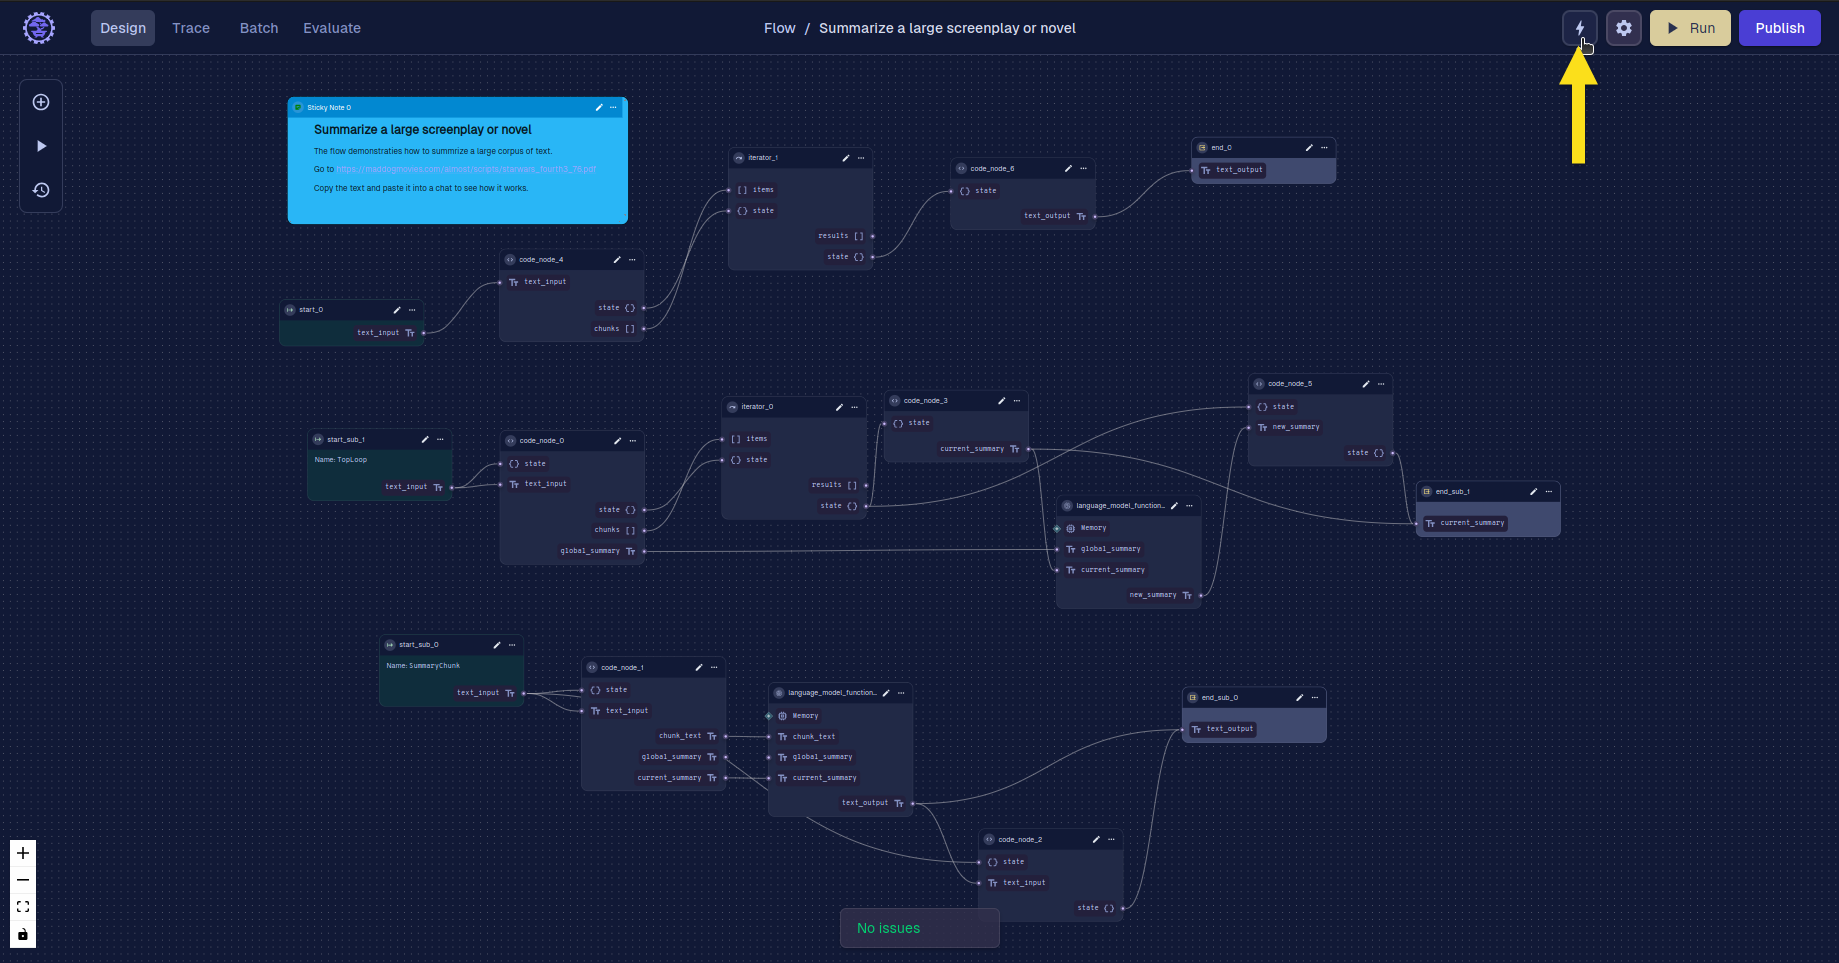
Once inside the flow, click on the Trigger icon in the top right corner of the screen to open the trigger options. This will allow you to set up the flow's scheduling.
3. Access the Flow Triggers Dialog
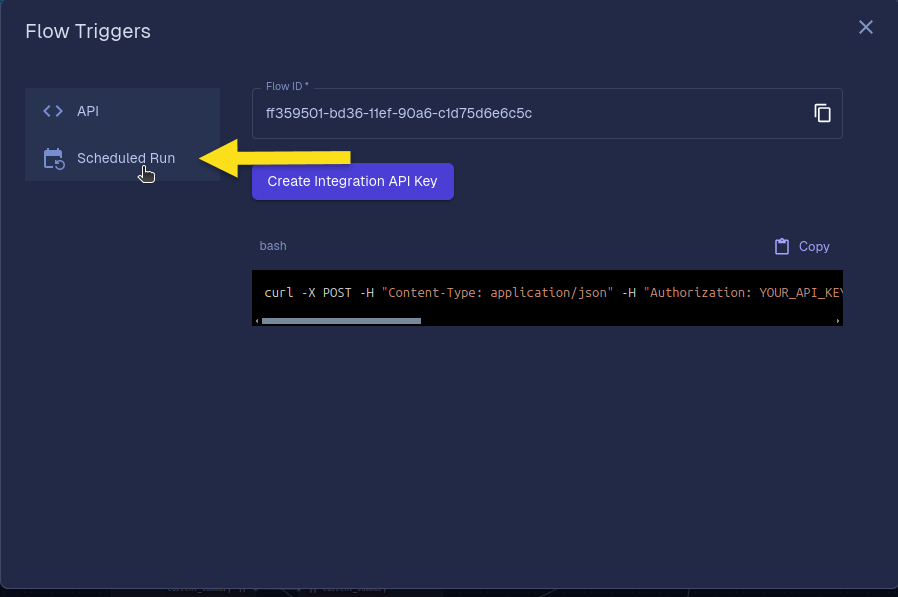
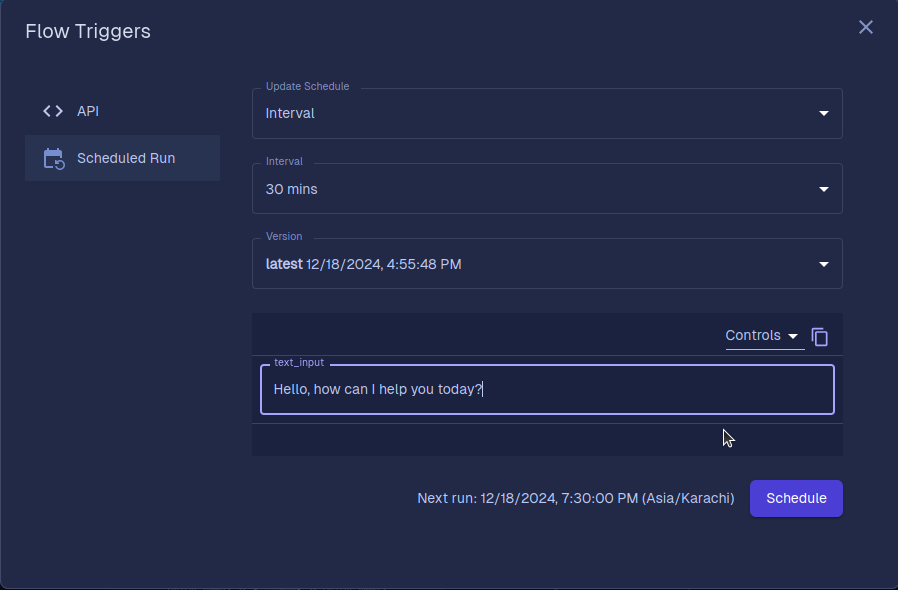
A dialog box titled Flow Triggers will appear. In the left sidebar, you’ll see different options. Click on Schedule Run to configure the schedule for your flow.
4. Update the Schedule
You’ll now see the Update Schedule dropdown. This is where you’ll choose the type of schedule that suits your needs.
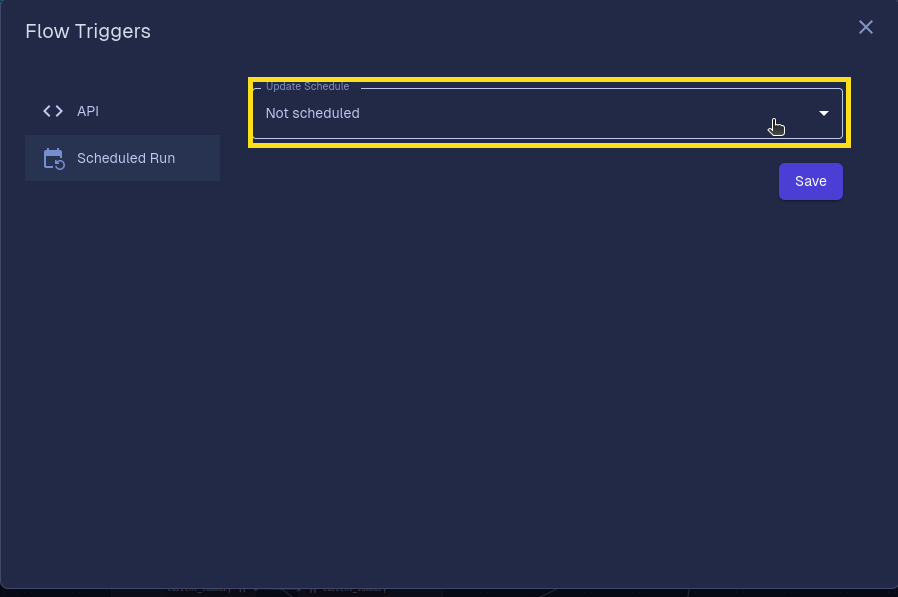
5. Choose Your Schedule Type
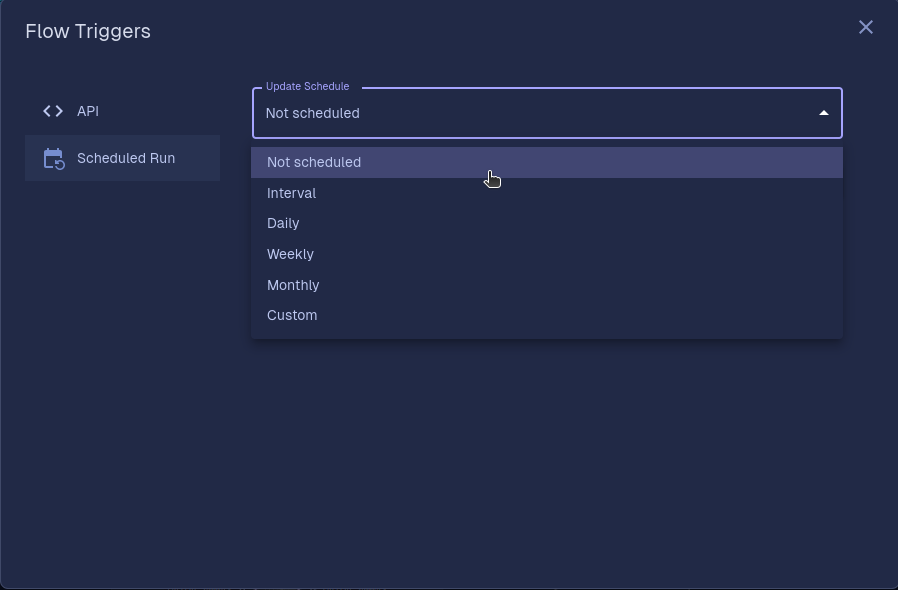
Click the dropdown to view and select one of the following scheduling options:
- Interval – Set a custom interval to run your flow.
- Daily – Set your flow to run at a specific time every day.
- Weekly – Choose specific days of the week for your flow to run.
- Monthly – Set your flow to run on a specific date each month.
- Custom – Tailor a schedule that fits your unique needs.
Detailed Breakdown of Each Schedule Type
Interval
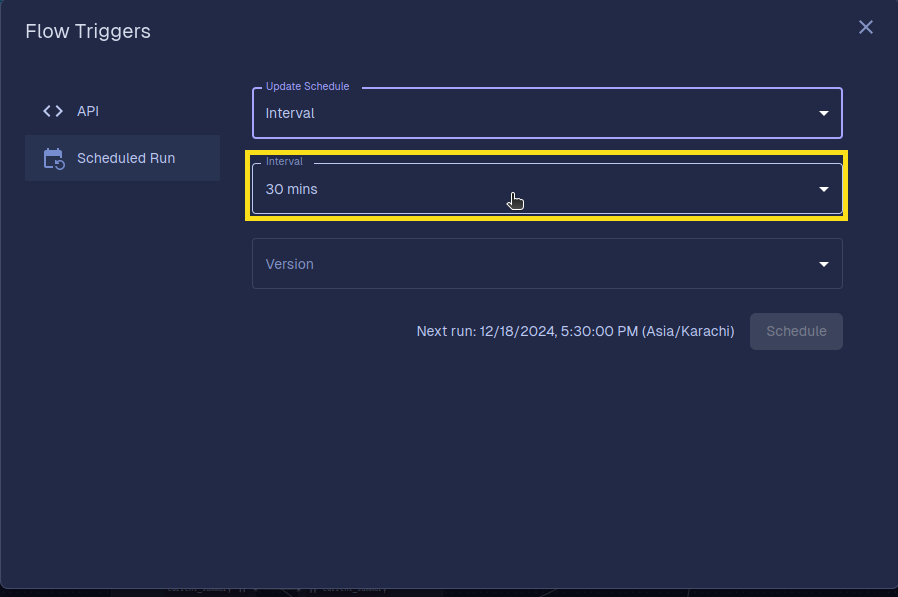
The Interval option lets you define a specific time interval between each execution of your flow. For example, you can choose to run your flow every 1 hour, 2 hours, etc. This is ideal when you want frequent and automated execution without having to set a fixed time.
- Once you select Interval, you will be prompted with a dropdown where you can select the exact interval frequency.
Daily
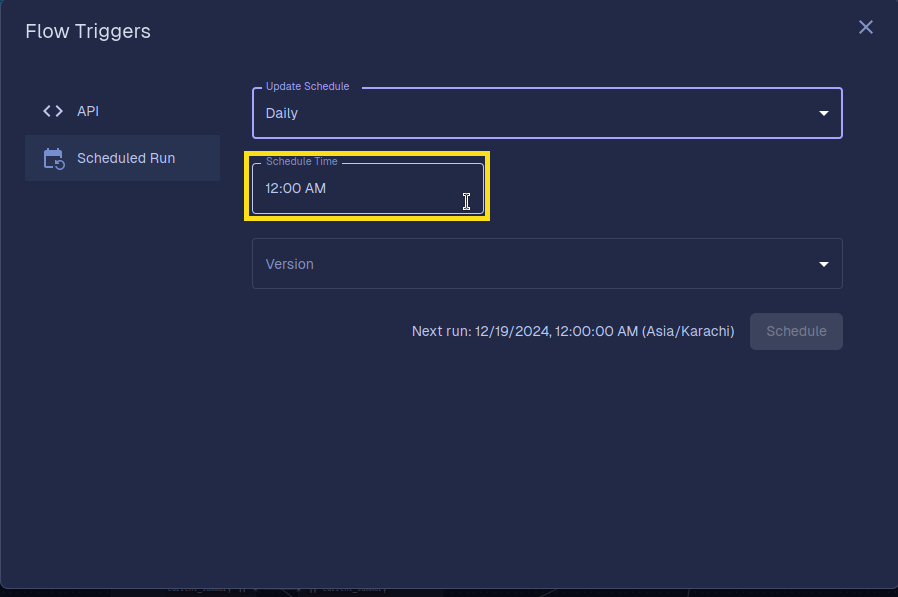
The Daily schedule allows you to run your flow at the same time every day. This option is ideal for flows that need to be executed daily, such as routine data processing tasks or daily reports.
- After selecting Daily, you'll be prompted to enter the Schedule Time. Here, you can specify the exact time you want the flow to run each day.
Weekly
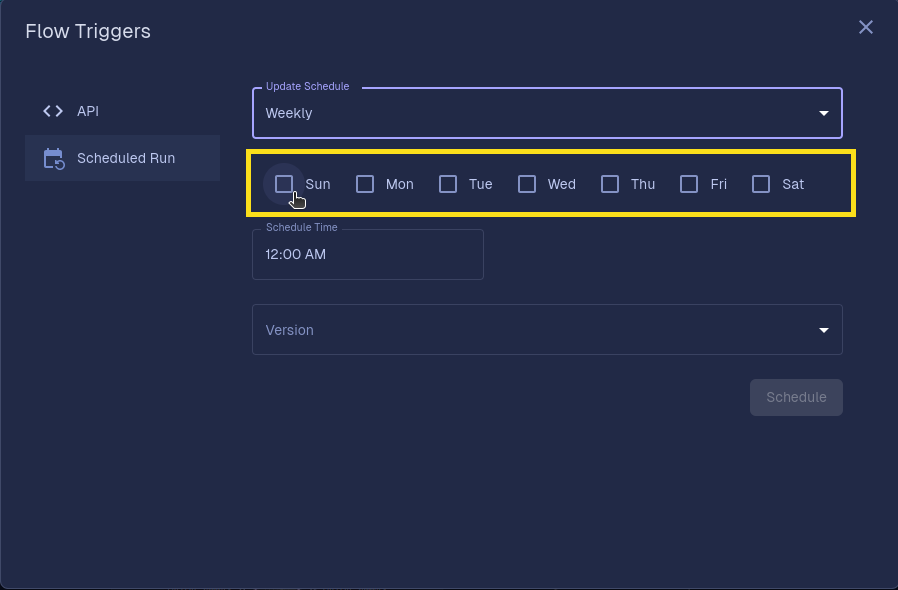
The Weekly option lets you choose specific days of the week for the flow to run. You can select multiple days (e.g., every Monday, Wednesday, and Friday) and set the time for each run. This option is great if you have tasks that need to be executed on a weekly basis, such as weekly reports or maintenance tasks.
- After selecting Weekly, you will see checkboxes for the days of the week, and a Schedule Time field where you can set the time for each selected day.
Monthly
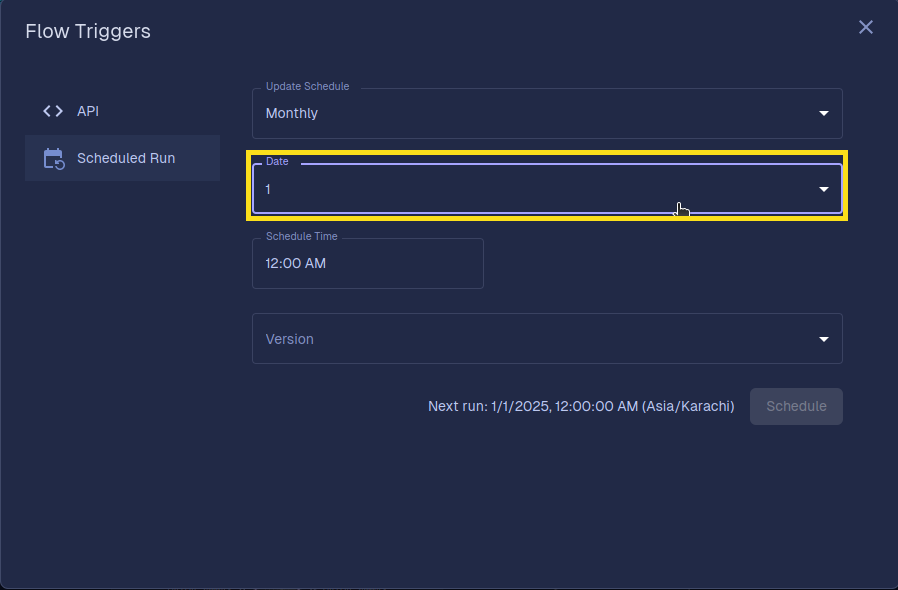
The Monthly schedule runs your flow on a specific date of each month. You can choose the day of the month (e.g., the 1st, 15th, or last day) and specify the time you want the flow to execute. This is useful for monthly reports, payments, or data syncing that needs to occur at a consistent time each month.
- Once you select Monthly, you will see a Date dropdown to select the exact day of the month and a Schedule Time field to set the time for execution.
Custom
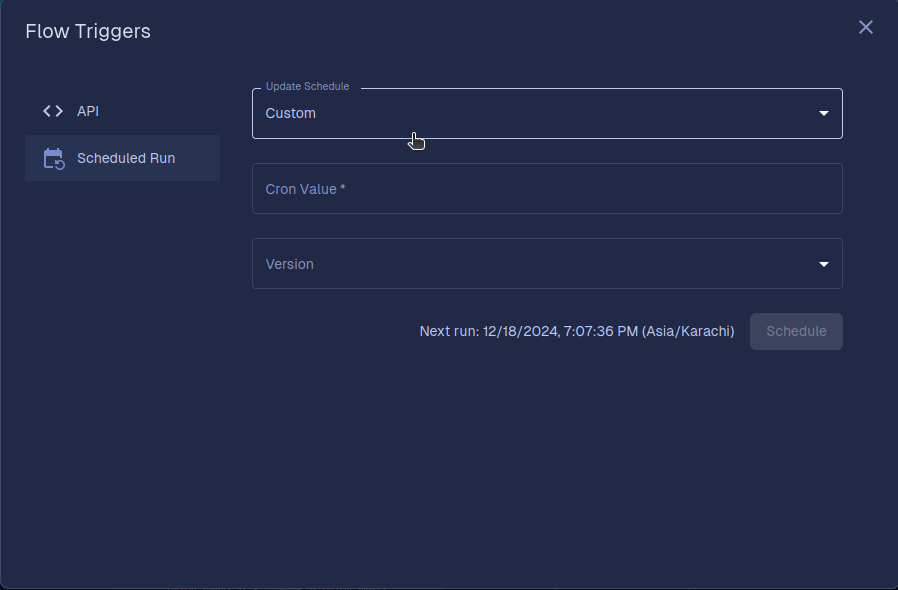
The Custom schedule option allows you to define a unique schedule using a Cron Expression. This feature provides flexibility and advanced scheduling capabilities for users who are familiar with cron syntax.
- Once you select Custom, you will be prompted to enter a Cron Value. This is where you can input your cron expression that determines the exact timing of your flow's execution.
A cron expression consists of six fields:
- Minute: The minute of the hour (0-59)
- Hour: The hour of the day (0-23)
- Day of the Month: The day of the month (1-31)
- Month: The month of the year (1-12)
- Day of the Week: The day of the week (0-6, where 0 = Sunday)
For example, a cron expression of 0 12 * * 1-5 would run the flow at 12:00 PM on weekdays (Monday to Friday).
- You can input your cron expression directly into the Cron Value field, and the flow will automatically run based on the defined schedule.
Finalizing the Schedule
6. Select the Flow Version
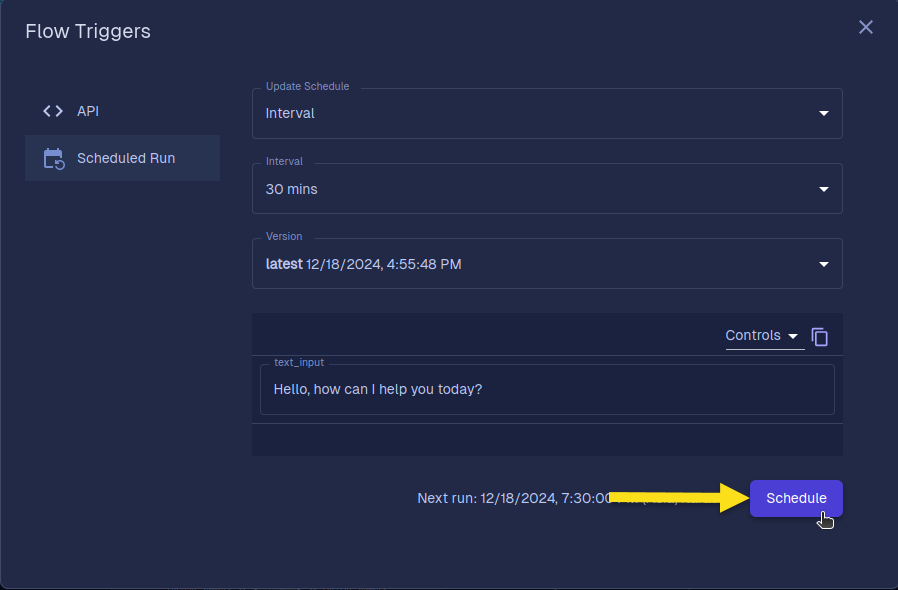
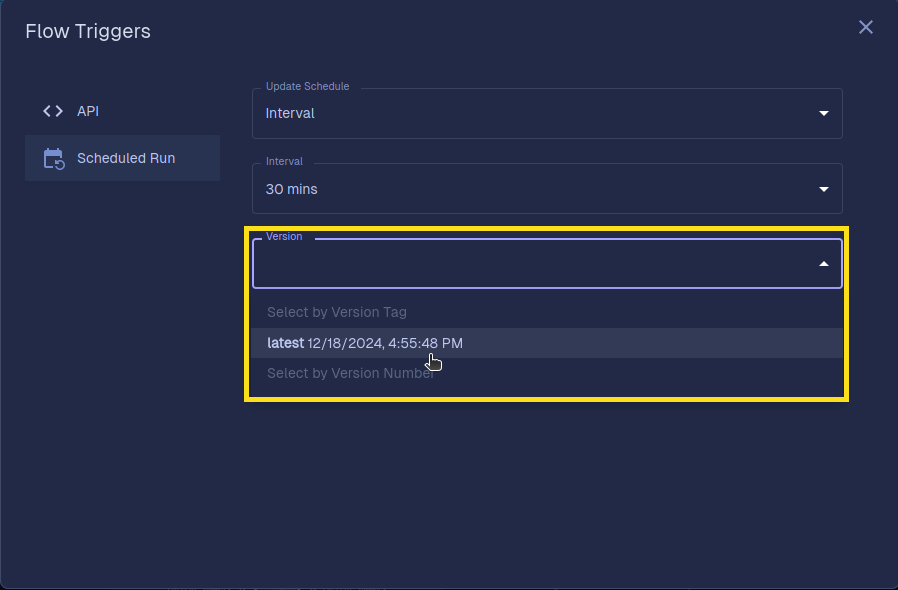
After selecting your schedule type and configuring the details, the next step is to select the Flow Version you want to set.
- Use the Version dropdown to choose the specific version of the flow you want to schedule. This ensures that the correct version of the flow runs according to your schedule.
7. Enter Input
As soon as you select the Flow Version, an input field for your flow will appear where you are supposed to give the input that you want to be passed to your flow.
8. Save Your Schedule
Once you’ve set the schedule type and flow version, you are ready to save your configuration.
- Click the Schedule button at the bottom right of the dialog to apply the changes. Your flow will now be scheduled to run according to the defined settings.
