Embedded Widget
The BotDojo Embedded Chat Widget allows you to easily integrate a chat interface into your website. This chat interface connects users directly to your BotDojo Flow.
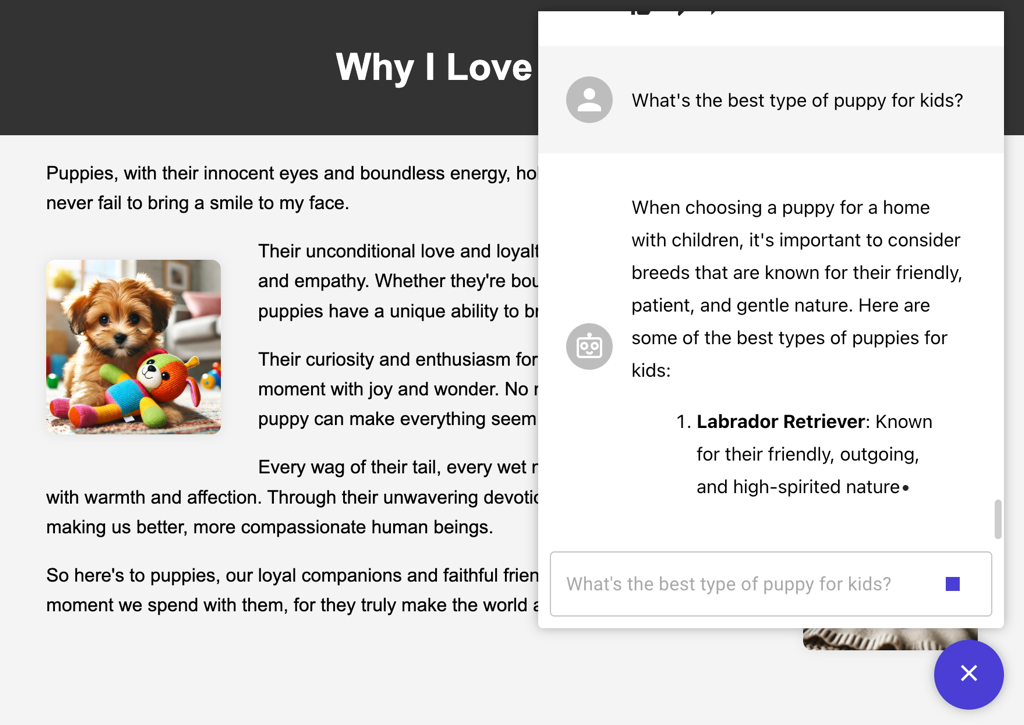
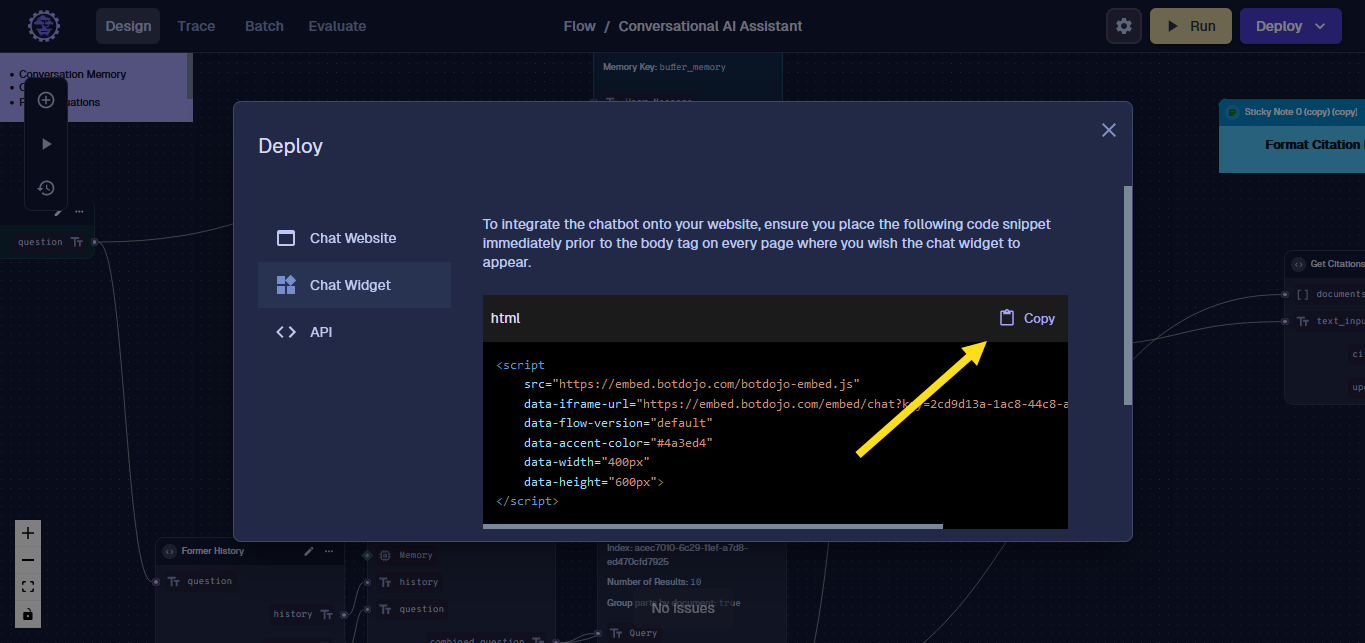
To integrate the BotDojo chat widget into your website, simply paste a script tag into your website's HTML. This script tag will add a button to your website that loads the chat widget into an iframe when clicked. To get the script, open any Compatible Chat Flow in the designer, then click Deploy. In the Chat Widget section, you can create a new widget and then copy the script to your clipboard.
The widget can be customized to match your specific needs:
- Accent Color: Customize the chat widget's color scheme to align with your website's design. This is controlled via the
data-accent-colorattribute. The value should be a valid CSS color, e.g.,#4a3ed4. - Flow Release: You can specify which version of your Flow to use. This allows for targeted testing or consistent functionality with a particular Flow version. Set this using the
data-flow-versionattribute. Use values likedefaultto select the default release, or a specific version number or alias, e.g.1.2orembedded-chat. - Welcome Message: Define a custom message that will greet users when they first load the chat widget. This creates a more engaging user experience right from the start.
- Custom Error Message: If there are any issues with the chat widget, you can define a custom error message to provide users with clear guidance on the next steps. This could include a link to a support ticket system or other relevant resources.
Size Customization
You can control the dimensions of the chat widget using these attributes:
- Width: Set the width of the chat widget using
data-widthattribute (default:400px) - Height: Set the height of the chat widget using
data-heightattribute (default:600px)
Example:
<script
    src="https://embed.botdojo.com/botdojo-embed.js"
    data-iframe-url="https://embed.botdojo.com/embed/chat?key=YOUR_KEY"
    data-width="450px"
    data-height="650px"
></script>
Advanced Attributes
The widget script supports several advanced attributes for further customization:
- Bot Image: Set a custom avatar for the bot responses using
data-bot-imageattribute with an image URL - User Image: Set a custom avatar for user messages using
data-user-imageattribute with an image URL - Widget Image: Set a custom icon for the chat button using
data-widget-imageattribute with an image URL - New Session: Force starting a new chat session on widget load using
data-new-session="true". By default, the widget remembers the user's previous chat session and continues from where they left off. - Flow Headers: Send custom headers to the flow using
data-flow-headersattribute with a JSON string (e.g.,'{"customer_name": "John Smith"}')
Visual Customization via URL Parameters
You can further customize the appearance and behavior of the chat widget by adding URL parameters to the iframe source (or the data-iframe-url attribute if using the script tag):
- accent-color: Sets the primary accent color (e.g.,
#4a3ed4) - background-color: Sets the chat window background (e.g.,
#ffffffor#1a1a2e) - theme: Set the chat interface to either a
lightordarktheme using thethemeparameter (defaults tolight). Example:theme=dark - font-size: Controls chat font size in em (e.g.,
font-size=1.2em) - bot-image, user-image, voice-icon: Custom avatar/image URLs
- new-session, session-id, external-ui-channel-id: Session and integration options
Example:
<iframe
  src="https://embed.botdojo.com/embed/chat?key=YOUR_KEY&theme=dark&accent-color=%234a3ed4&background-color=%23ffffff&font-size=1.1em&bot-image=https://your-domain.com/bot.png"
  width="400"
  height="600"
  style="border: none; border-radius: 16px; overflow: hidden;"
  allow="microphone"
></iframe>
You can dynamically update these parameters to change the chat's appearance in real time (see the test page for live controls). For most visual customizations, prefer using URL parameters as shown above.
Widget Positioning
By default, the widget is positioned in the bottom-right corner of the page. You can customize the position using CSS to override the default positioning:
<style>
.botdojo-container {
    right: 100px !important;
    bottom: 20px !important;
    /* Keep position: fixed for proper layering */
    position: fixed !important;
}

/* Optional: Remove default padding */
.botdojo-container {
    padding-right: 0 !important;
    padding-bottom: 0 !important;
}
</style>
Important Notes:
- Use
!importantdeclarations as the JavaScript sets inline styles - Keep
position: fixedon the container for proper layering unless you have a specific positioned parent element - The chat button positioning within the container is handled automatically by flexbox
Complete Example
Here's a complete example showcasing various customization options:
<script
    src="https://embed.botdojo.com/botdojo-embed.js"
    data-iframe-url="https://embed.botdojo.com/embed/chat?key=YOUR_KEY"
    data-accent-color="#ff6b6b"
    data-width="450px"
    data-height="650px"
    data-widget-image="https://your-domain.com/chat-icon.png"
    data-bot-image="https://your-domain.com/bot-avatar.png"
    data-user-image="https://your-domain.com/user-avatar.png"
    data-new-session="false"
    data-flow-version="default"
    data-flow-headers='{"authorization": "Bearer token"}'
    data-allow-microphone="true"
></script>

<style>
.botdojo-container {
    right: 100px !important;
    bottom: 20px !important;
    position: fixed !important;
}
</style>
JavaScript API
The widget also exposes a JavaScript API for programmatic control:
// Open the chat widget
window.botdojo.openChat();

// Close the chat widget
window.botdojo.closeChat();

// Check if chat is currently open
if (window.botdojo.isChatOpen) {
    console.log('Chat is open');
}
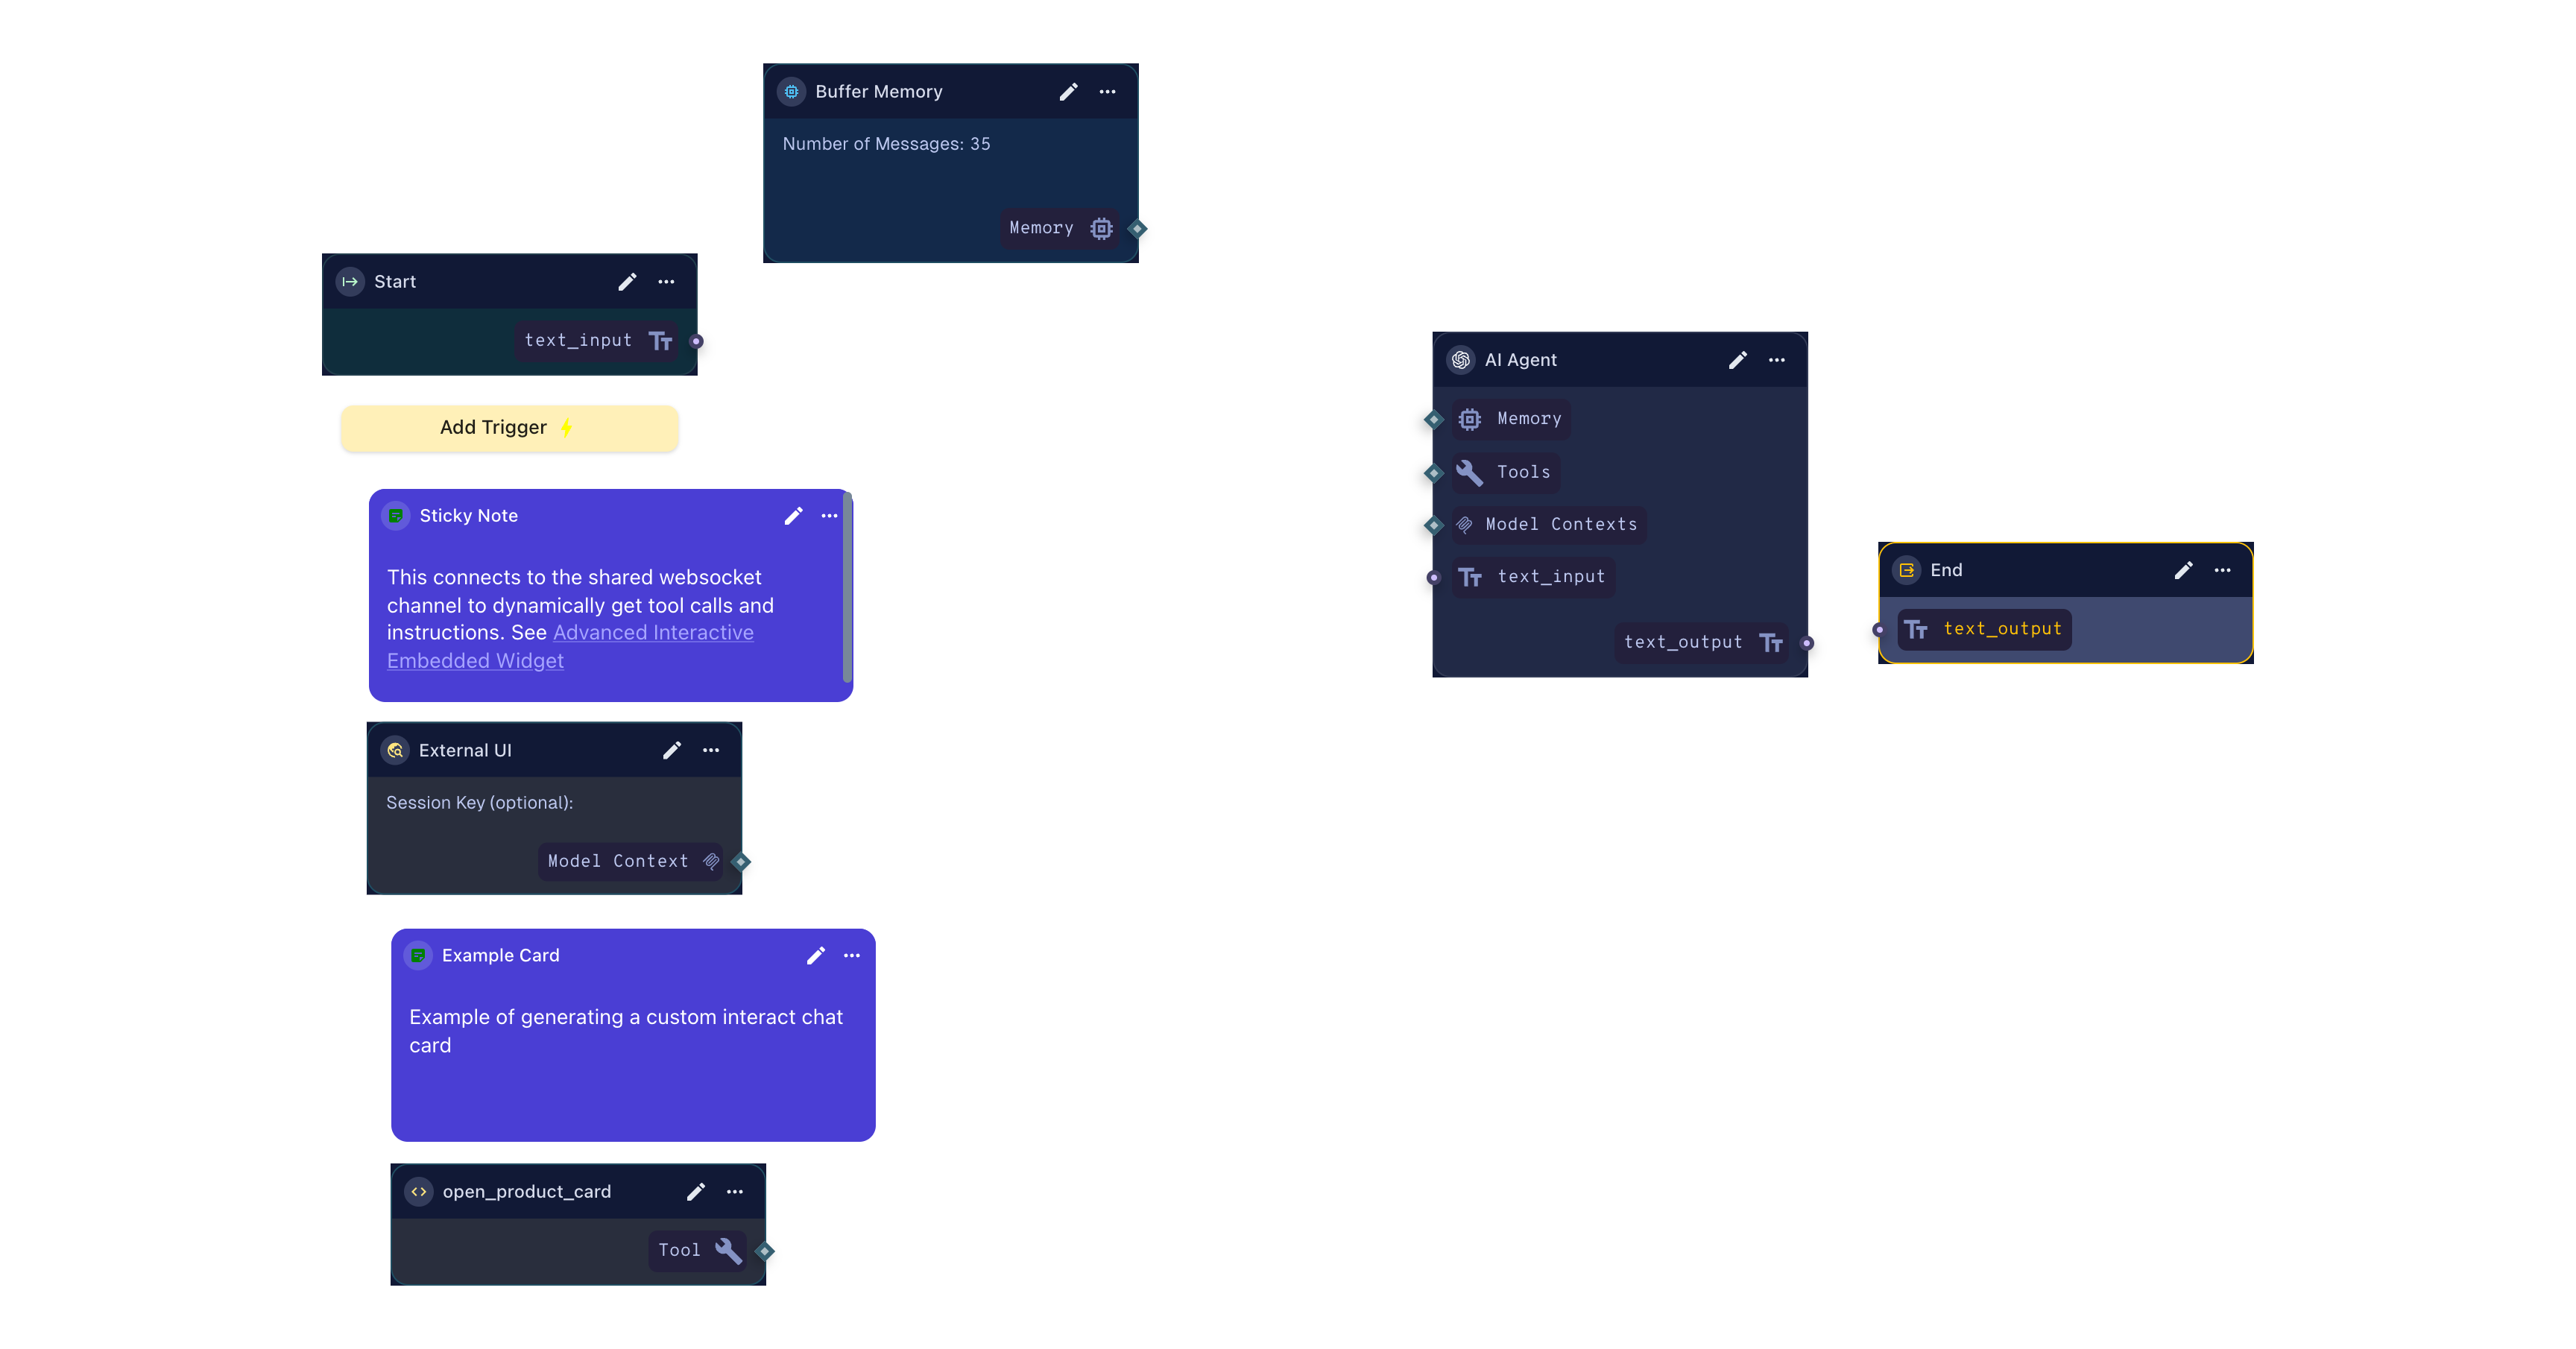
Advanced: Interactive Embedded Widget (Tools + Custom Cards)
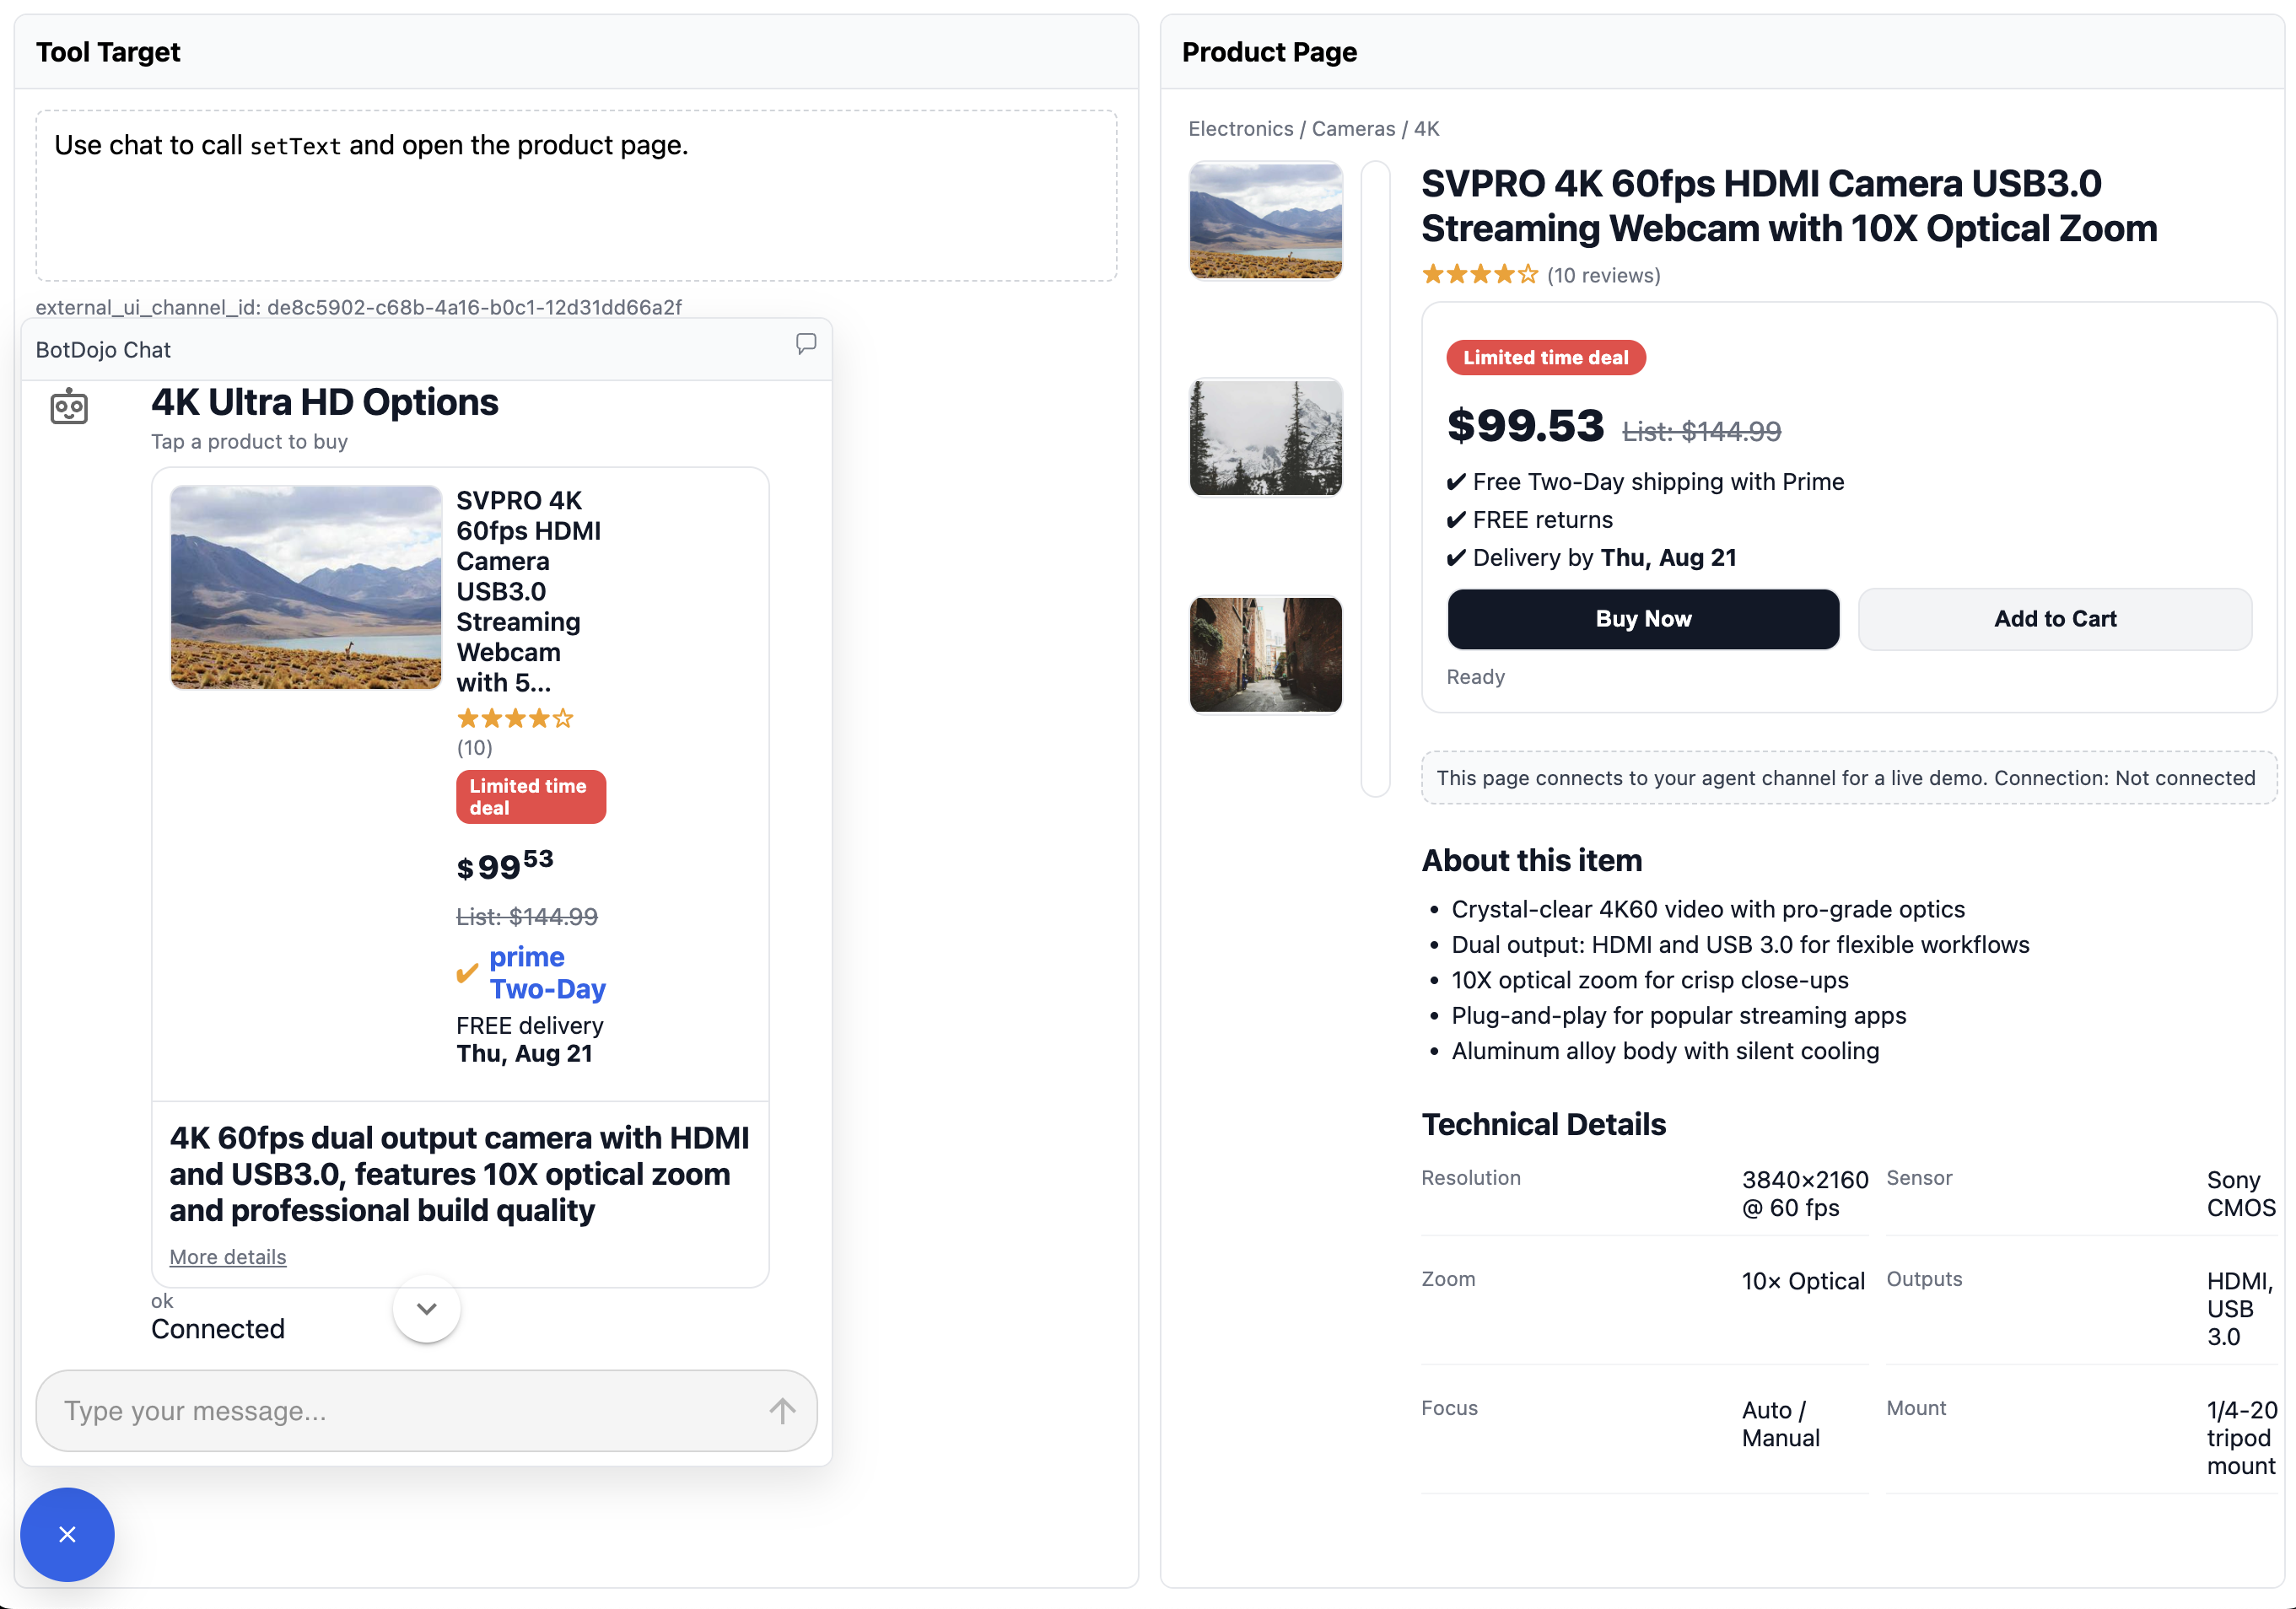
You can take the embedded chat beyond Q&A by letting your agent call tools that run in your page (DOM changes, navigation, in-page apps) and by rendering clickable product cards that trigger actions. A minimal end-to-end example is available here: botdojo-ai/interactive-website-agent.