Twilio
Introduction
Integrating Twilio with your BotDojo account allows you to leverage Twilio's powerful communication capabilities within your BotDojo workflows.
This guide provides a step-by-step walkthrough to connect Twilio with your BotDojo account, ensuring a seamless setup process. Follow each step carefully to ensure successful integration.
Prerequisites
Before you begin, ensure you have the following:
- Twilio Account: If you don't have one, sign up at Twilio.
- BotDojo Account: Access to your BotDojo account.
- Active Twilio Phone Number: A phone number purchased from Twilio to integrate with BotDojo.
Getting Twilio Credentials
Follow these steps to obtain your Twilio Account SID and Auth Token, which are essential for integration.
-
Log in to Twilio
- Navigate to Twilio Console.
- Enter your Twilio account credentials to log in.
-
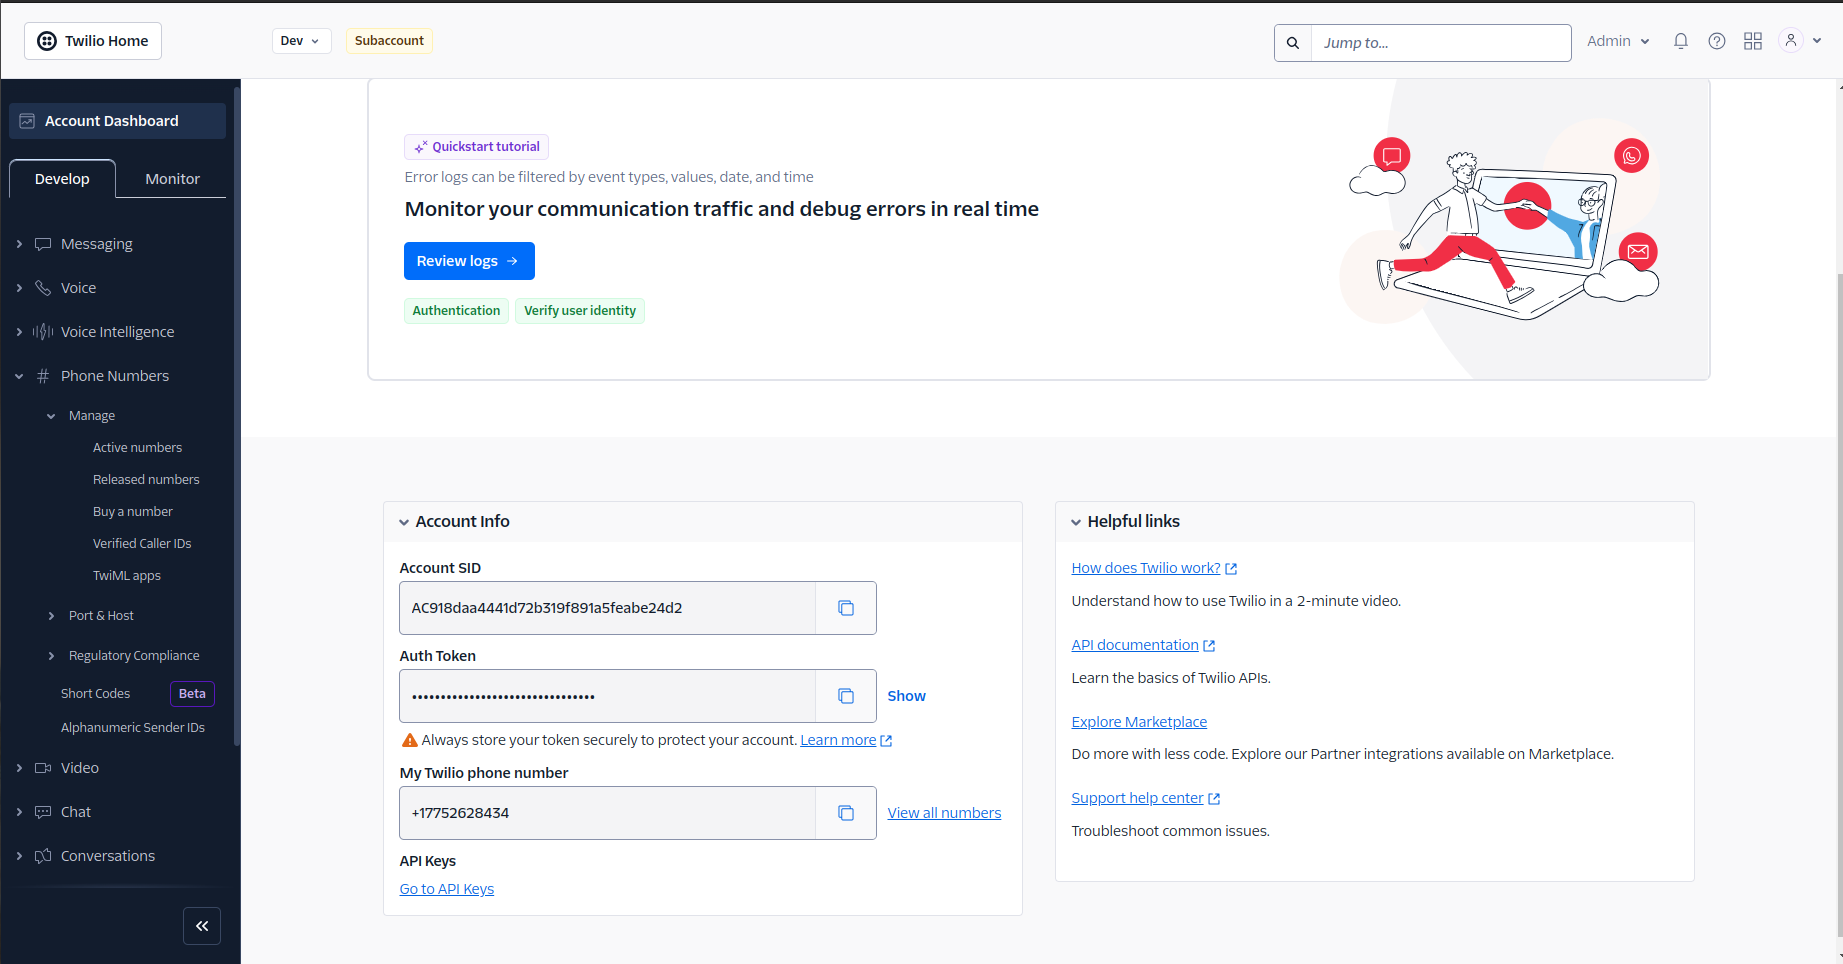
Access Account Dashboard
- Upon logging in, you'll be directed to the Account Dashboard.
- Copy Credentials
-
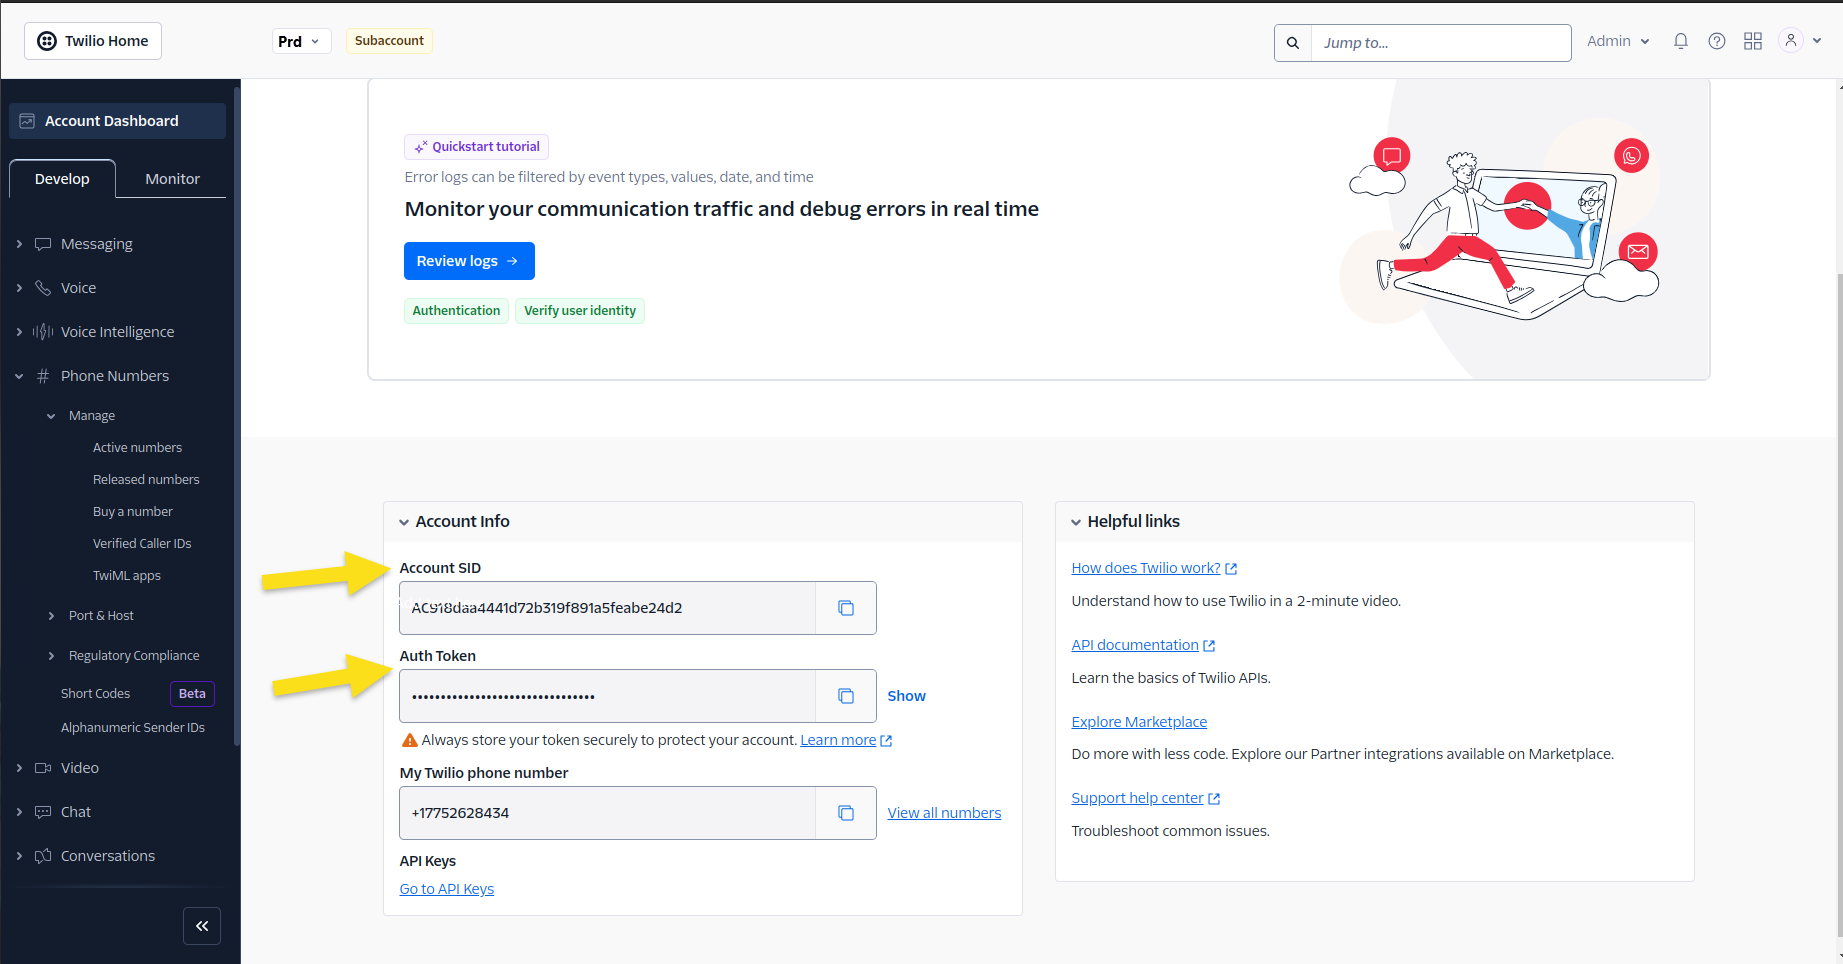
Locate your Account SID and Auth Token on this page.
-
Click the Copy buttons next to both Account SID and Auth Token to copy them to your clipboard.
Connecting Twilio to Your BotDojo Account
Now that you have your Twilio credentials, you can connect Twilio to your BotDojo account.
Step 1: Access Twilio Integration in BotDojo
-
Log in to BotDojo
- Go to your BotDojo account dashboard.
-
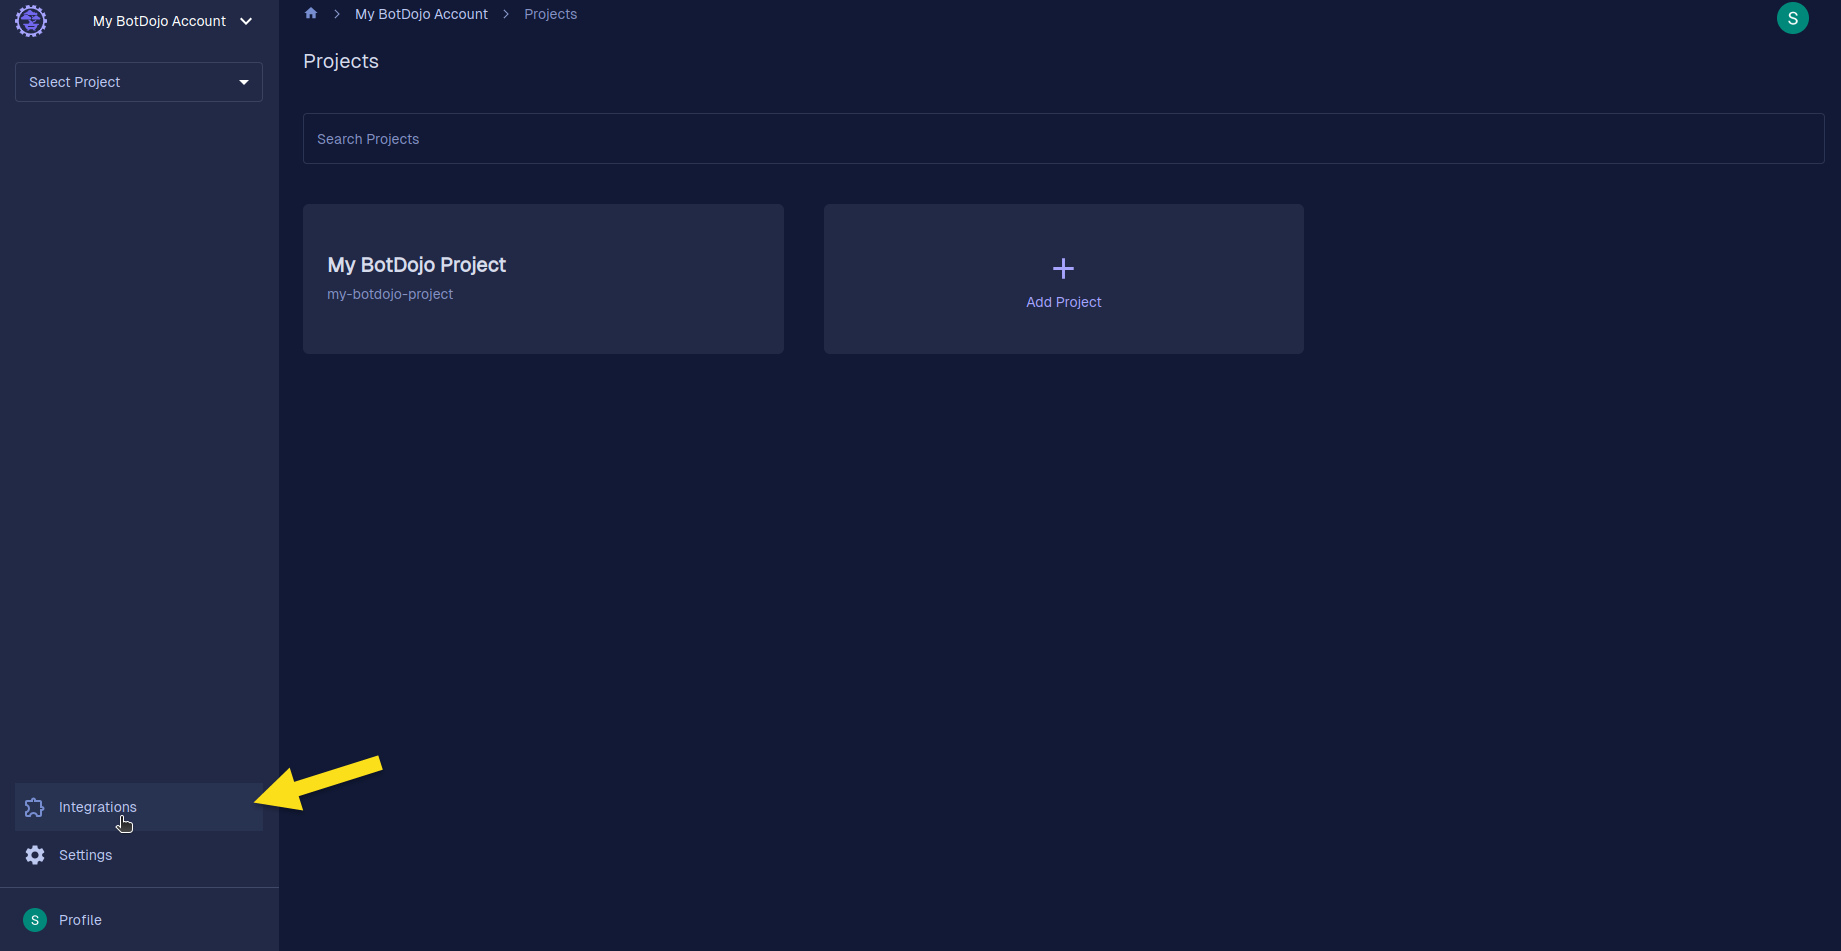
Navigate to Integrations
- On the left sidebar panel, click on the Integrations option.
Step 2: Connect Twilio Integration
-
Initiate Twilio Connection
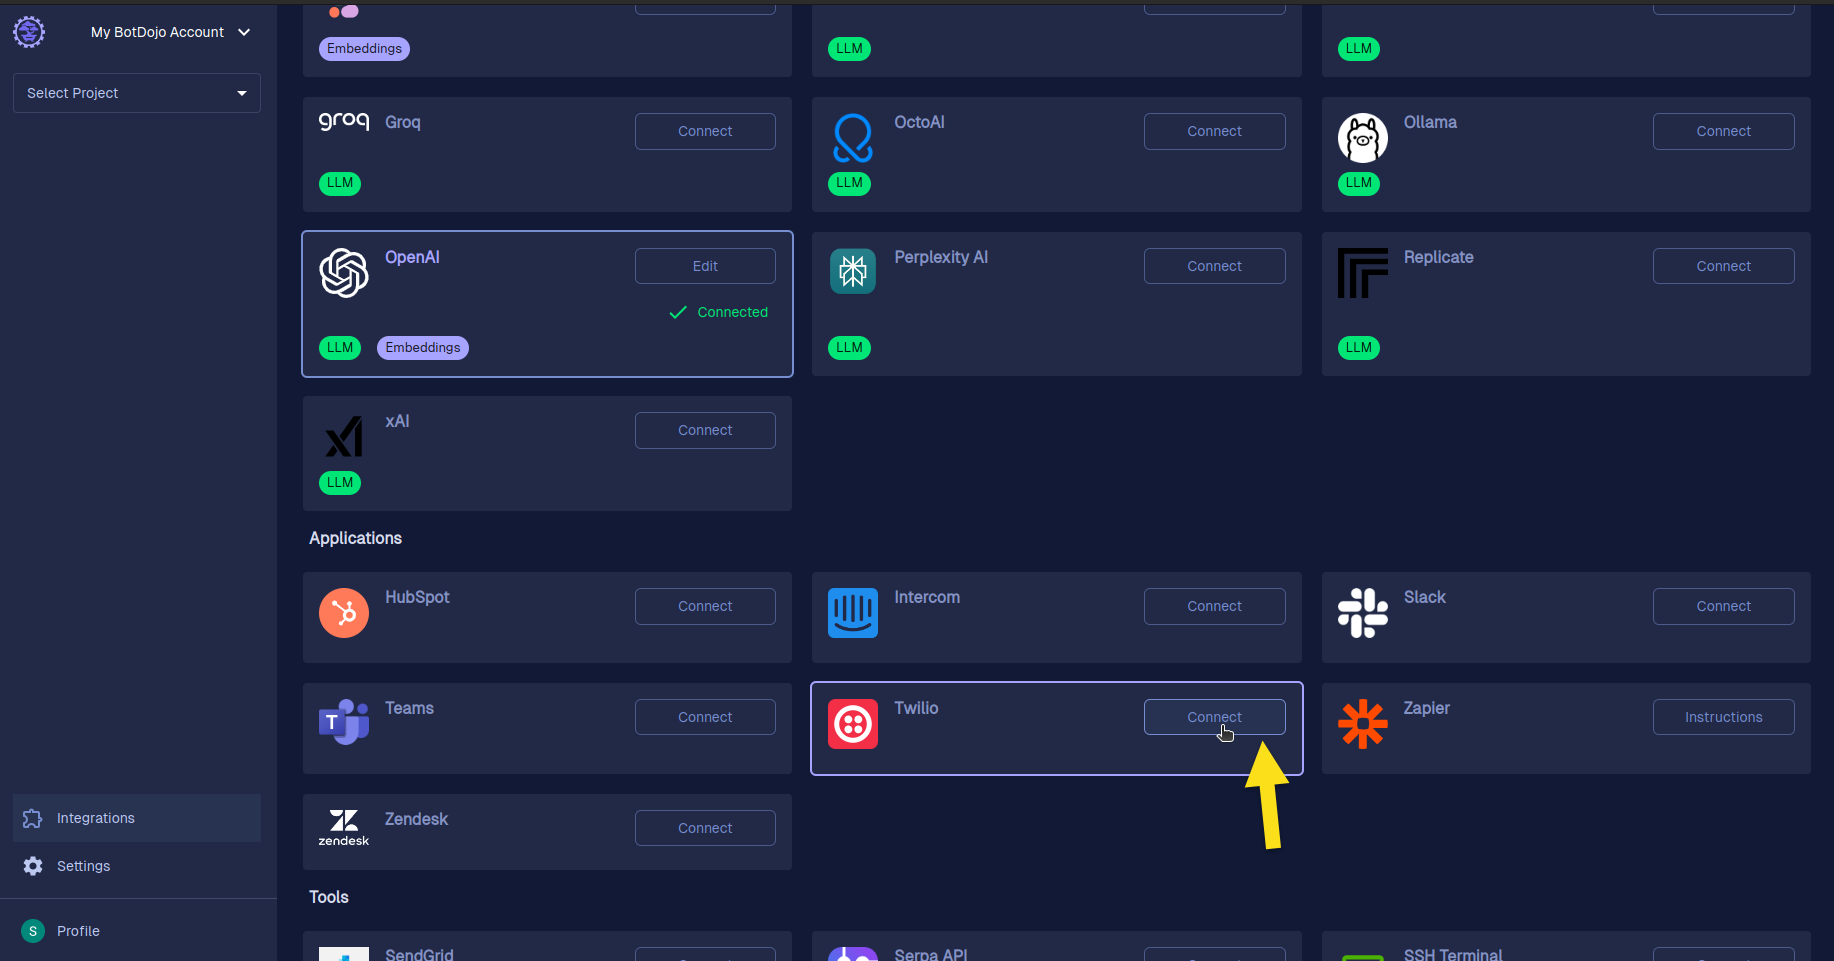
- In the Integrations page, locate the Twilio integration.
- Click on the Connect button associated with Twilio.
-
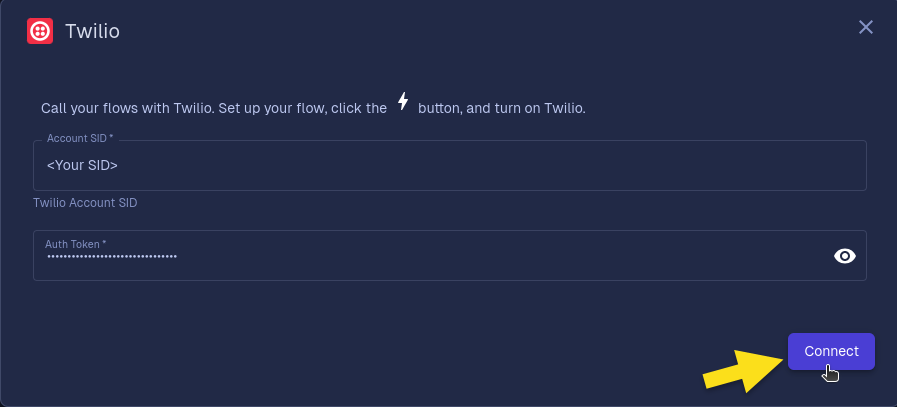
Enter Twilio Credentials
- A Twilio Integration dialog box will appear.
- Paste your previously copied Account SID and Auth Token into the respective fields.
- Click the Connect button to establish the connection.
-
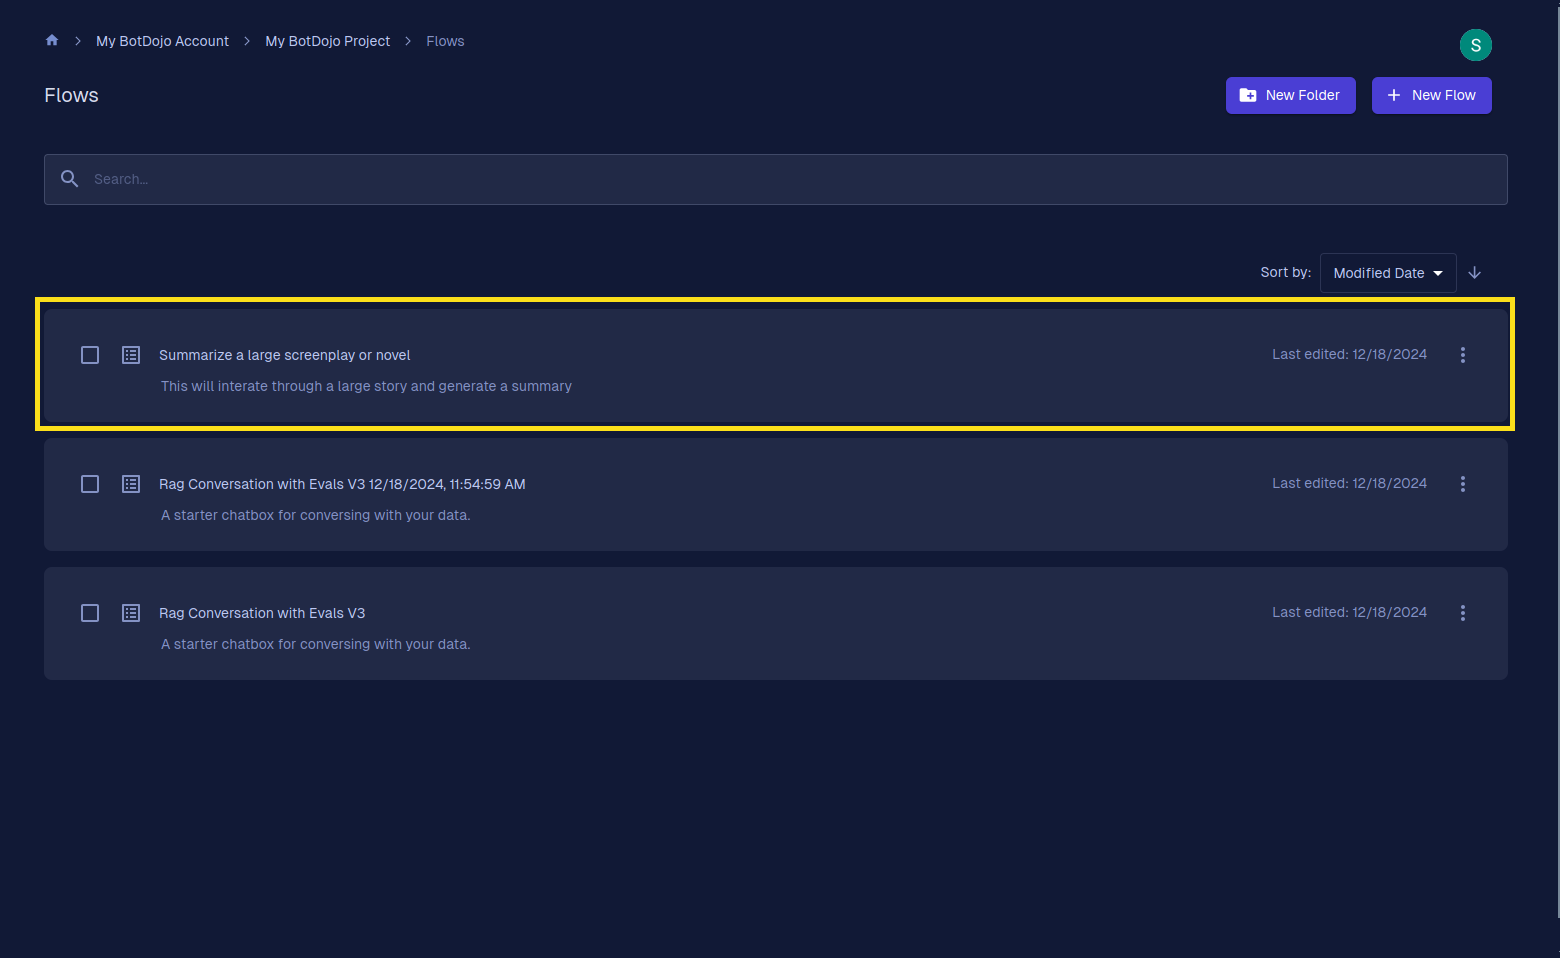
Access Flows
- After connecting, navigate to the Flows screen within BotDojo.
- This screen lists all your existing flows.
- Open the flow you wish to integrate with Twilio.
-
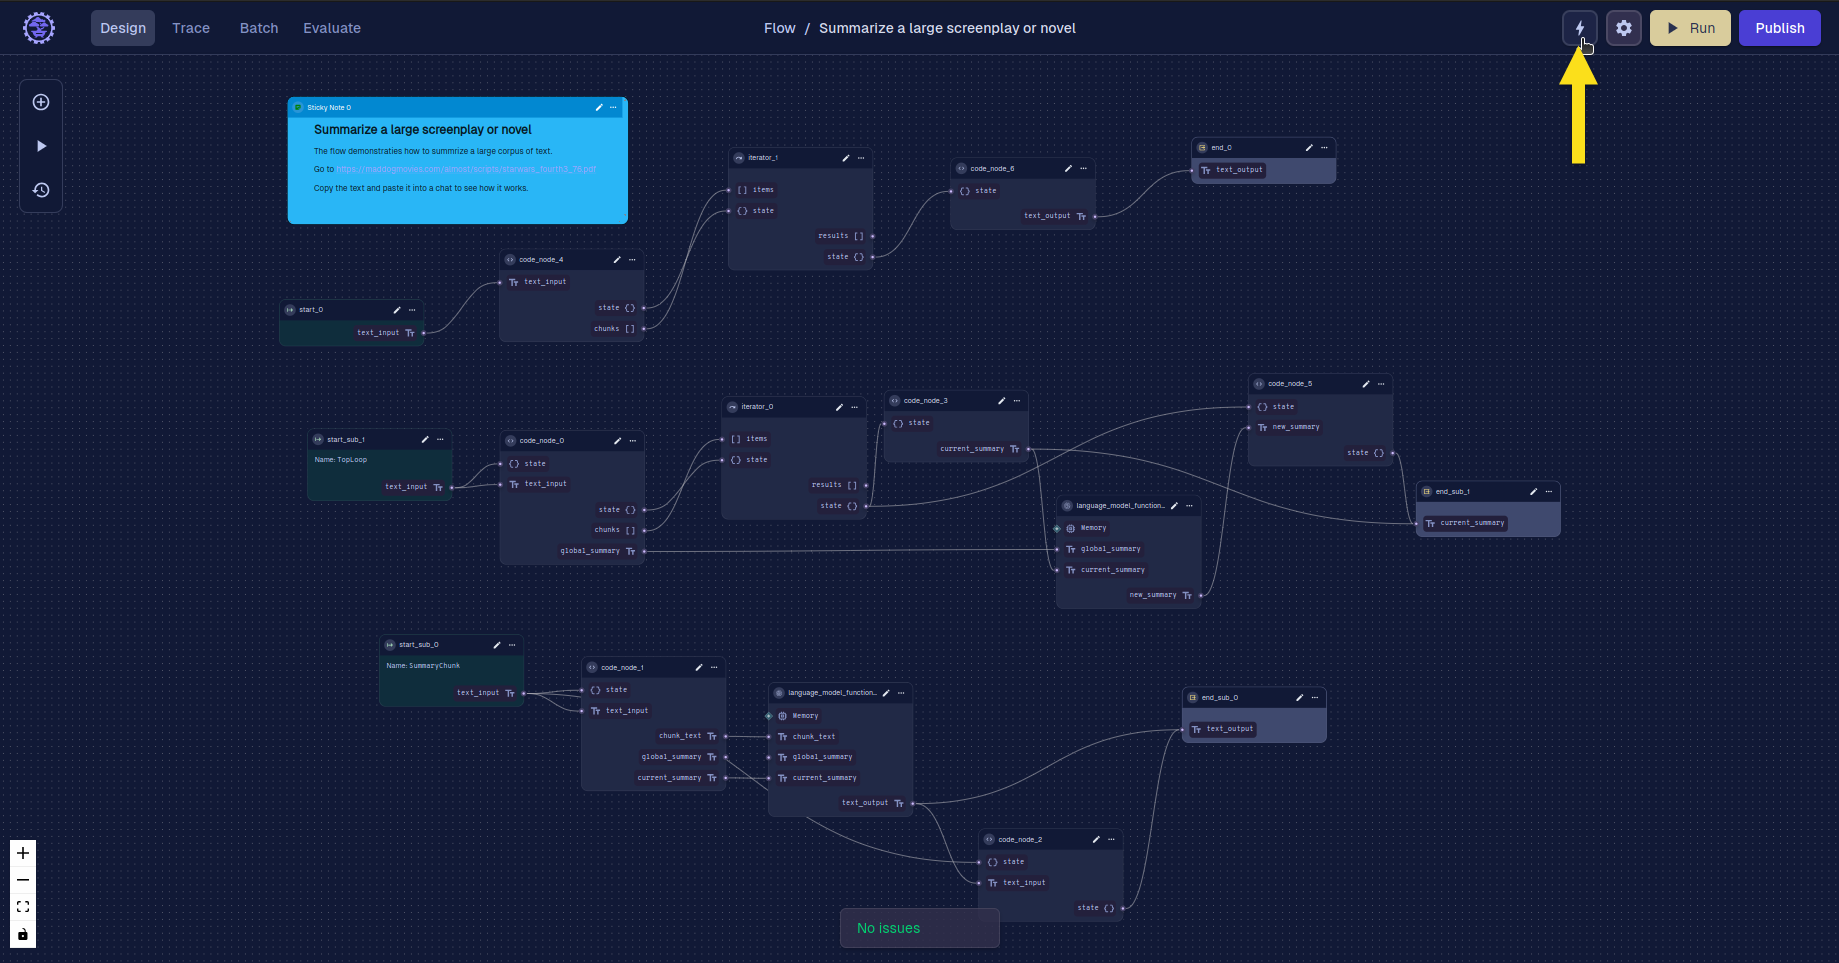
Configure Flow Trigger
- Inside your selected flow, locate the Trigger Icon in the top right corner.
- Click on it to open the Flow Triggers dialog box.
-
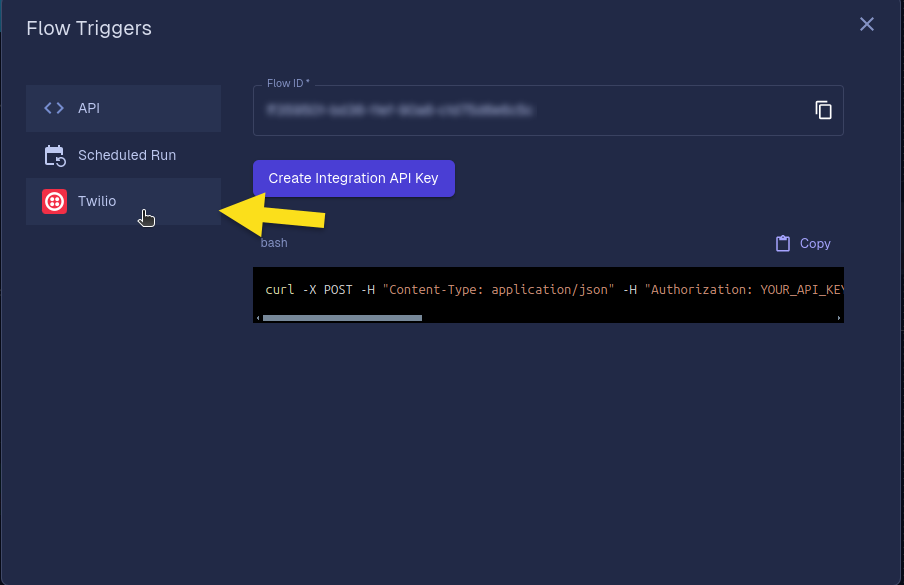
Select Twilio Trigger
- In the Flow Triggers dialog, look at the left sidebar for different trigger options.
- Click on Twilio to begin configuring it with your flow.
-
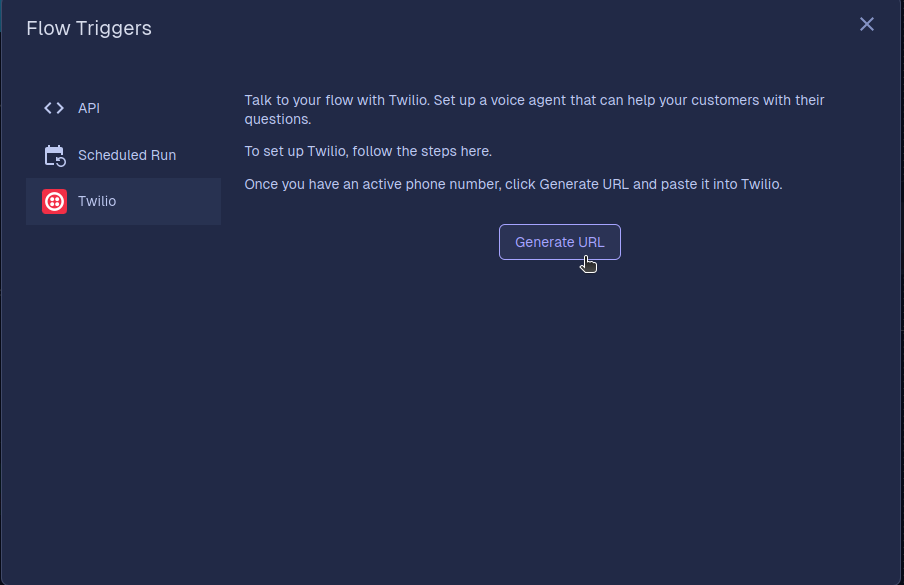
Generate Configuration URL
- Upon selecting Twilio, a Generate URL button will appear.
- Click on Generate URL to create a unique URL for your flow.
-
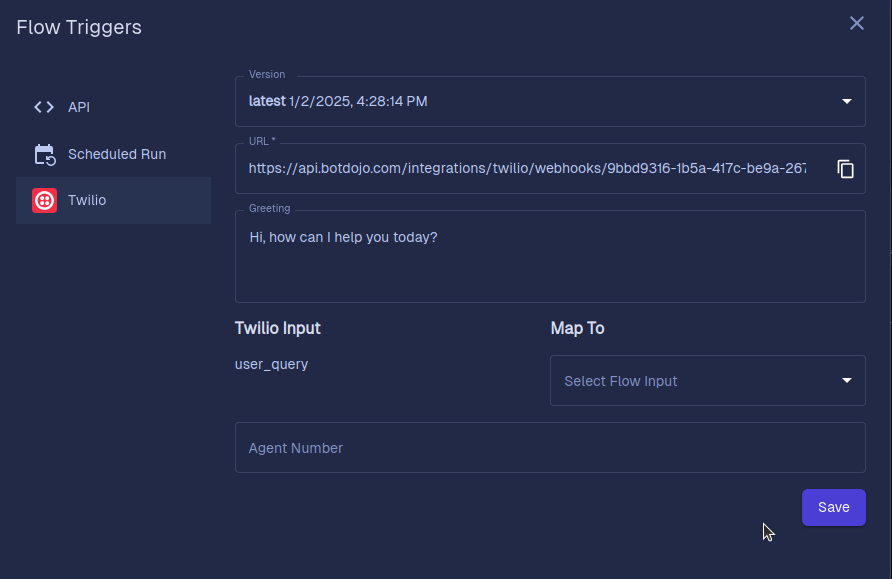
Review Configuration Prompt
- A configuration interface will appear, indicating that the initial setup is complete.
- However, The configuration is not yet done and some steps are required to finalize the configuration.
If you try to use the integration without performing the additional steps specified below, You will get a configuration error on the call.
Configuring Your Twilio with BotDojo Flow
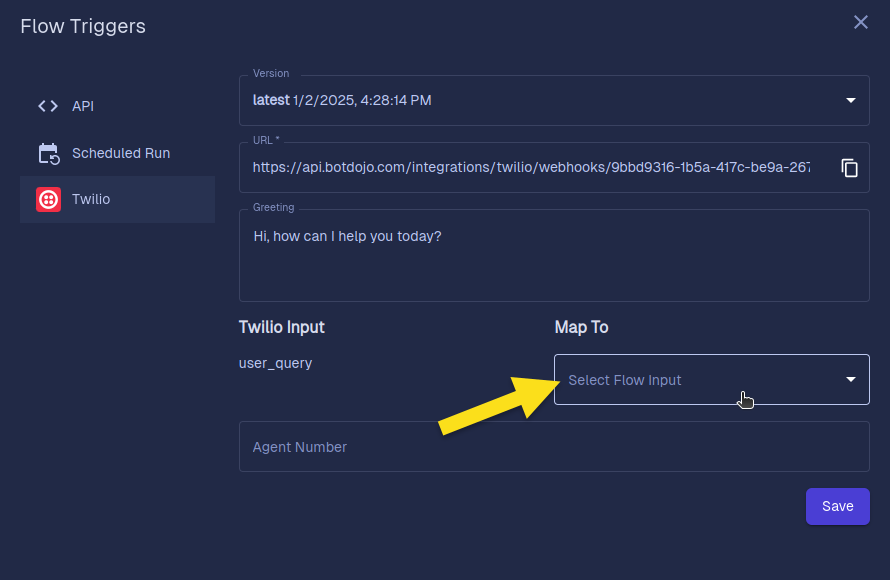
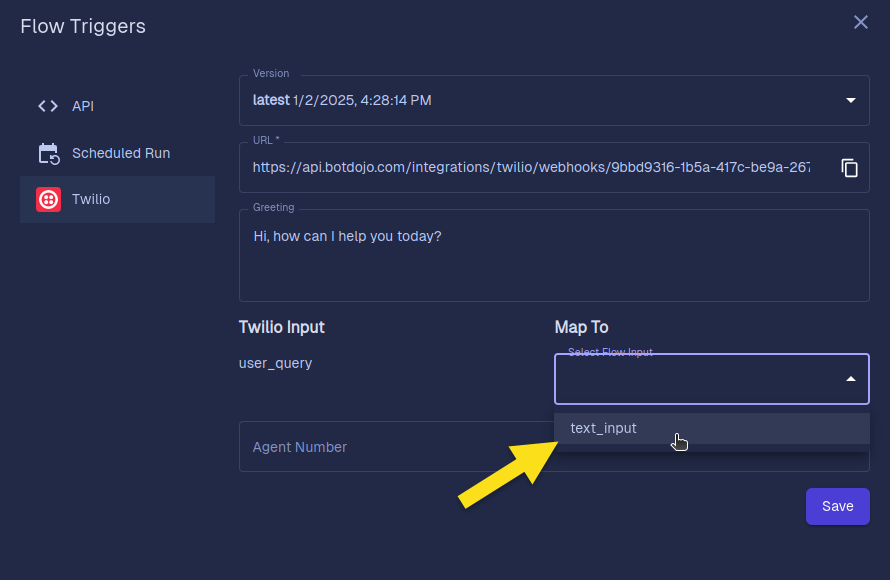
Step 1: Mapping your Flow input
-
Map the input to Your Flow
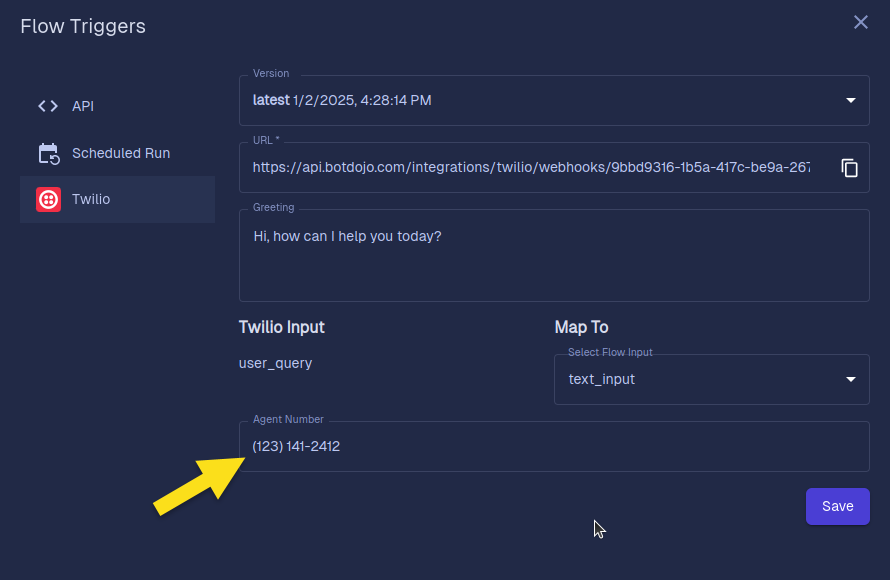
- Locate the Map To dropdown field in the dialog box.
- Click on it and select the specific flow input you want to associate with this Twilio integration.
Step 2: (Optional) Configure Escalation Phone Number
Now, only if you want a flow that has the ability to escalate the conversation to any of your live agent, follow these steps:
-
Escalation Phone Number Field
- In the Flow Triggers dialog, find the Escalation Phone Number field.
- Enter the phone number where live agents are available.
-
Choose Appropriate Flow
- In order to be able to escalate your conversation to the agent, make sure you use the following flow only.
infoUse the the above YAML to copy the flow in your BotDojo account
How to copy flow using YAML
In order to copy the flow using YAML:
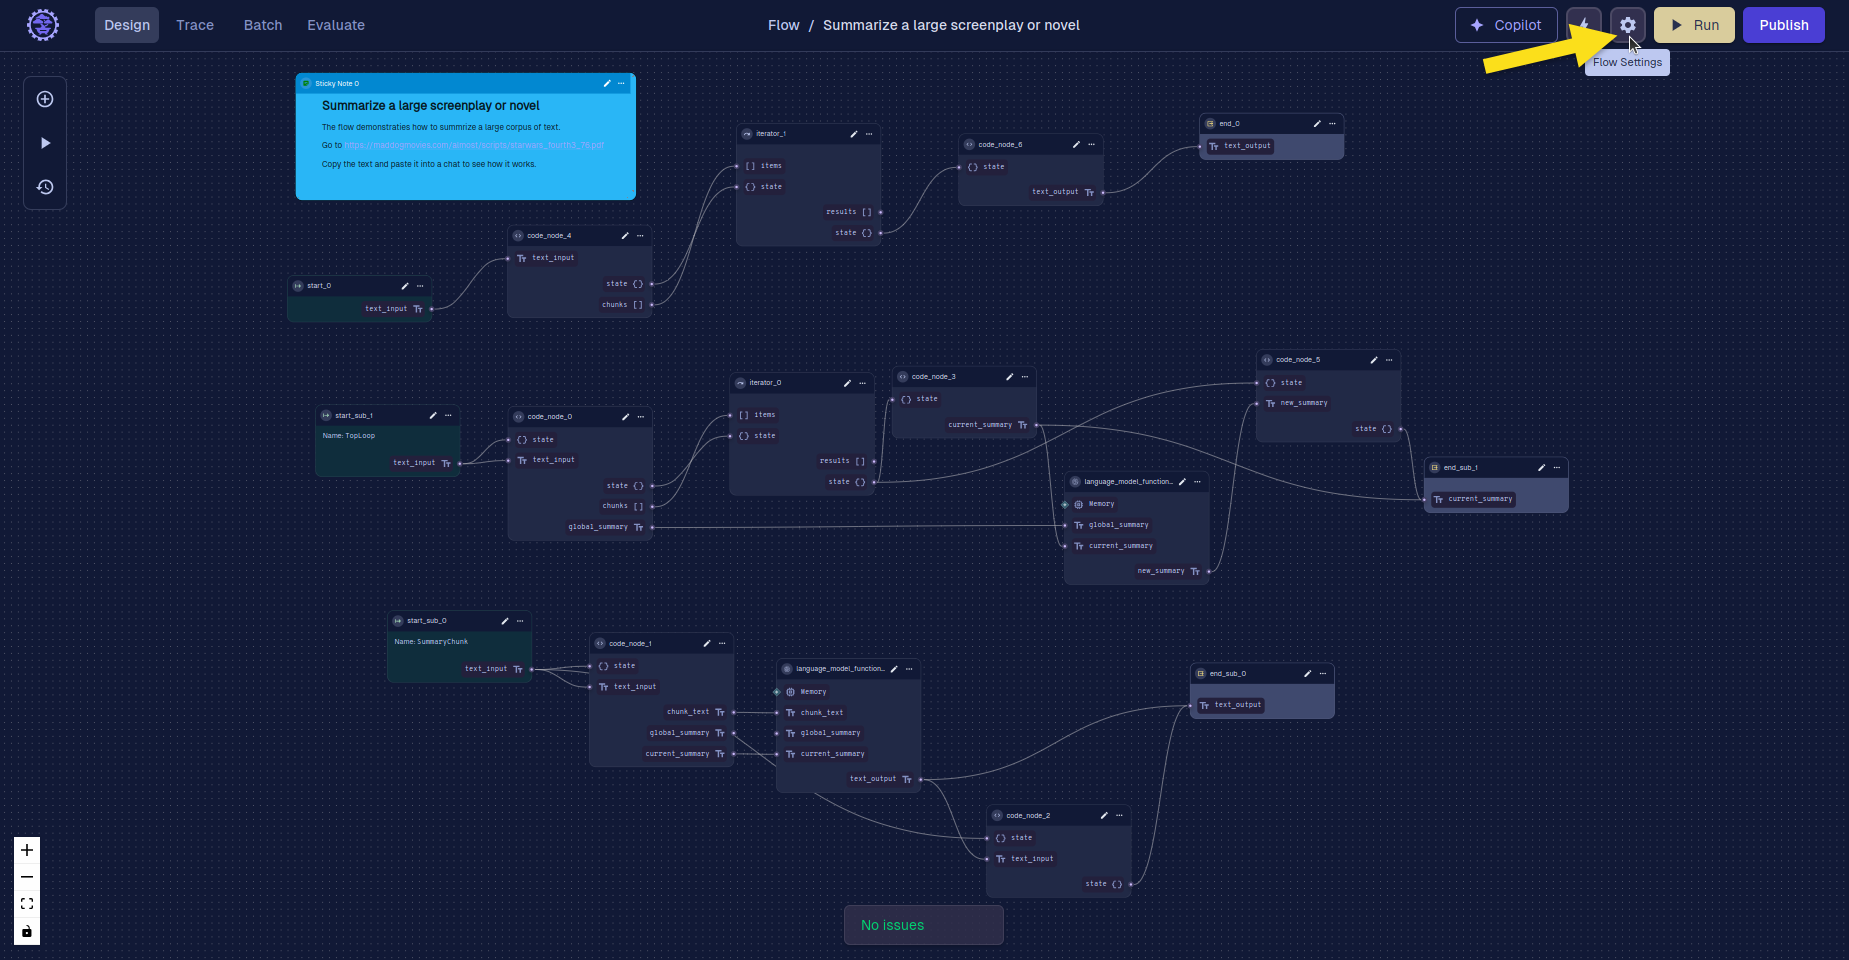
- Click on the Settings icon button on the top right corner.
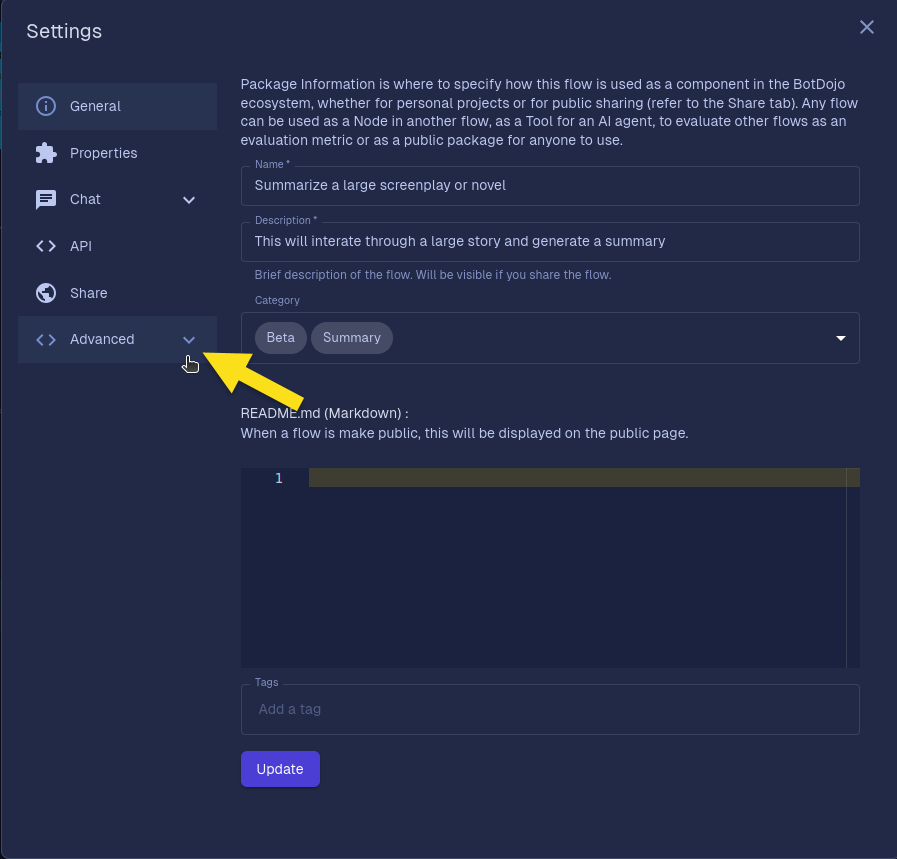
- A Settings dialog box will appear. Click on the Advanced option in the left sidebar panel.
- A dropdown will open. Click on the YAML/JSON option from the dropdown.
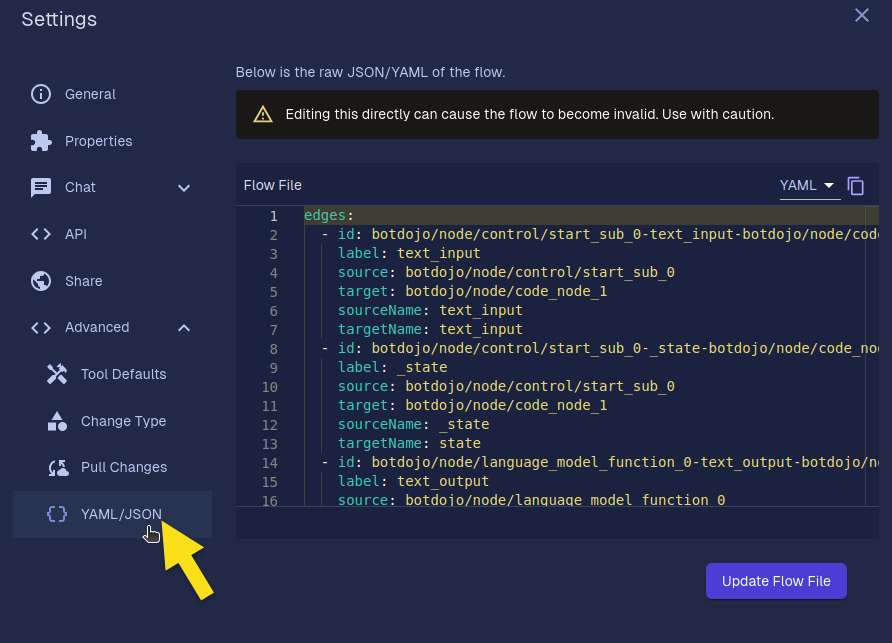
- Now replace the YAML you downloaded with the existing YAML (if there is any) and click on Update Flow File button.
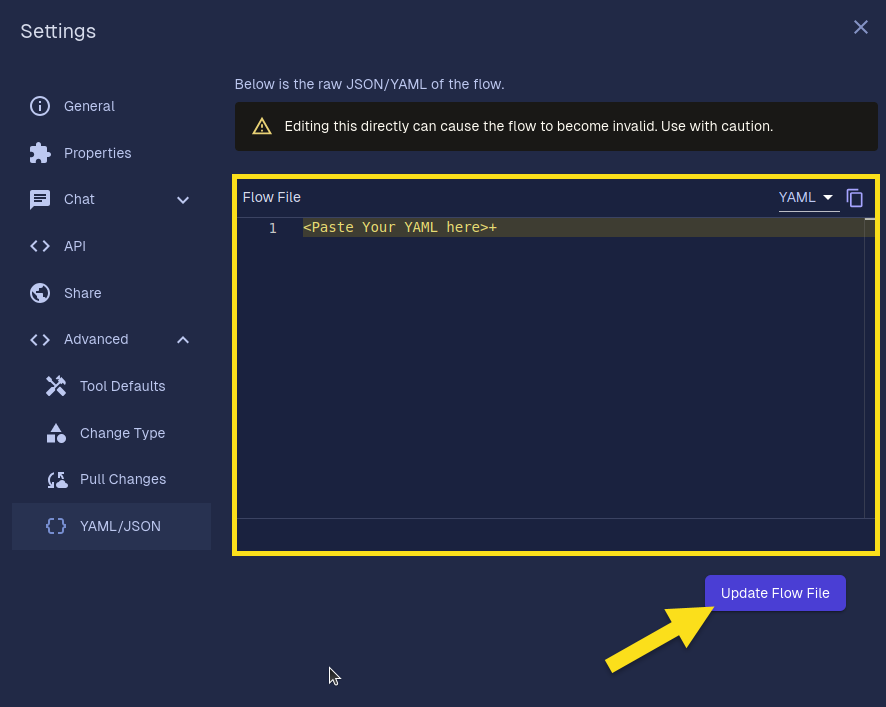
You have now copied the flow using YAML file.
-
Copy the URL
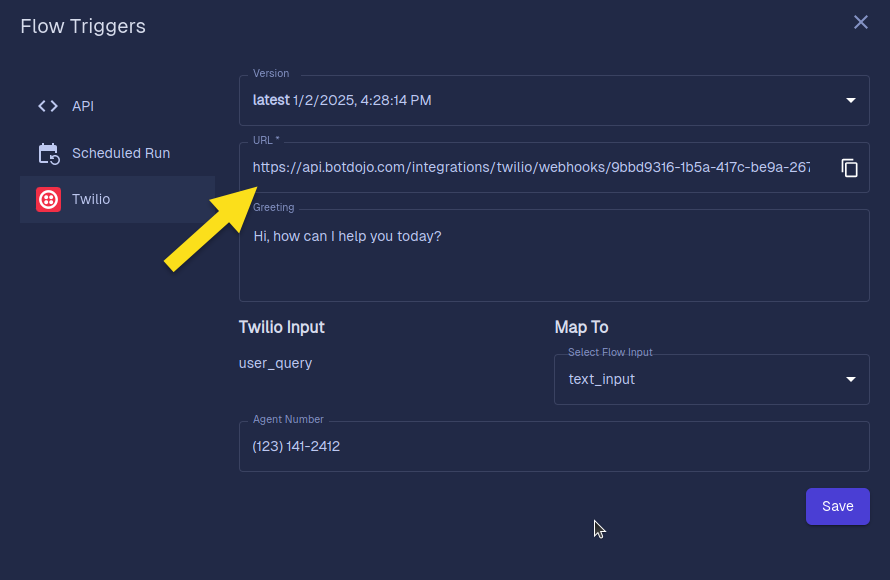
- In the Flow Triggers dialog box, locate the URL field.
- Copy the URL provided; you'll need it for Twilio configuration.
-
Save Your Settings
- Click on the Save button at the bottom of the dialog box.
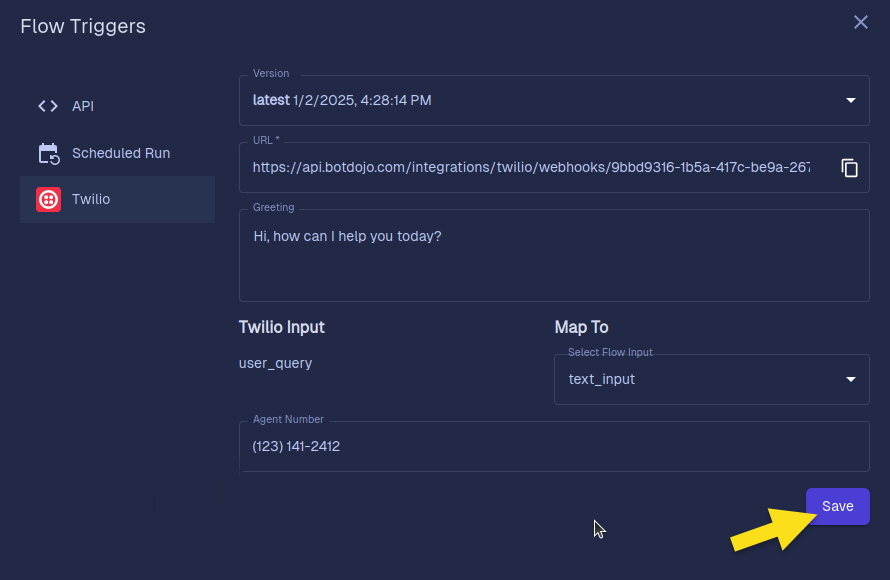
To complete the integration, you need to link your BotDojo flow with the Twilio phone number.
Step 3: Update Twilio Phone Number Settings
-
Navigate to Phone Numbers in Twilio
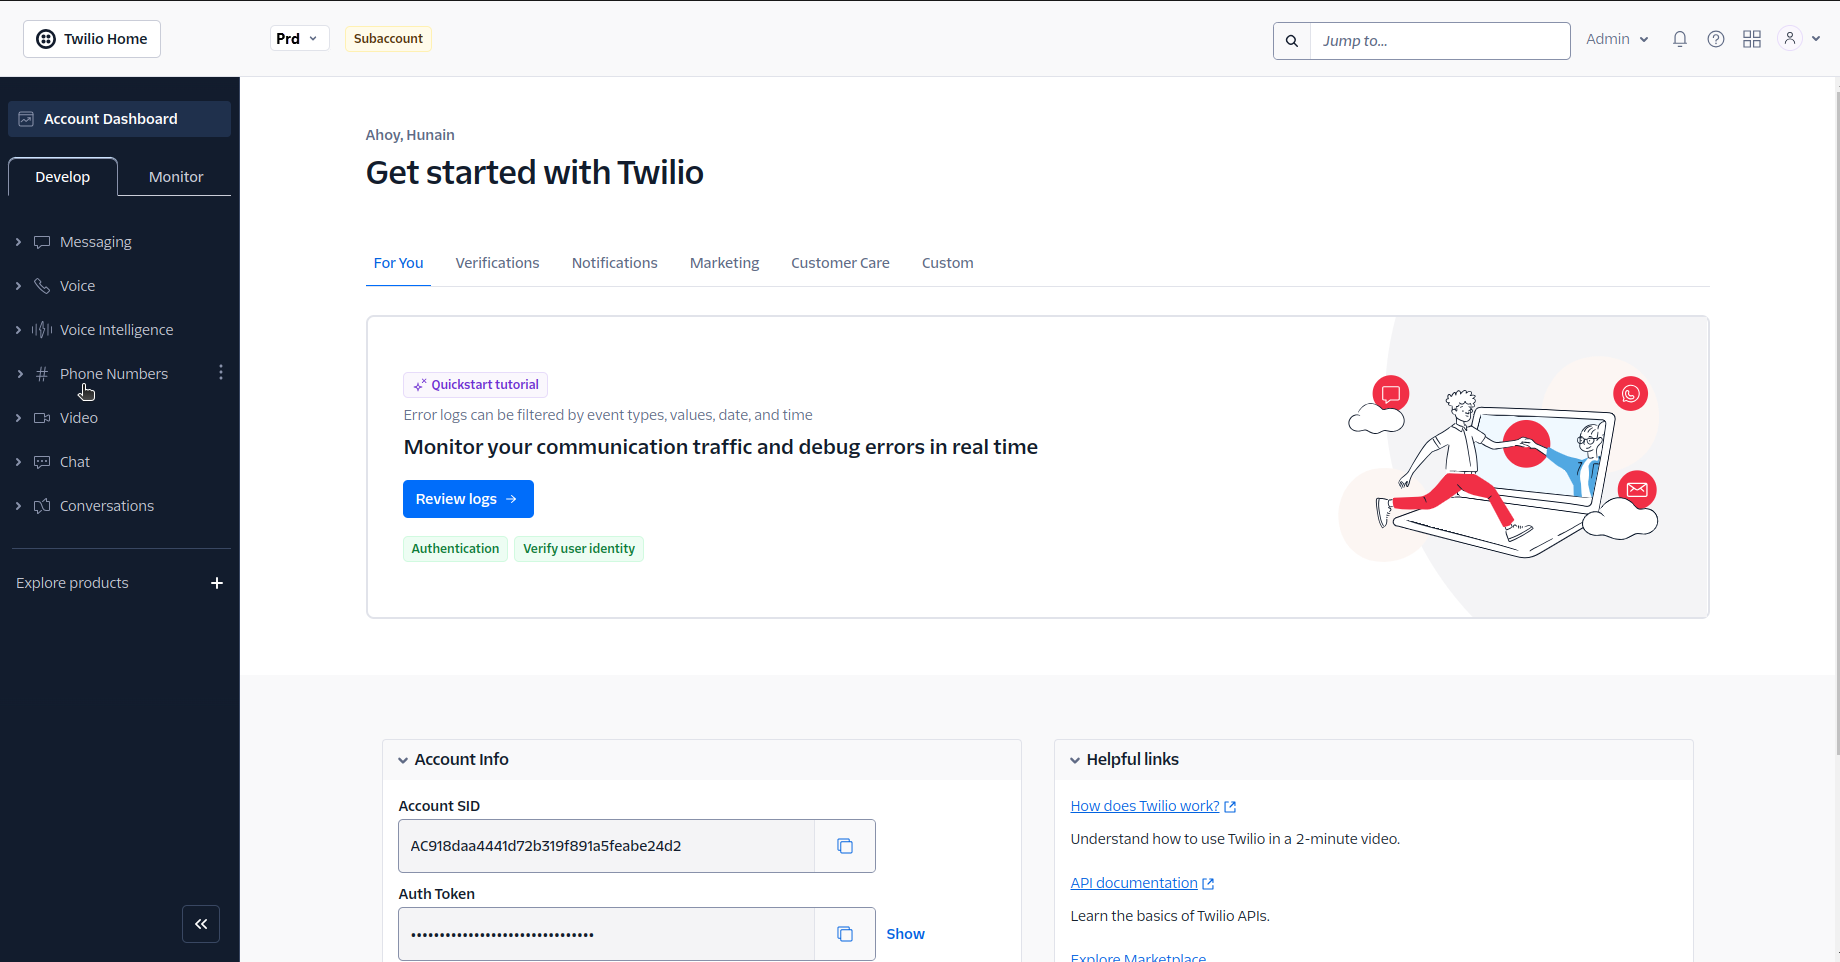
- Return to the Twilio Console.
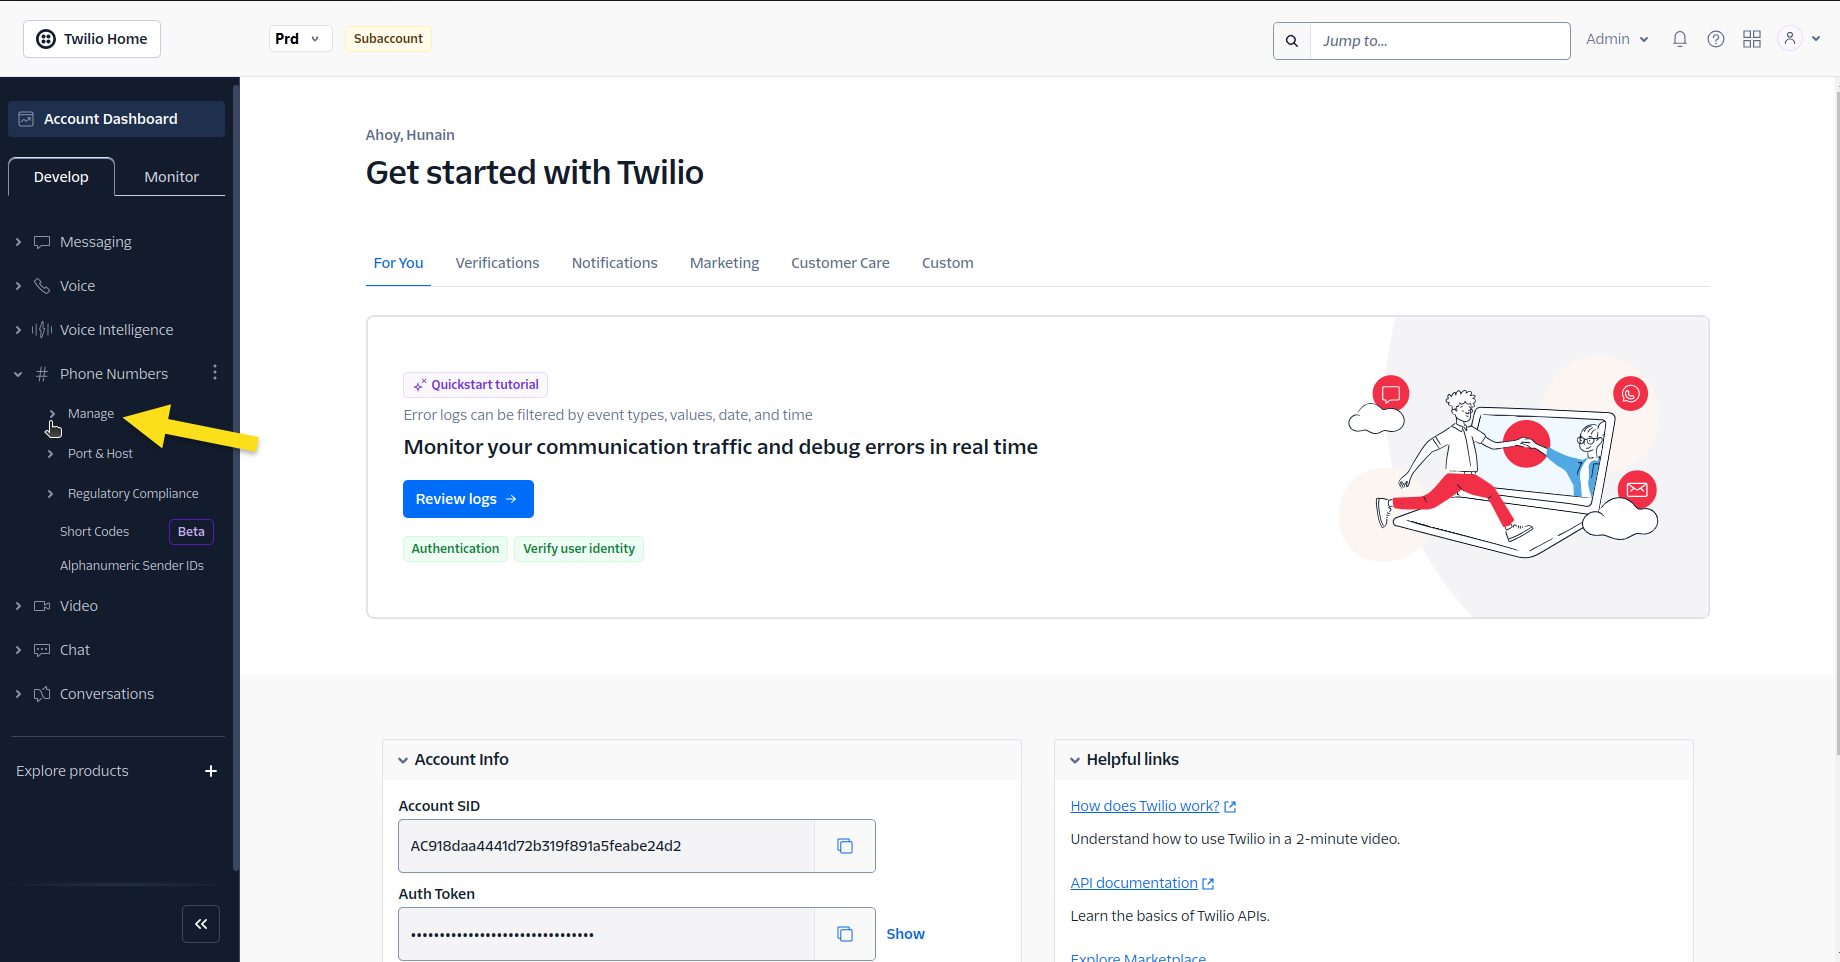
- In the left sidebar, click on Phone Numbers to expand the section.
-
Manage Phone Numbers
- From the expanded Phone Numbers section, click on Manage.
-
Select Active Numbers
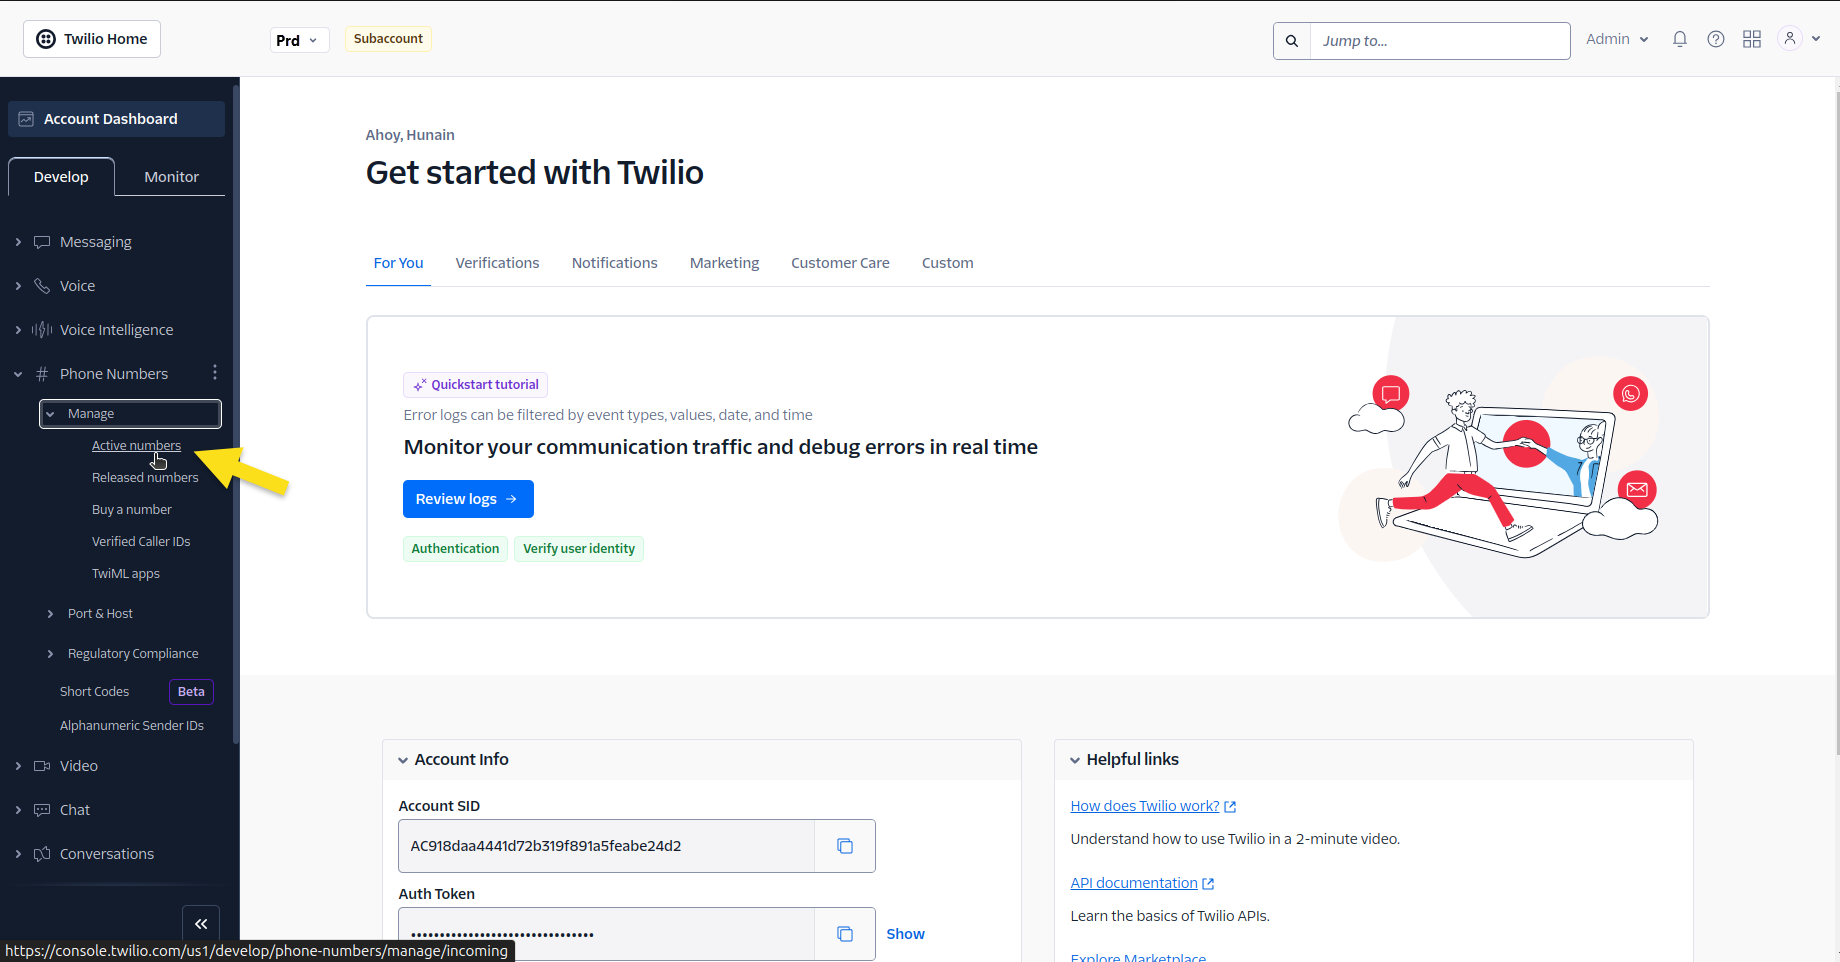
- In the subsequent dropdown, select Active Numbers to view all your active Twilio phone numbers.
-
Choose a Phone Number
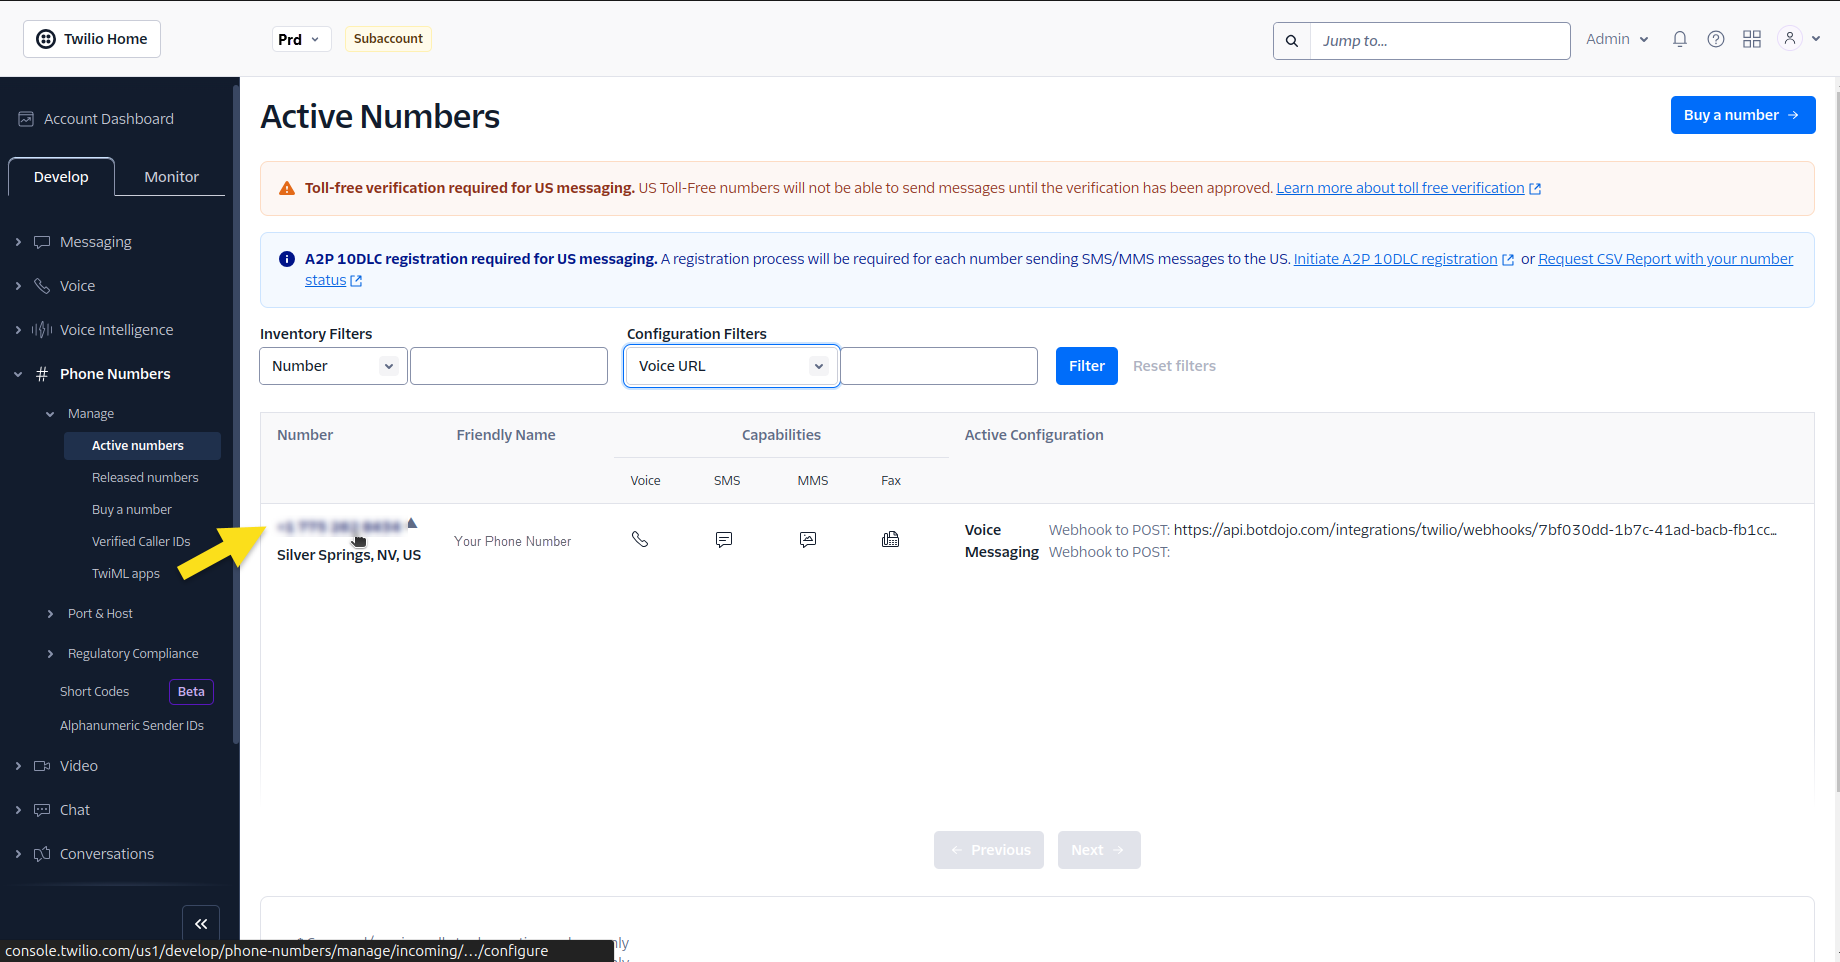
- Click on the specific phone number you want to configure with BotDojo.
-
Configure Call Settings
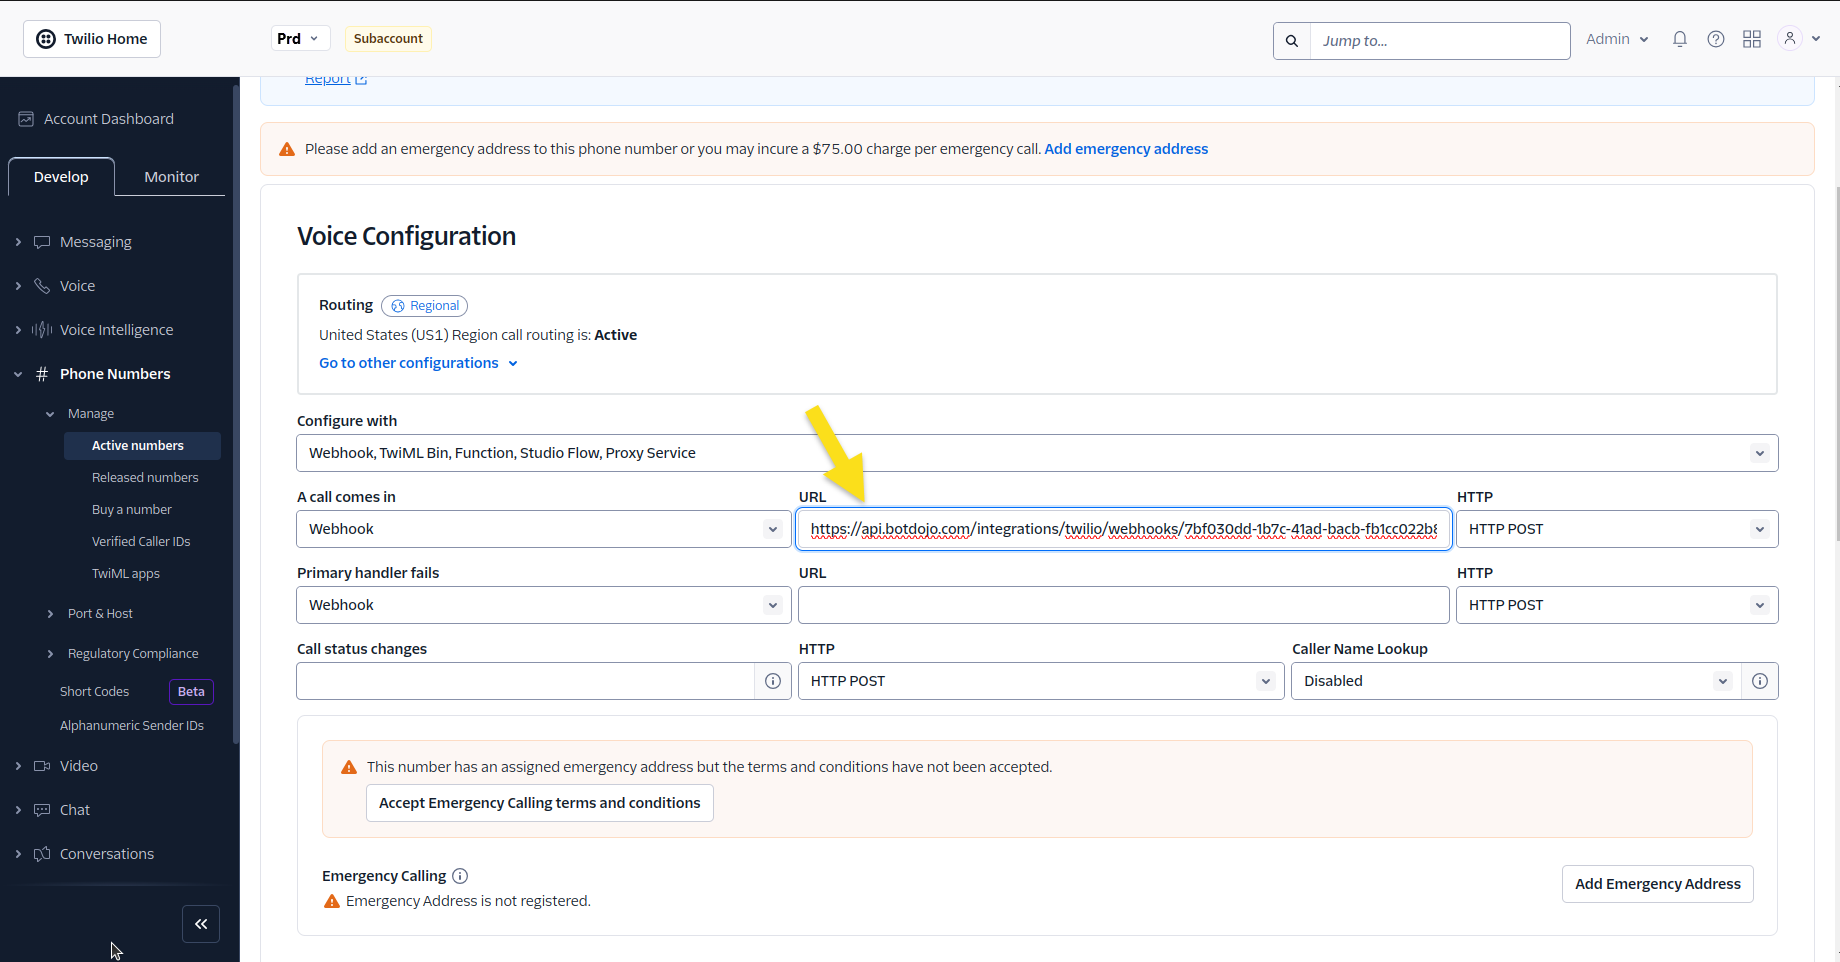
- Now, locate the Voice Configuration section.
- Find the A call comes in field and select Webhook from its dropdown.
- Paste the BotDojo URL you copied earlier from the Flow Trigger dialog box into the URL field beside it.
Important: Ensure that you replace any existing URL (if there's any) with the BotDojo URL.
-
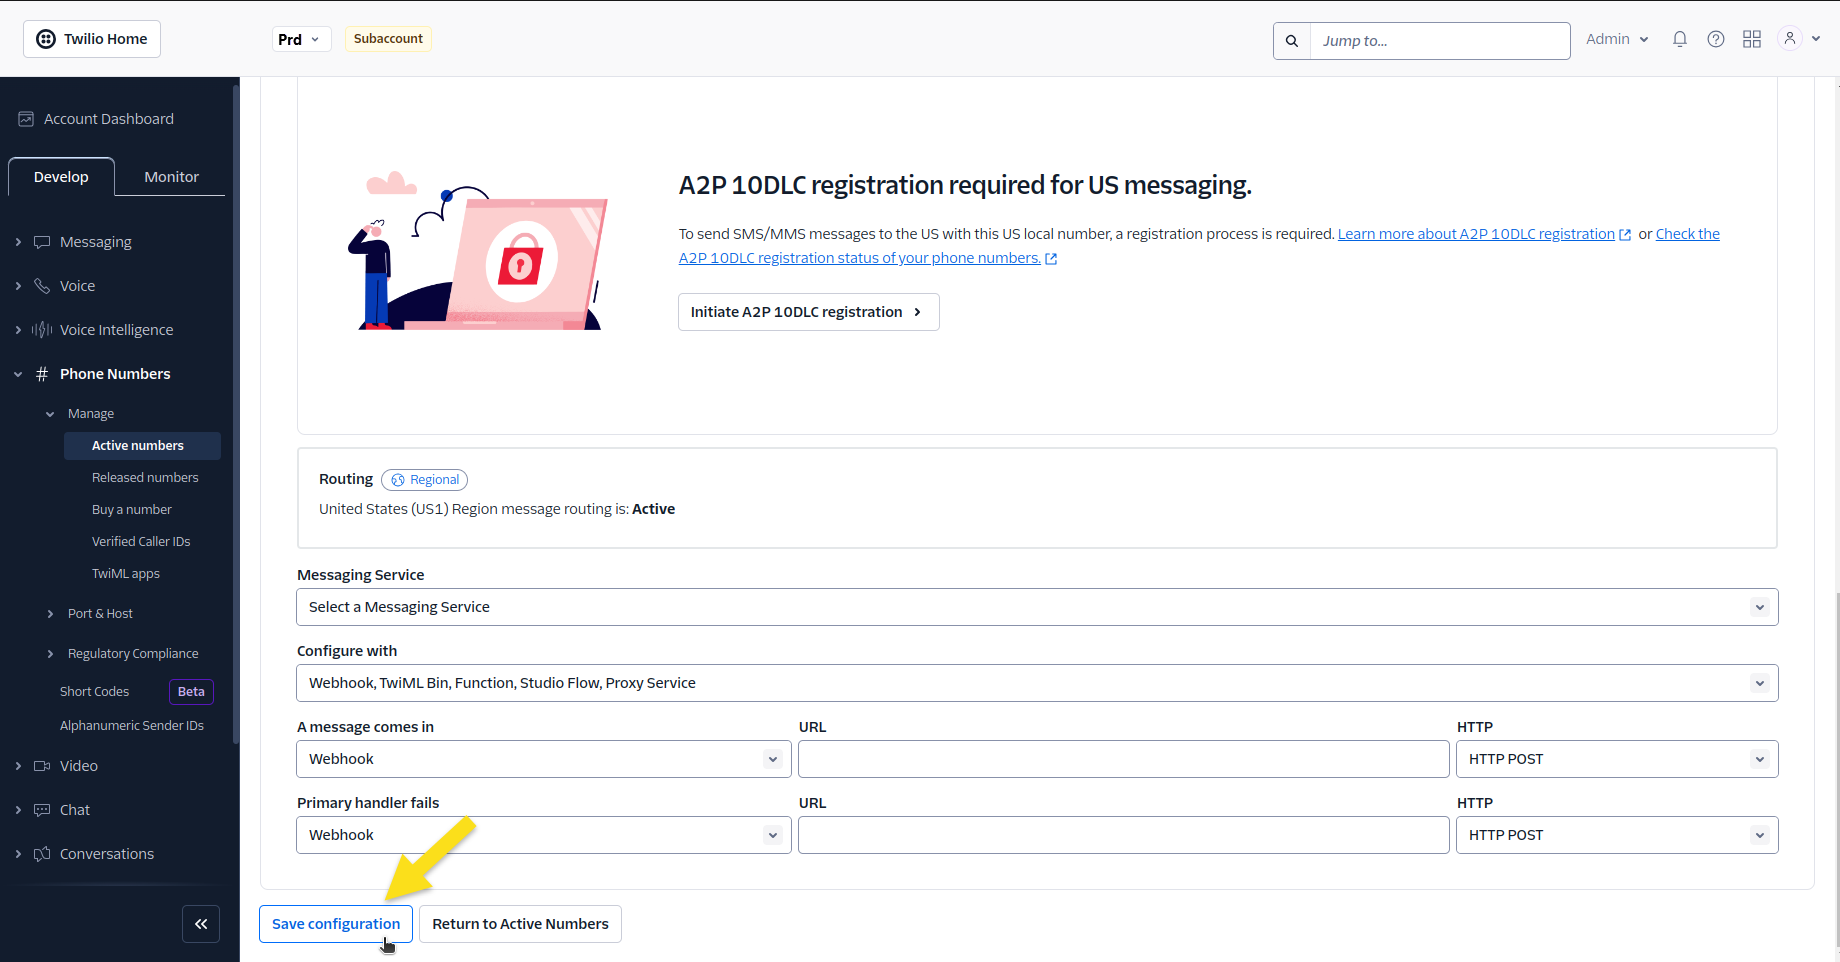
Save Configuration
- Scroll to the bottom of the page and click on the Save Configuration button to apply the changes.
Finalizing the Integration in BotDojo
- Now your BotDojo flow is configured with the Twilio phone number.
Conclusion
Congratulations! You've successfully integrated Twilio with your BotDojo account. Your Twilio phone number is now configured to interact with your BotDojo flows, enabling automated calls and, optionally, escalation to live agents.