Salesforce
Introduction
Integrating Salesforce with your BotDojo account enables you to leverage Salesforce's powerful CRM capabilities within your BotDojo workflows.
This guide provides a step-by-step walkthrough to connect Salesforce with your BotDojo account through OAuth integration, ensuring a seamless setup process. Follow each step carefully to ensure successful integration.
Prerequisites
Before you begin, ensure you have the following:
- Salesforce Account: Admin access to your Salesforce organization.
- BotDojo Account: Access to your BotDojo account.
- HTTPS Callback URL: You'll need this from your BotDojo application (provided below).
Creating a Connected App in Salesforce
Follow these steps to create a Connected App in Salesforce that will allow BotDojo to connect securely.
Step 1: Initial Navigation
- Access Setup
- Log in to your Salesforce account.
- Click on the gear icon in the top-right corner.
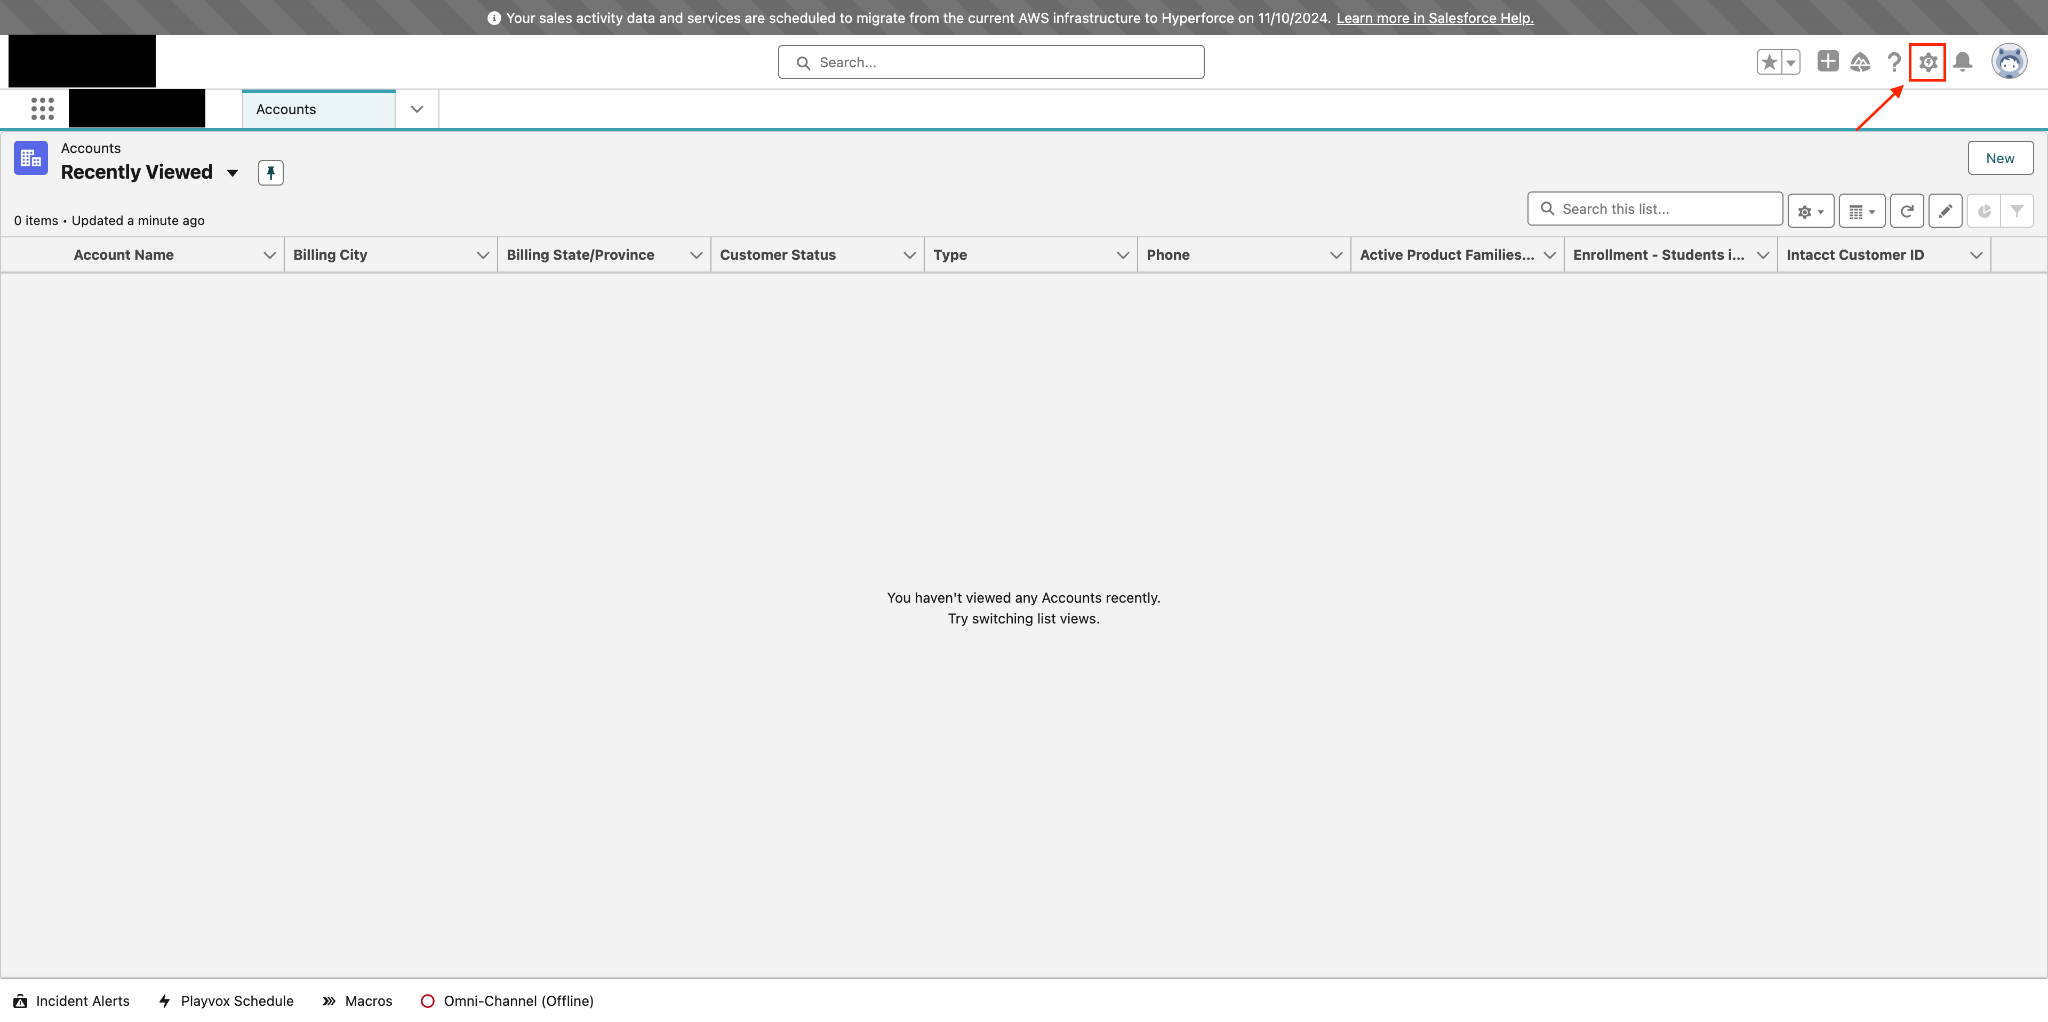
- A dropdown will appear, click on Setup from it
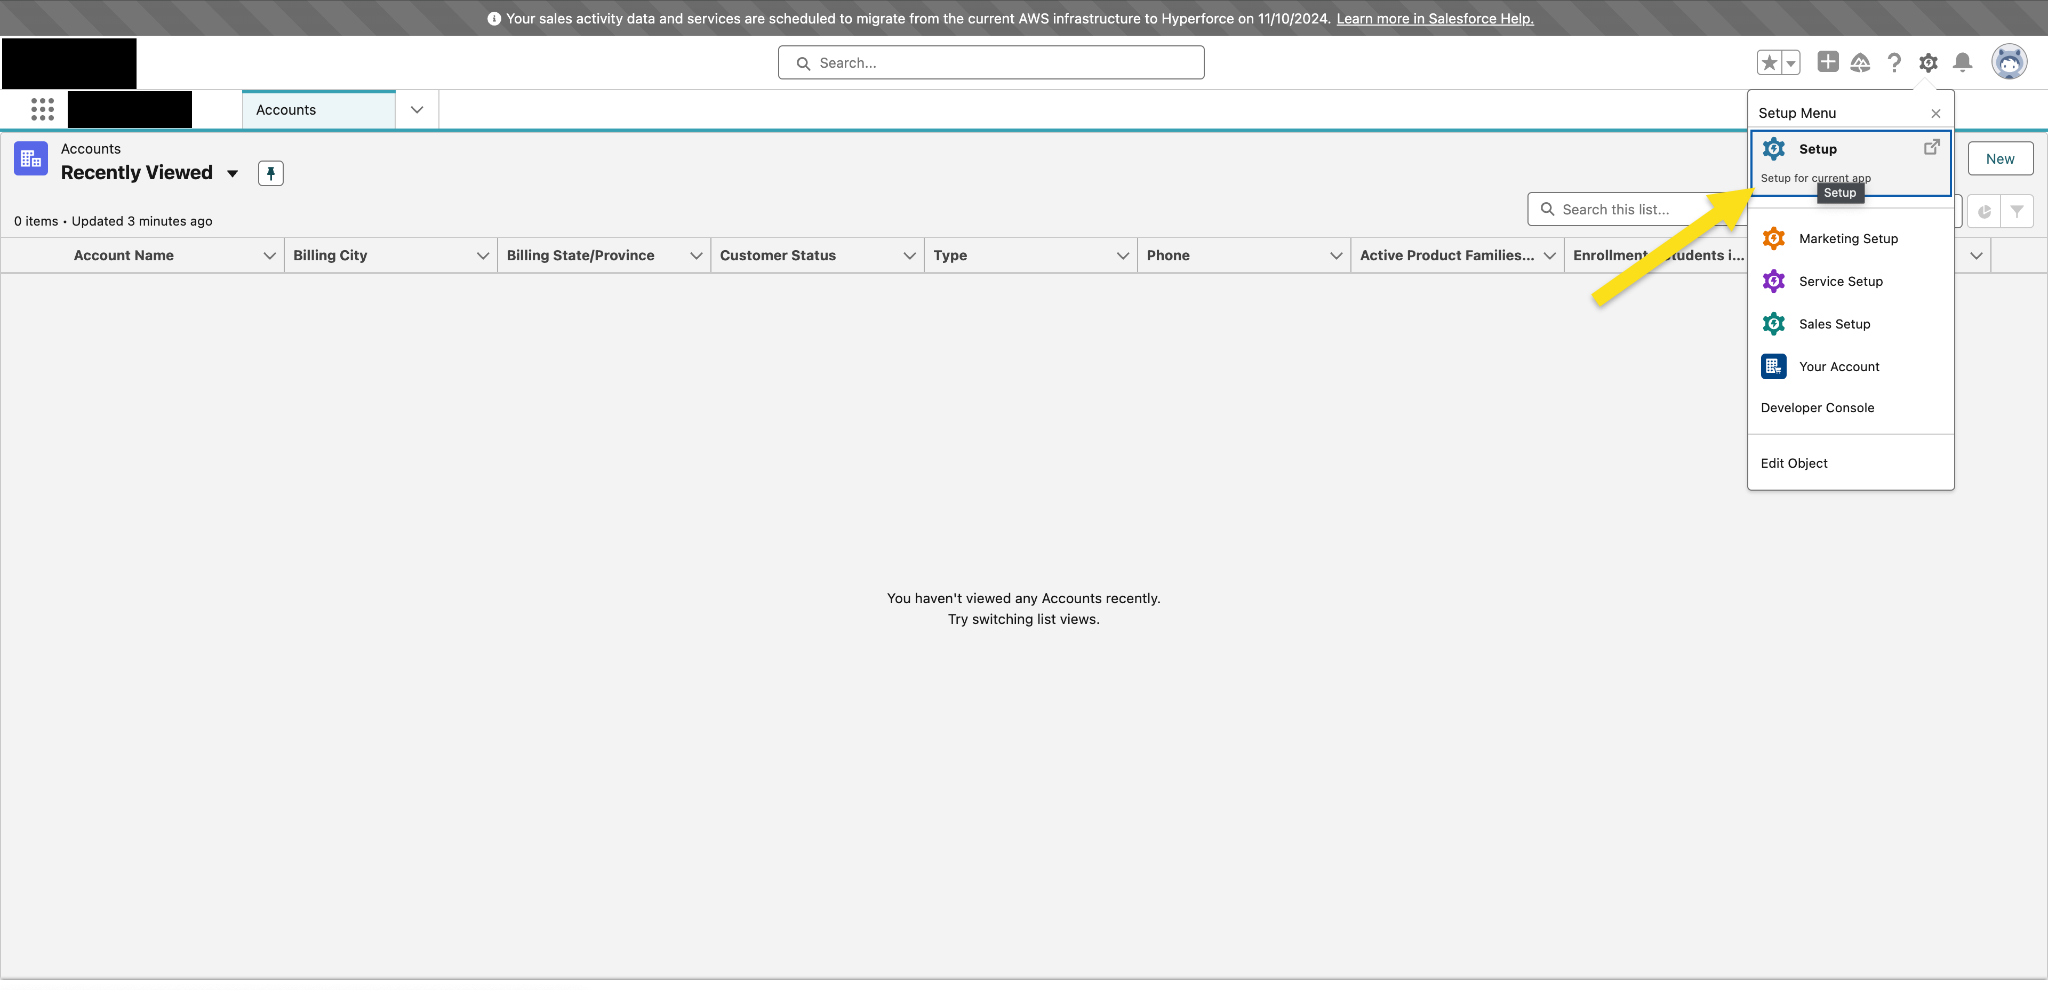
- Create New Connected App
- On the Setup screen in the left-side panel, under Platform Tools, click on Apps.
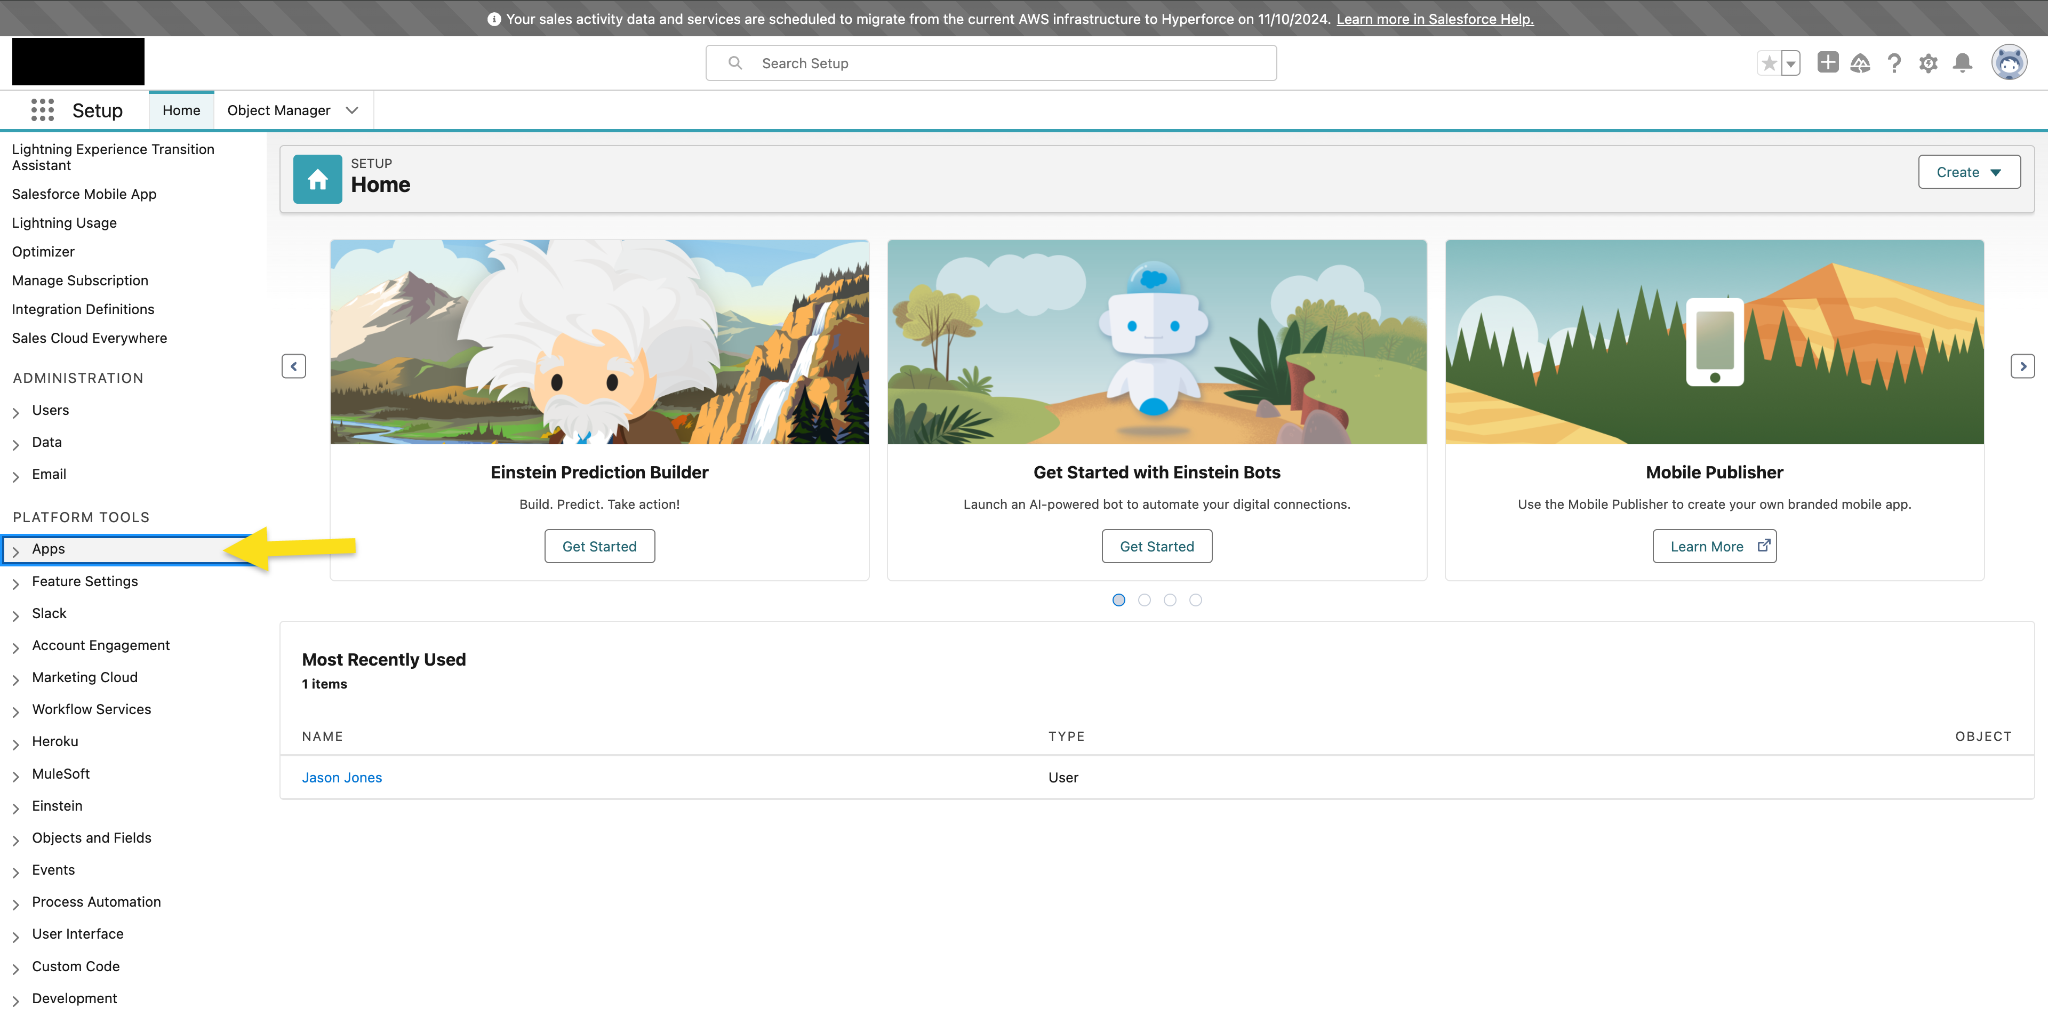
- An expanded list will appear, select App Manager from that list. Then, in the App Manager screen, click on the New Connected App button in the top-right corner.
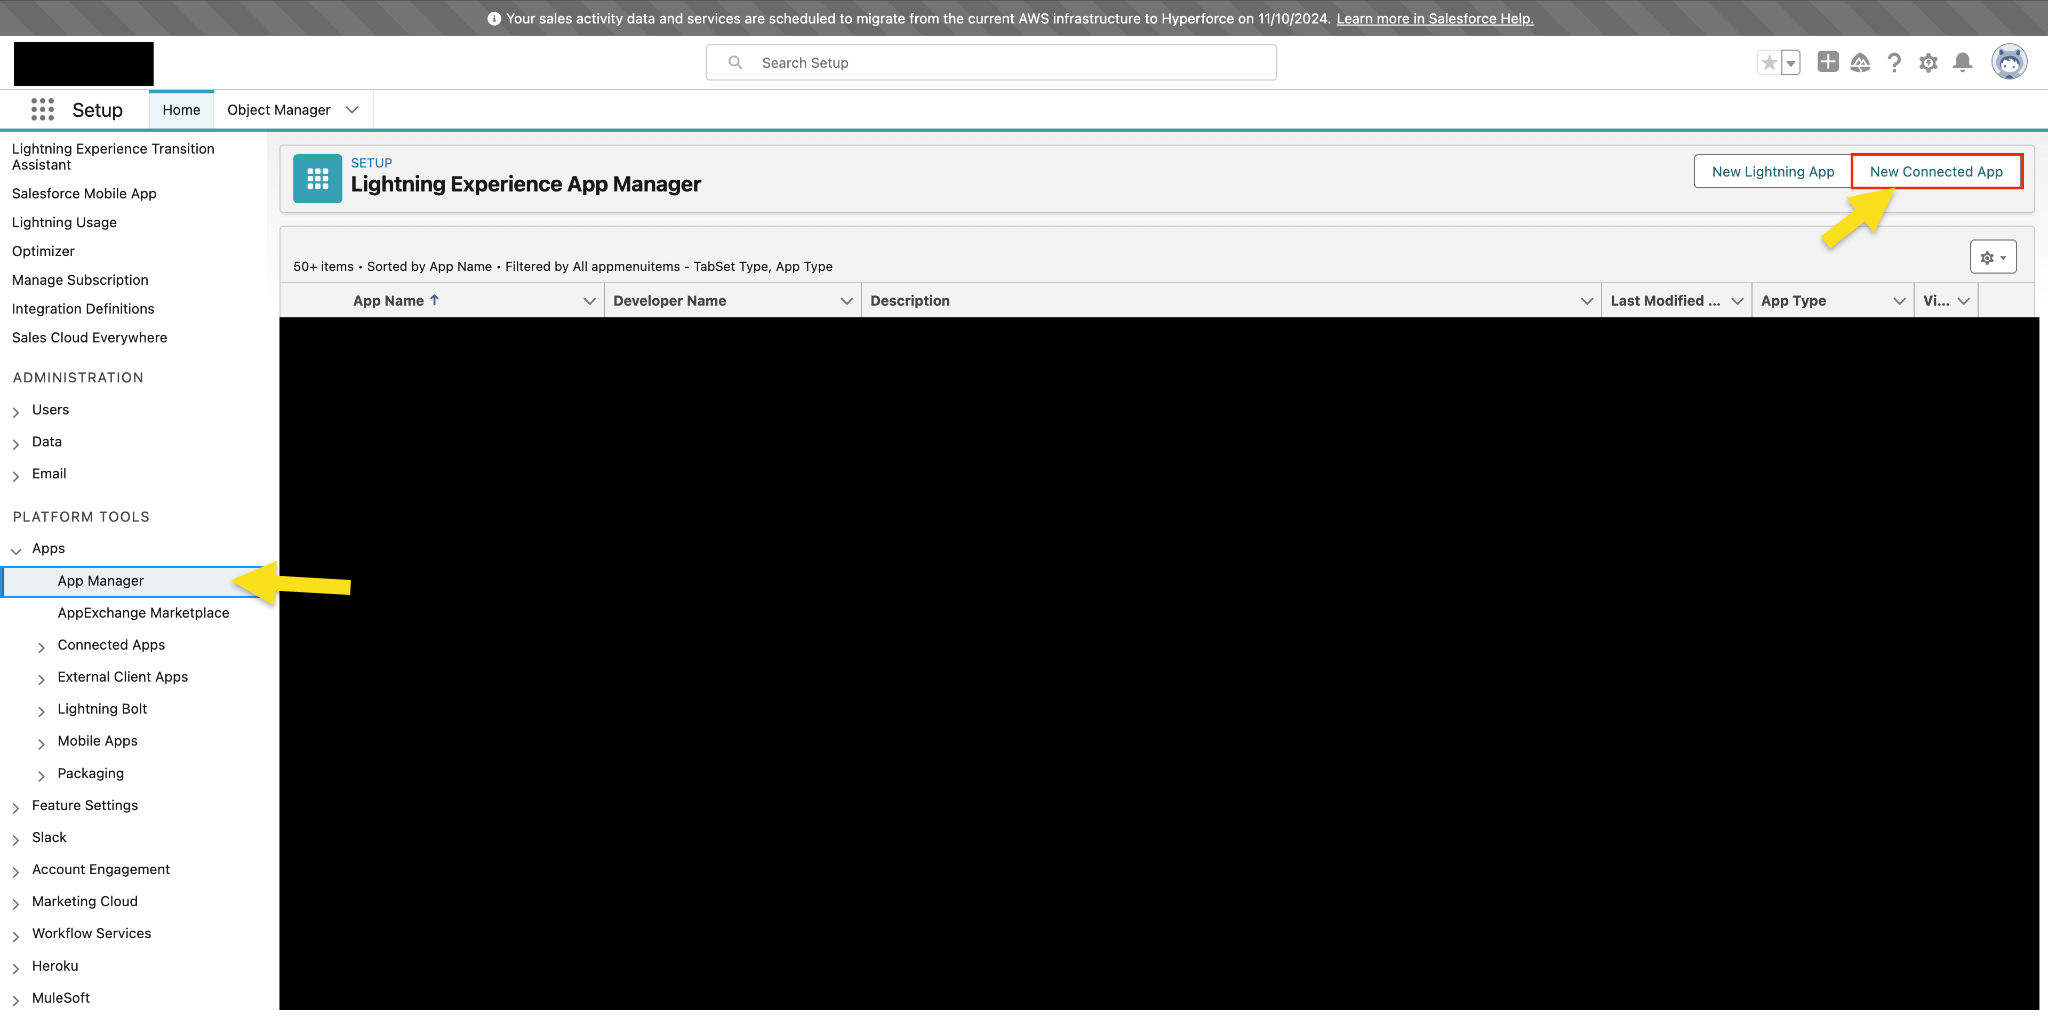
Step 2: Choose App Type
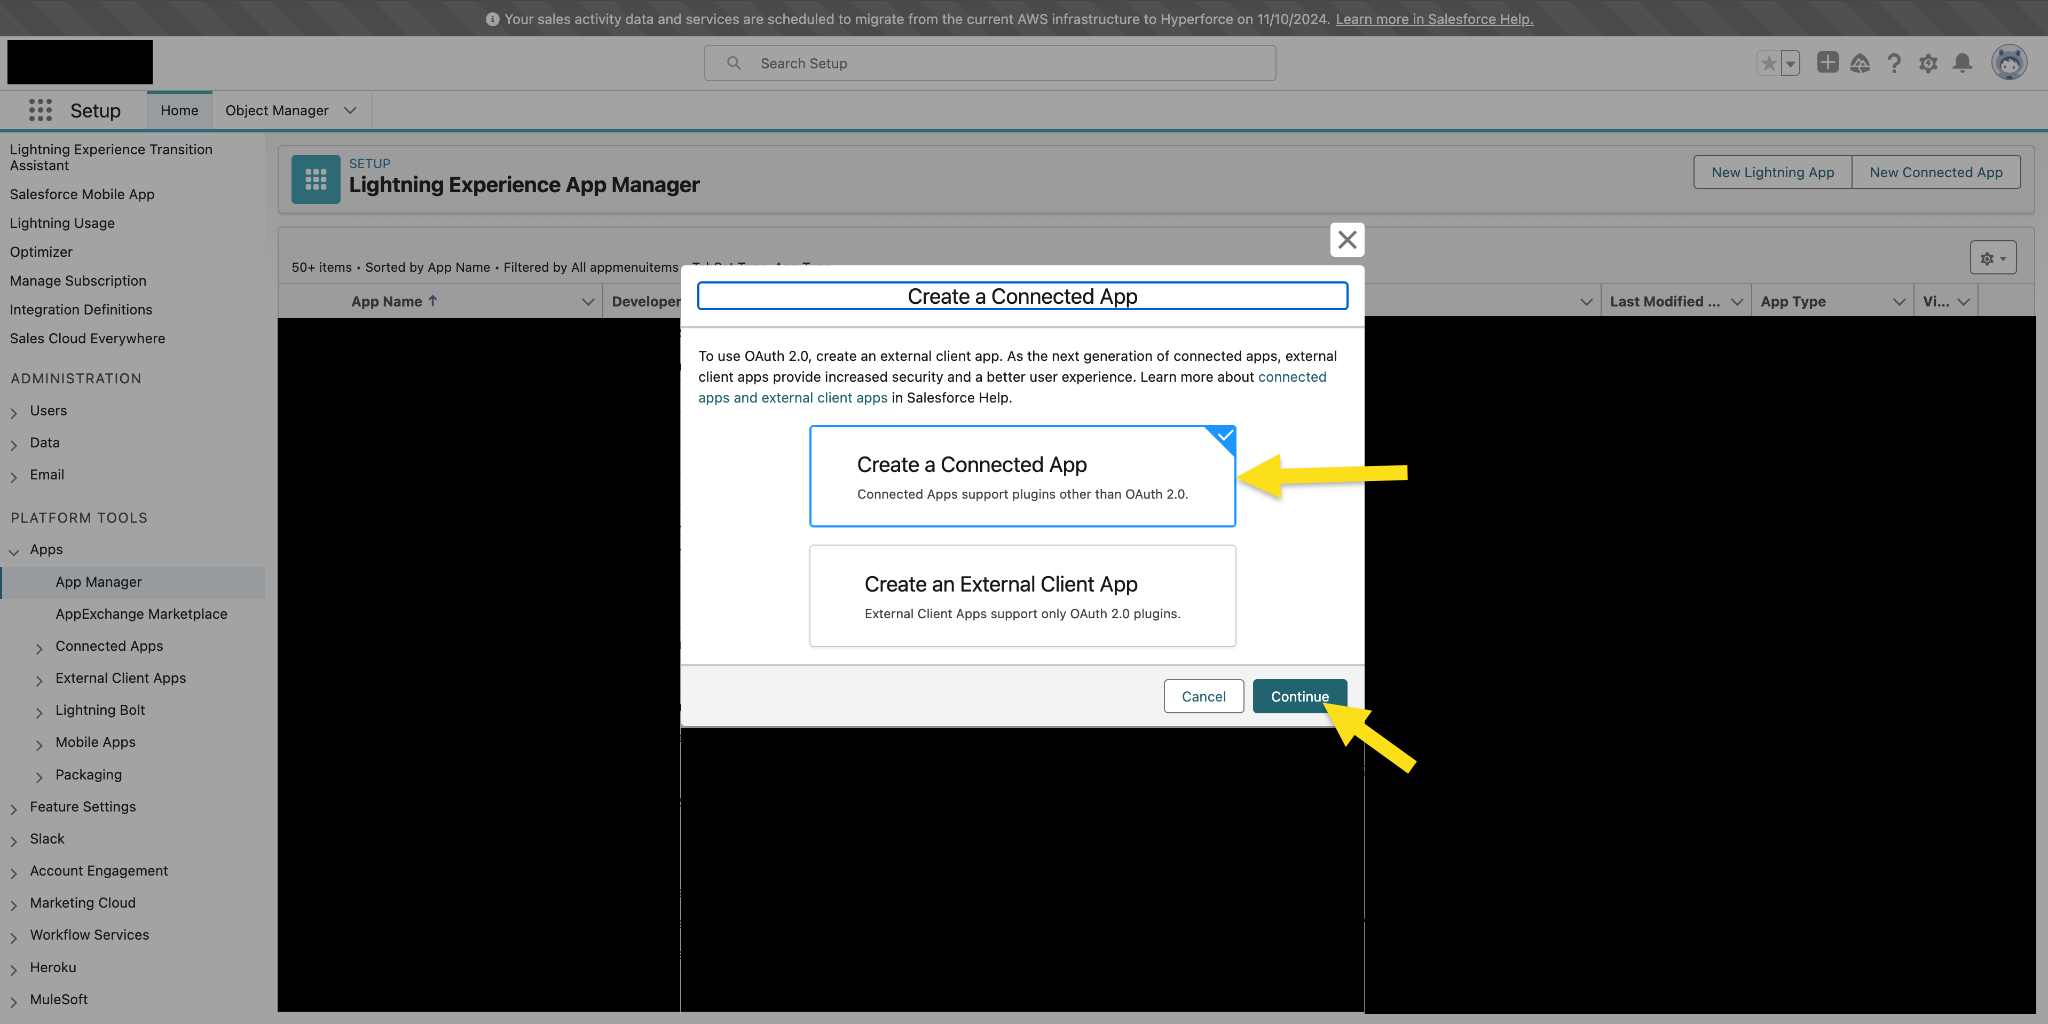
- When prompted, select Create a Connected App from the dialog box and click Continue.
Step 3: Set up New Connected App
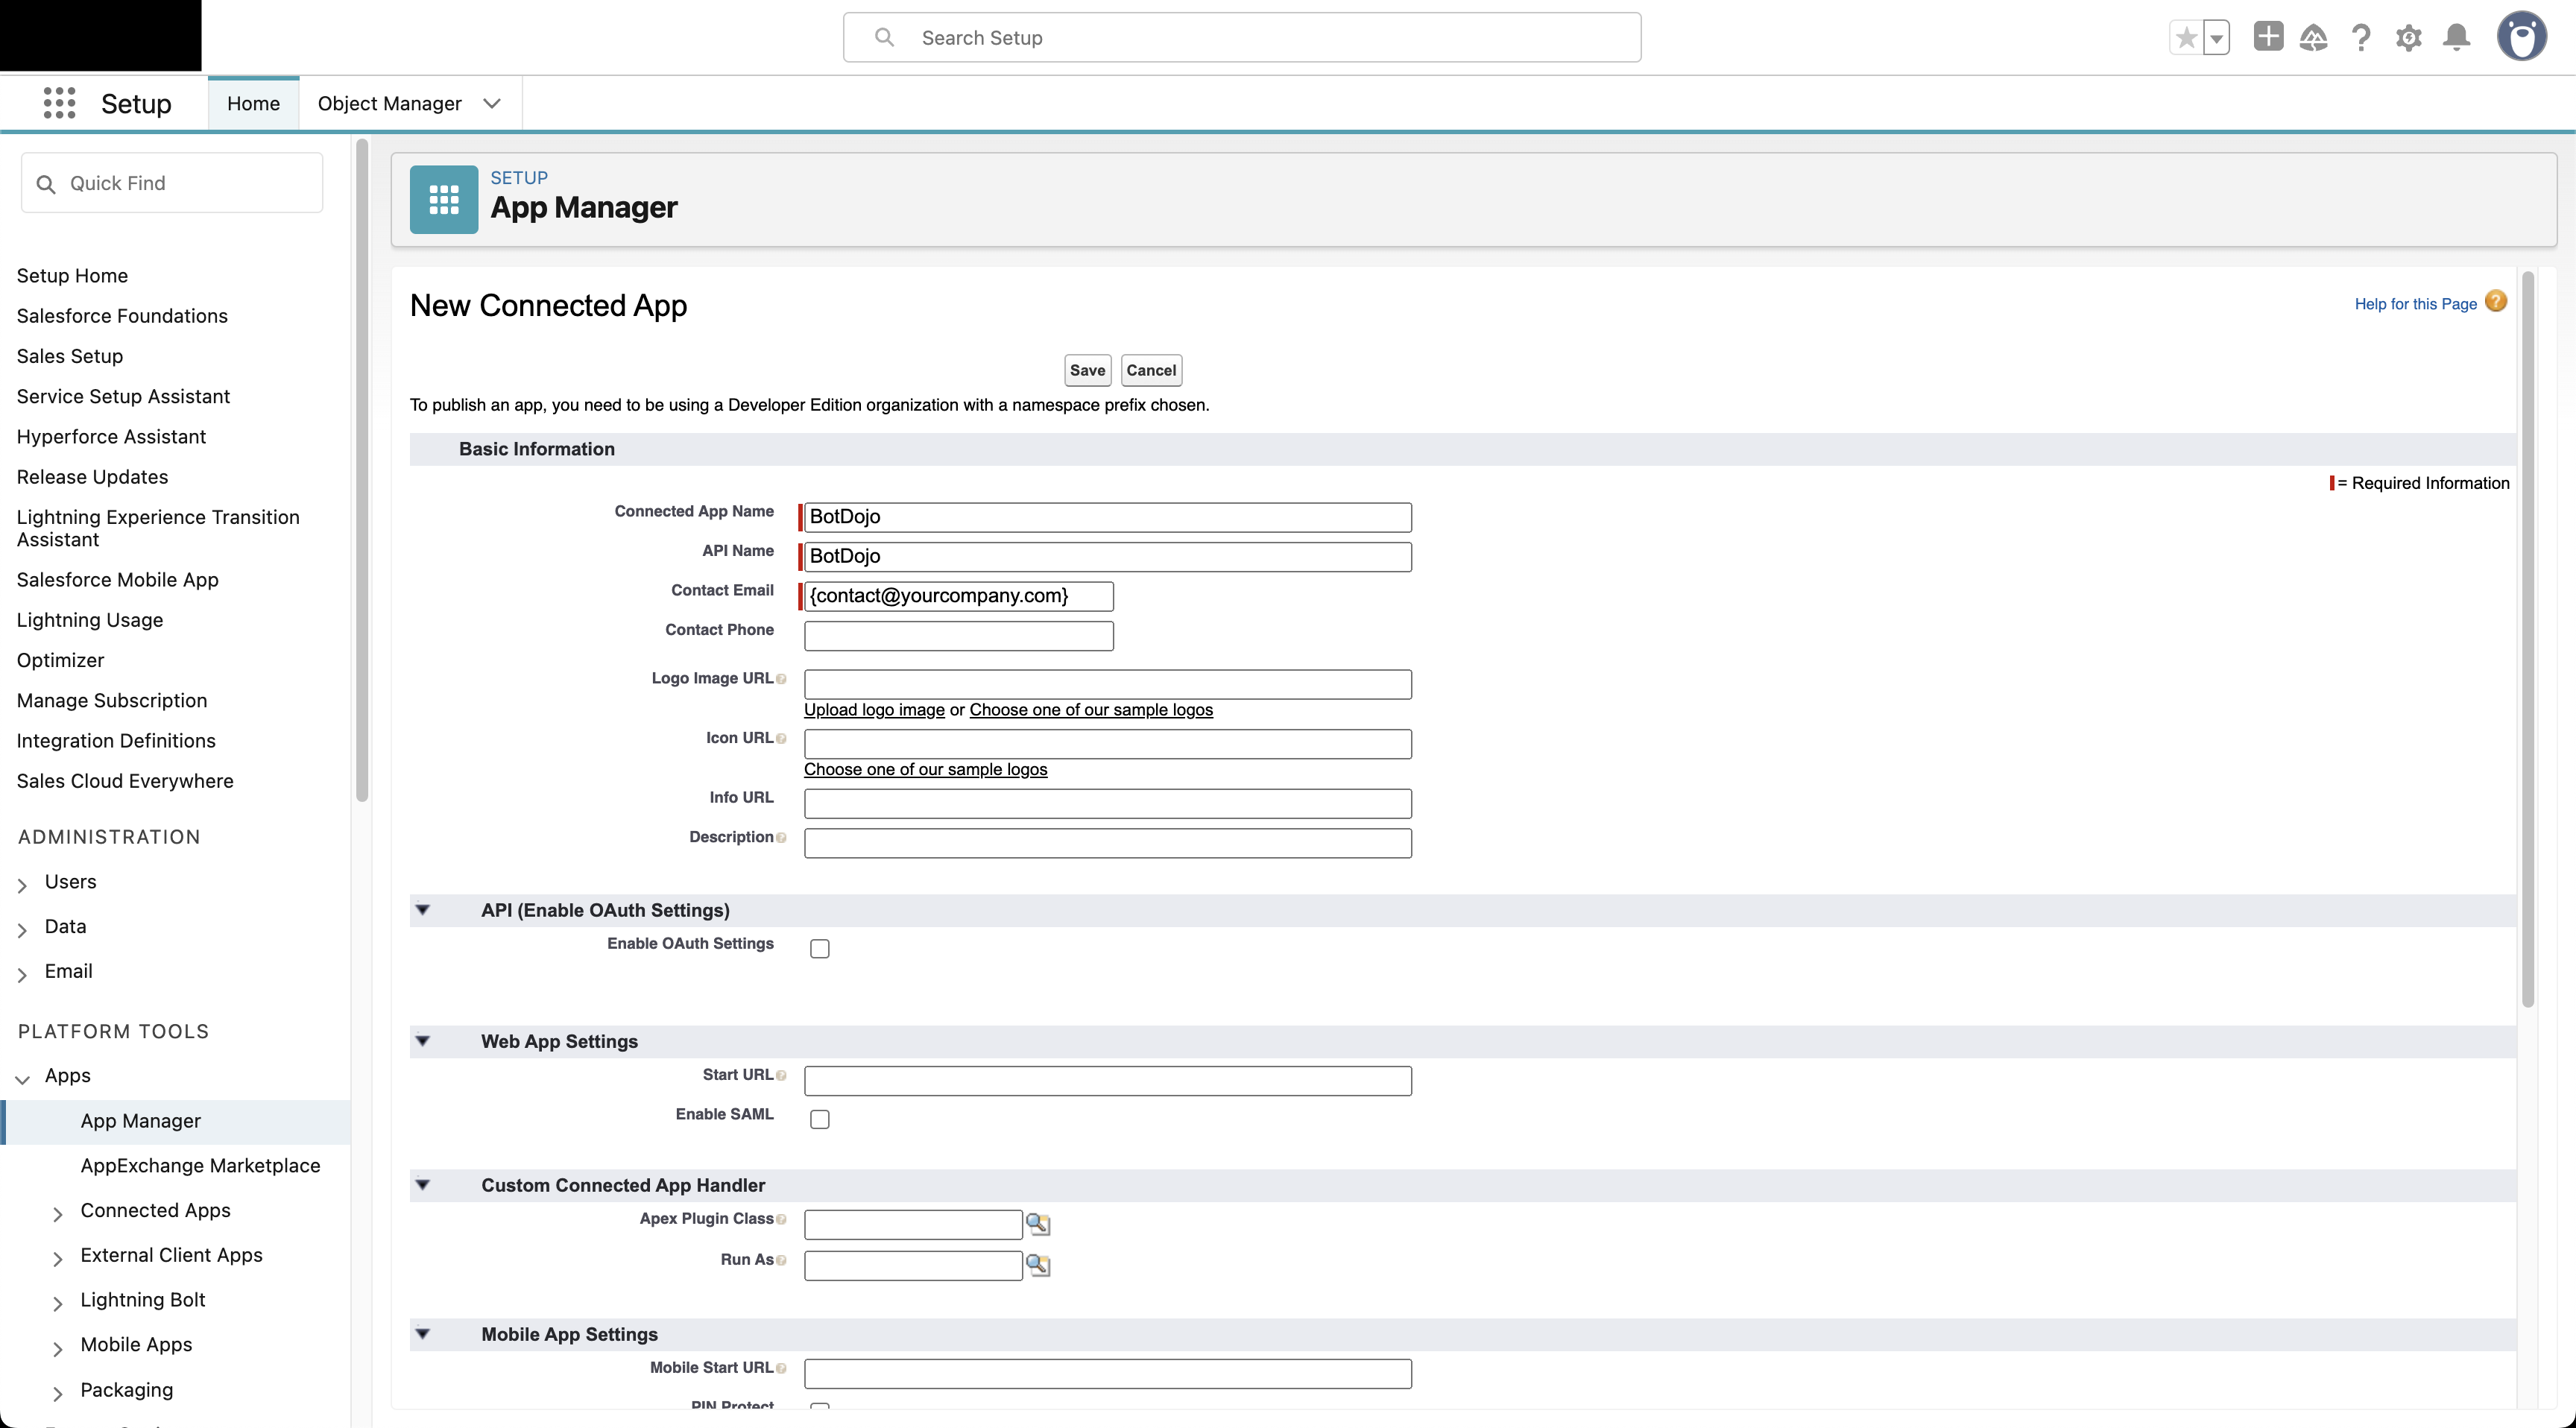
- Enter Setup Information
- Connected App Name: Enter a meaningful name (e.g., "BotDojo Integration").
- API Name: This will auto-generate based on your app name, but you can modify it if needed.
- Contact Email: Enter your email address or your support team's email.
- Contact Phone (optional): Enter a contact phone number.
- Logo Image URL (optional): Must use HTTPS if provided.
- Description (optional): Describe the purpose of this integration.
Step 4: Configure OAuth Settings
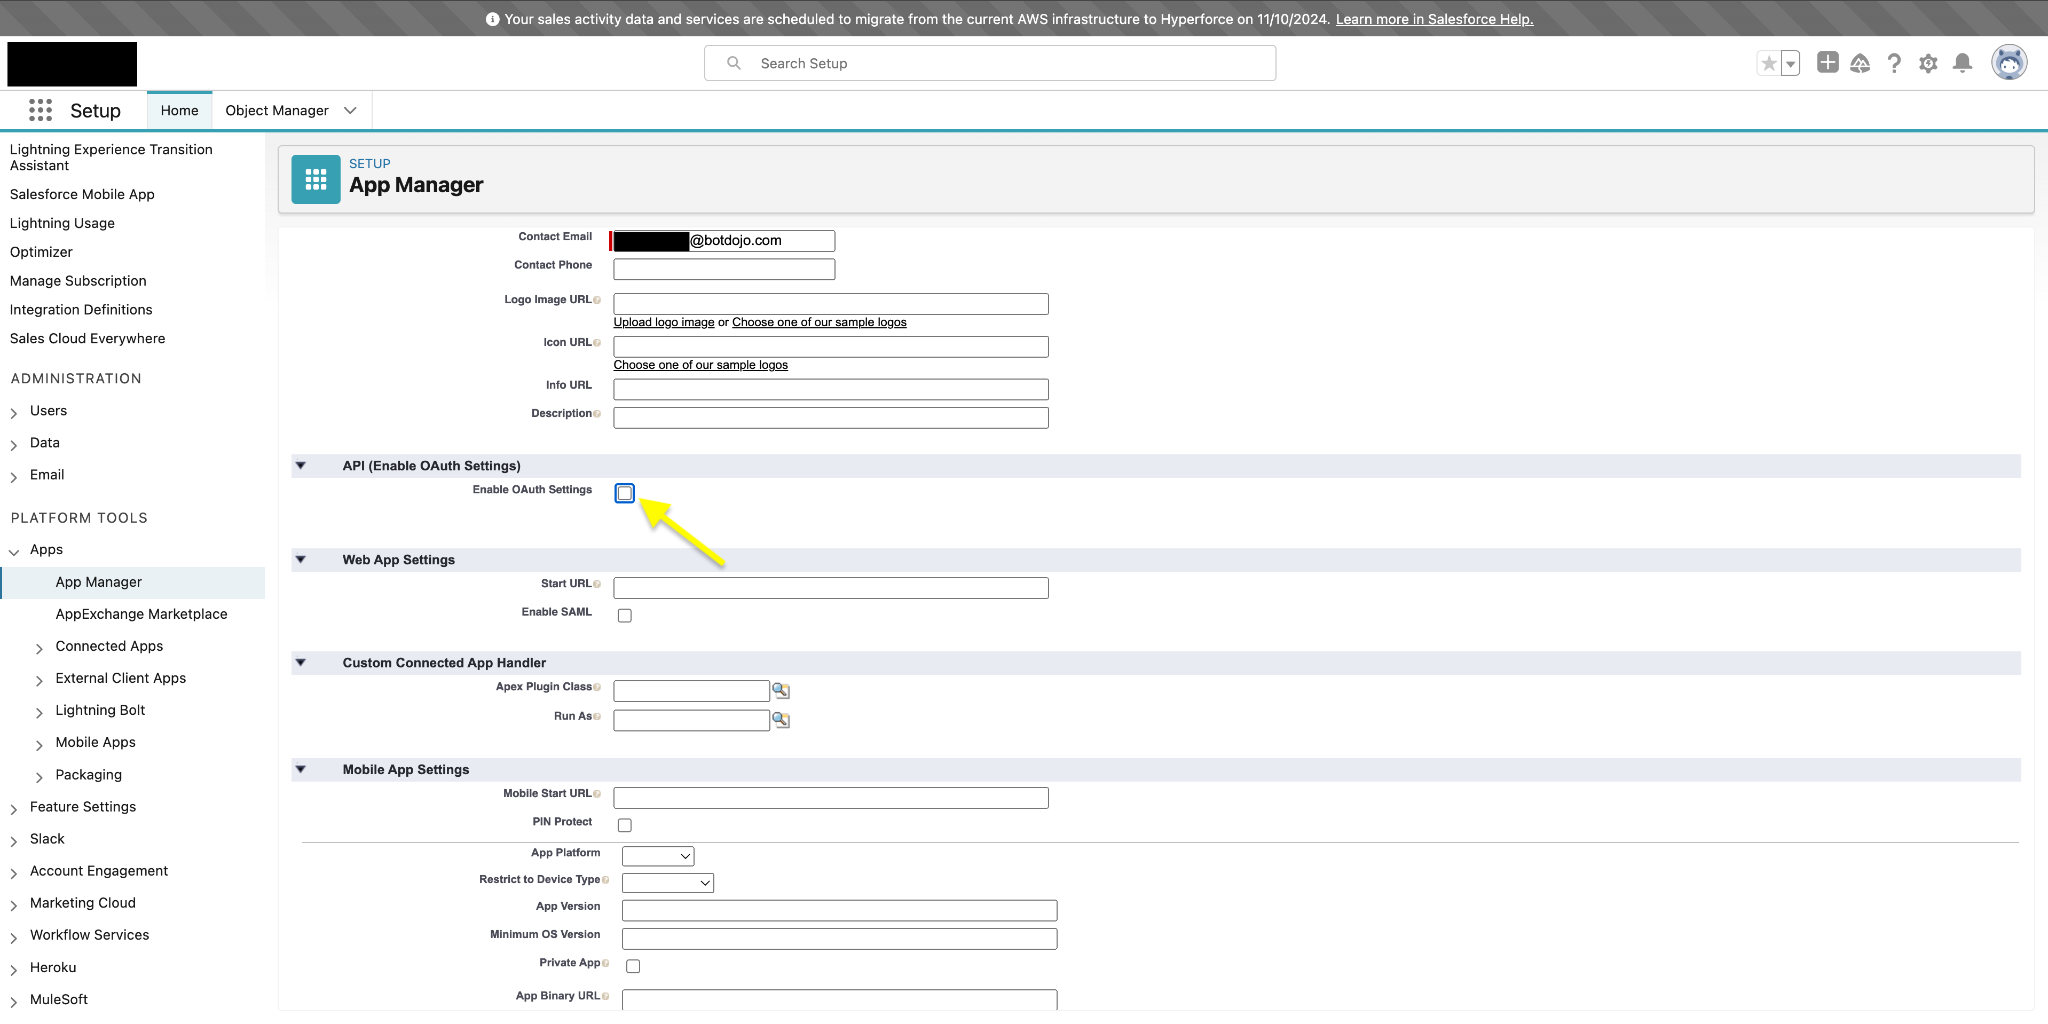
- Enable OAuth Settings
- In the API section, check the Enable OAuth Settings box.
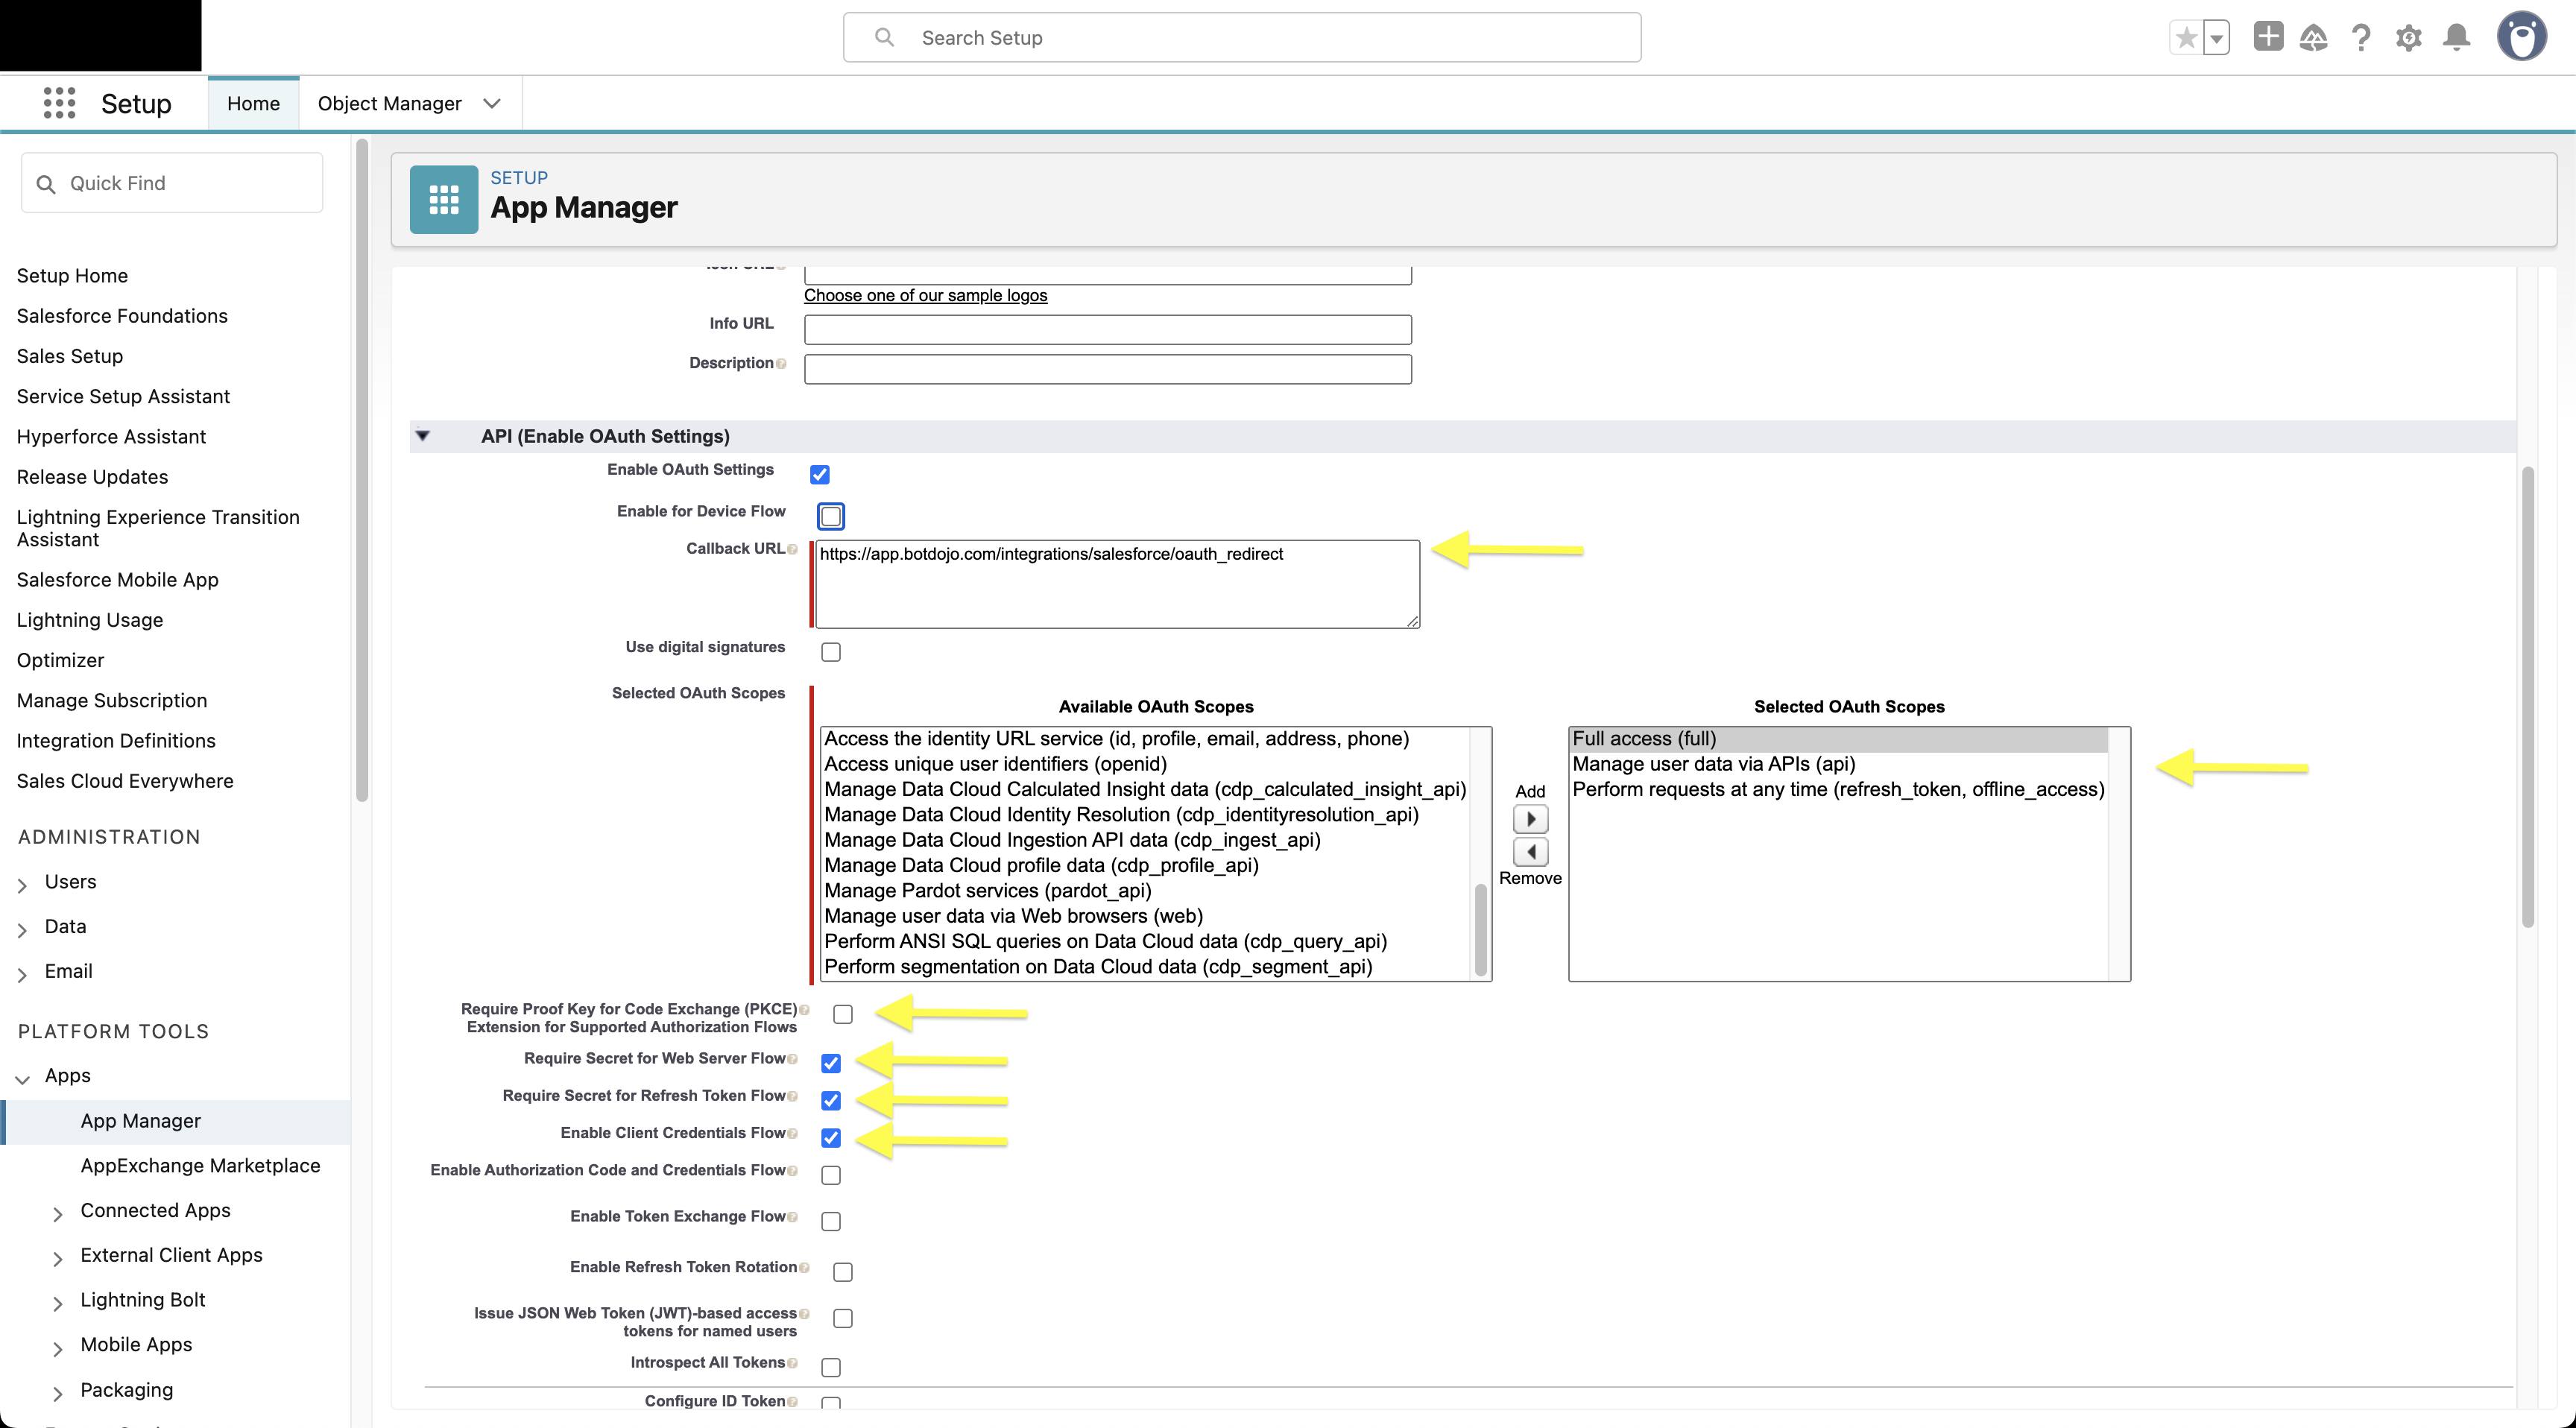
- Enter your Callback URL: Use
https://app.botdojo.com/integrations/salesforce/oauth_redirect. - Select the following OAuth scopes:
- Full access (full)
- Perform requests at any time (refresh_token, offline_access)
- Manage user data via APIs (api)
- Uncheck Require Proof Key for Code Exchange (PKCE) Extension for Supported Authorization Flows
- Check Require Secret for Web Server Flow
- Check Require Secret for Refresh Token Flow
- Check Enable Client Credentials Flow
- Read and acknowledge the security warning that appears.
- This setting is crucial as it allows for server-to-server integration without user interaction.
- Click Save to apply these settings.
Step 5: Select Execution User
-
Configure Run As User
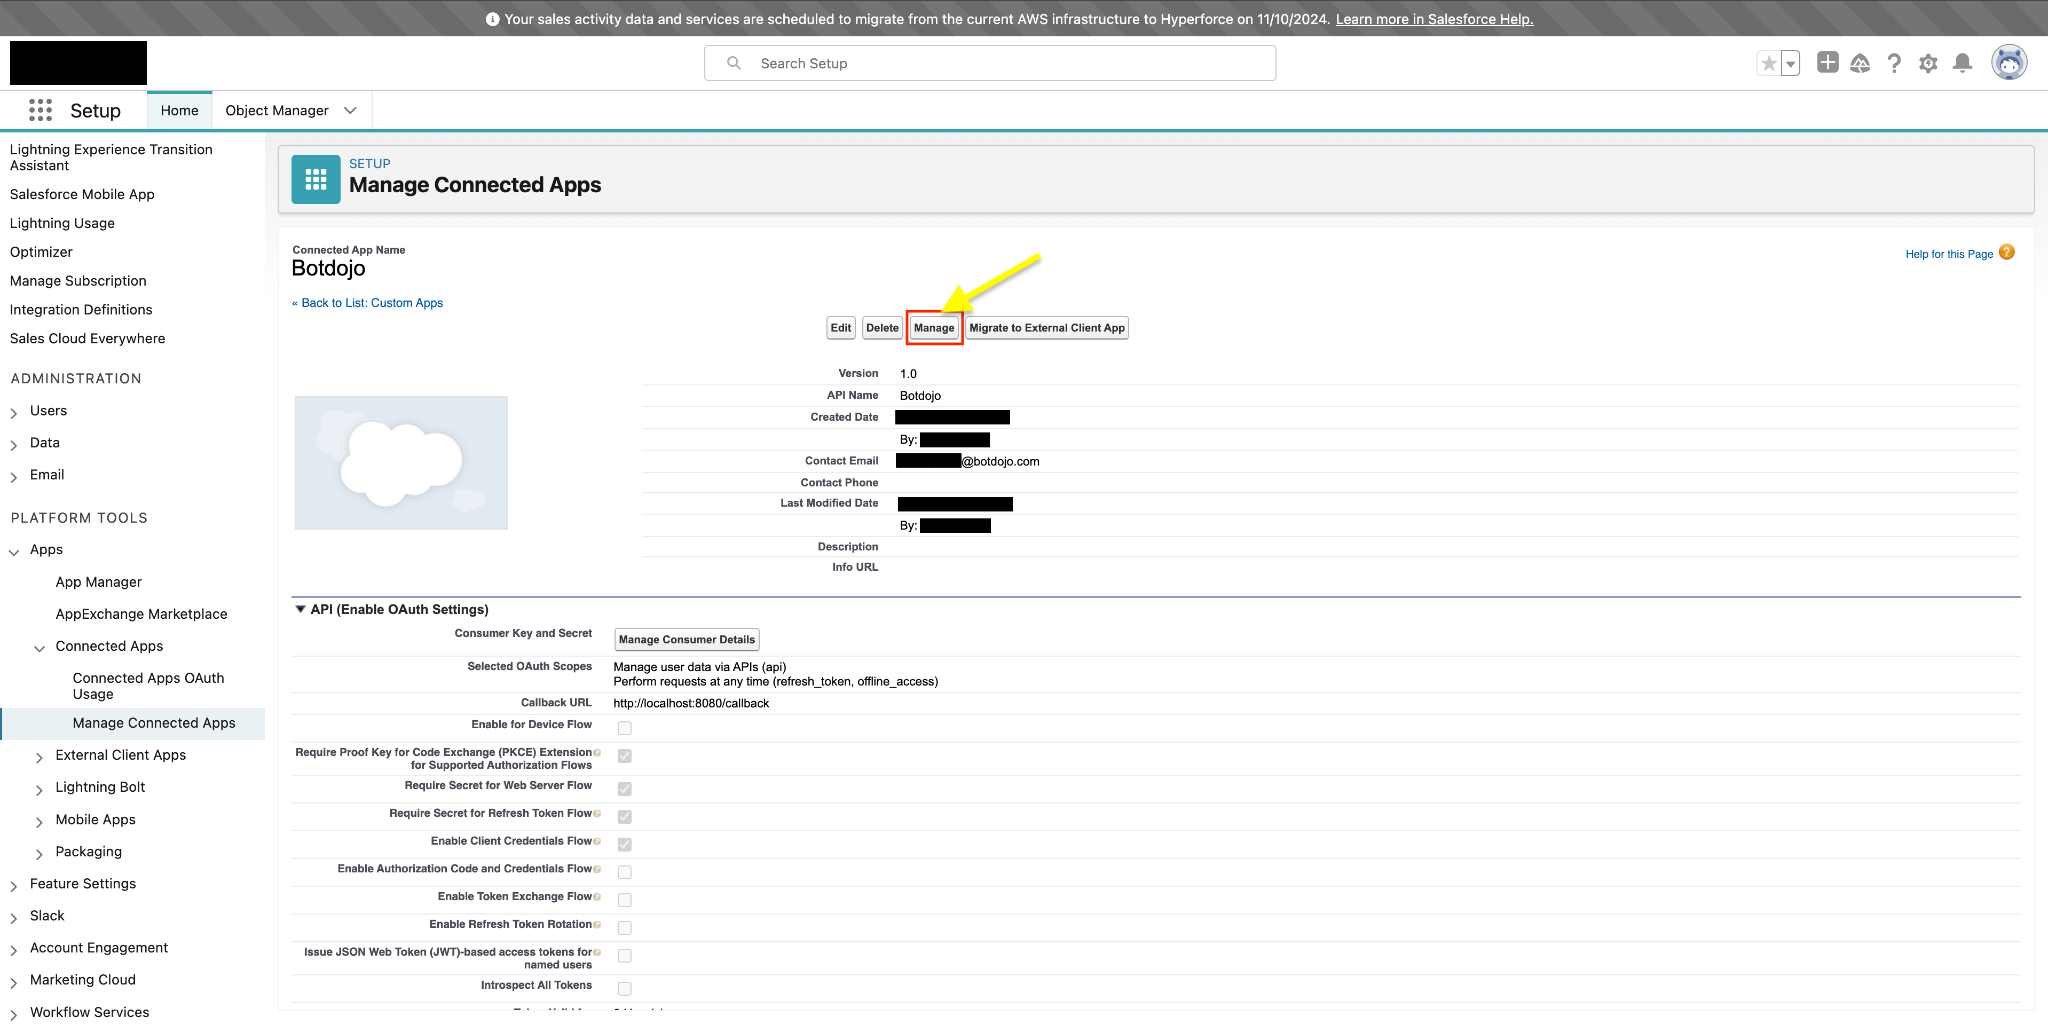
- After saving, click Manage on the connected app.
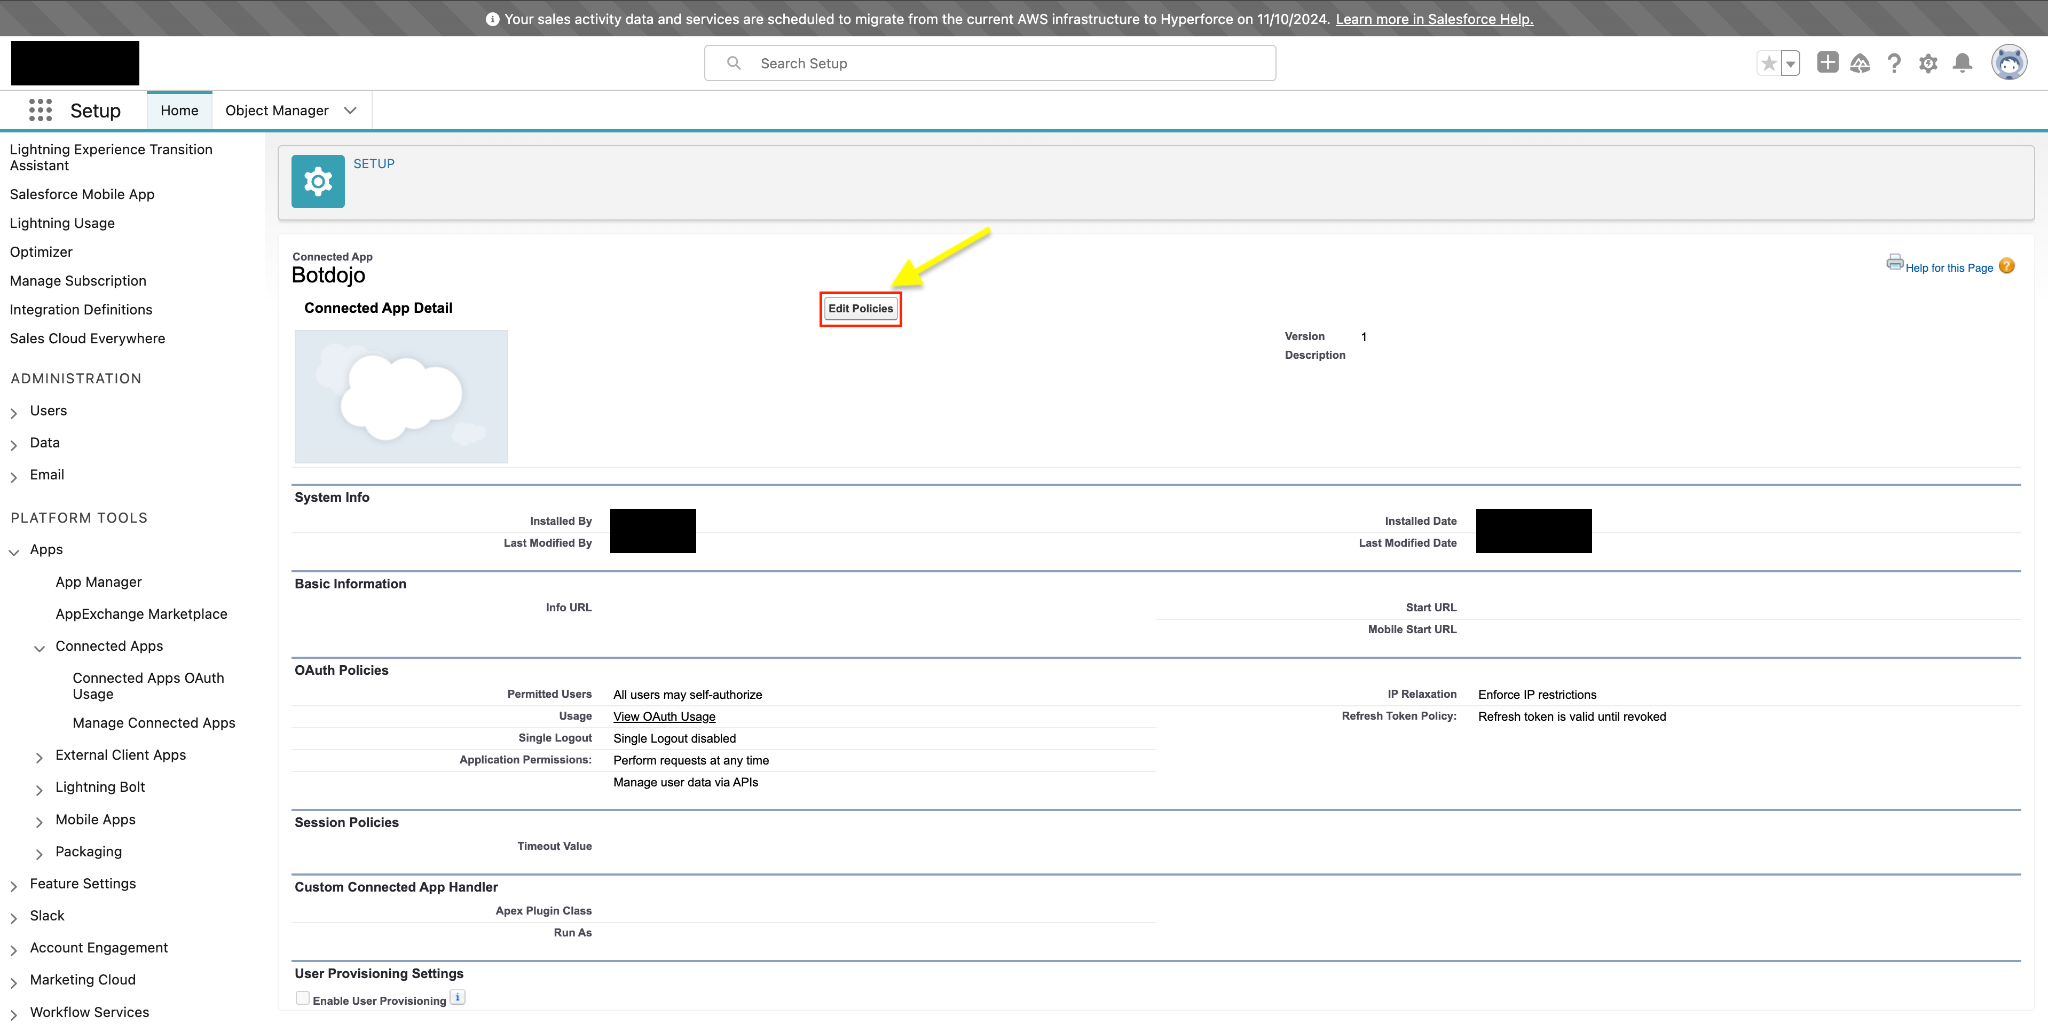
- Click Edit Policies.
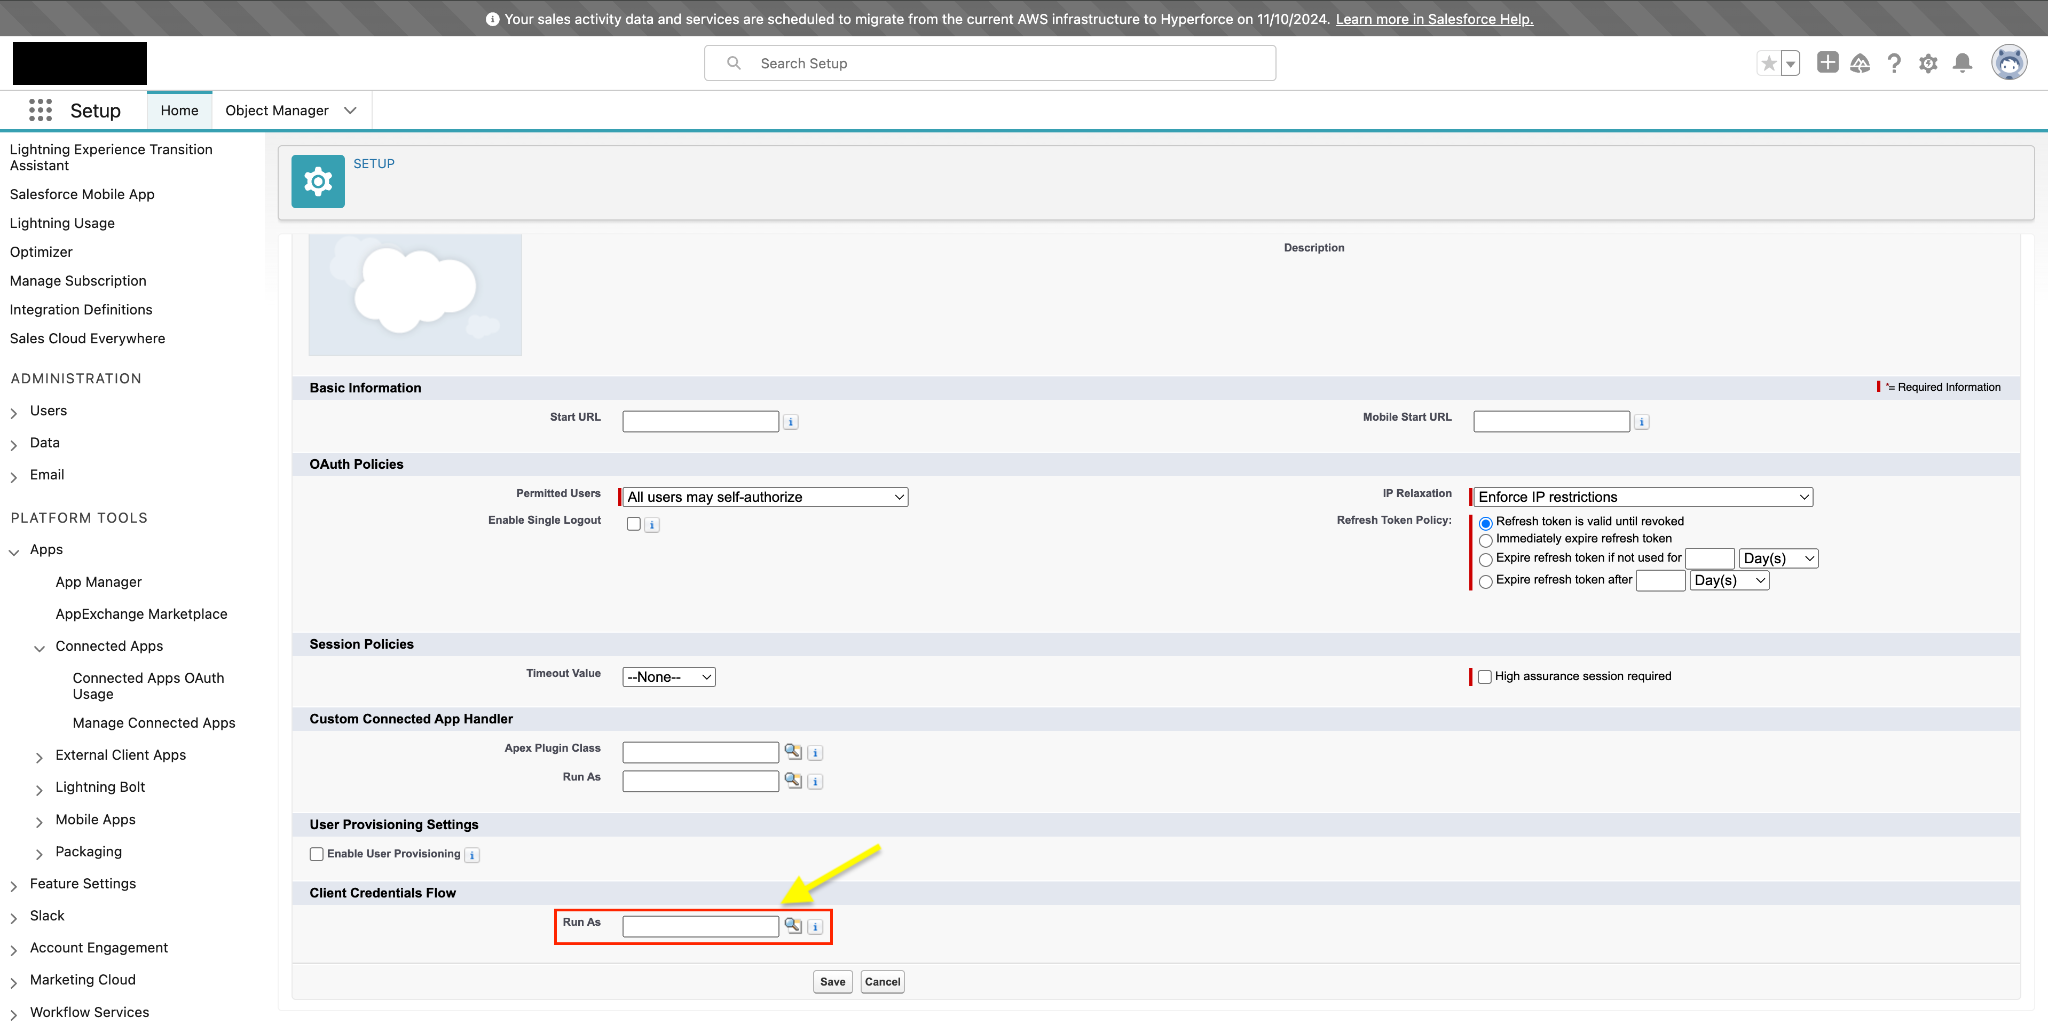
- Under Client Credentials Flow, use the lookup icon to select a Run As user.
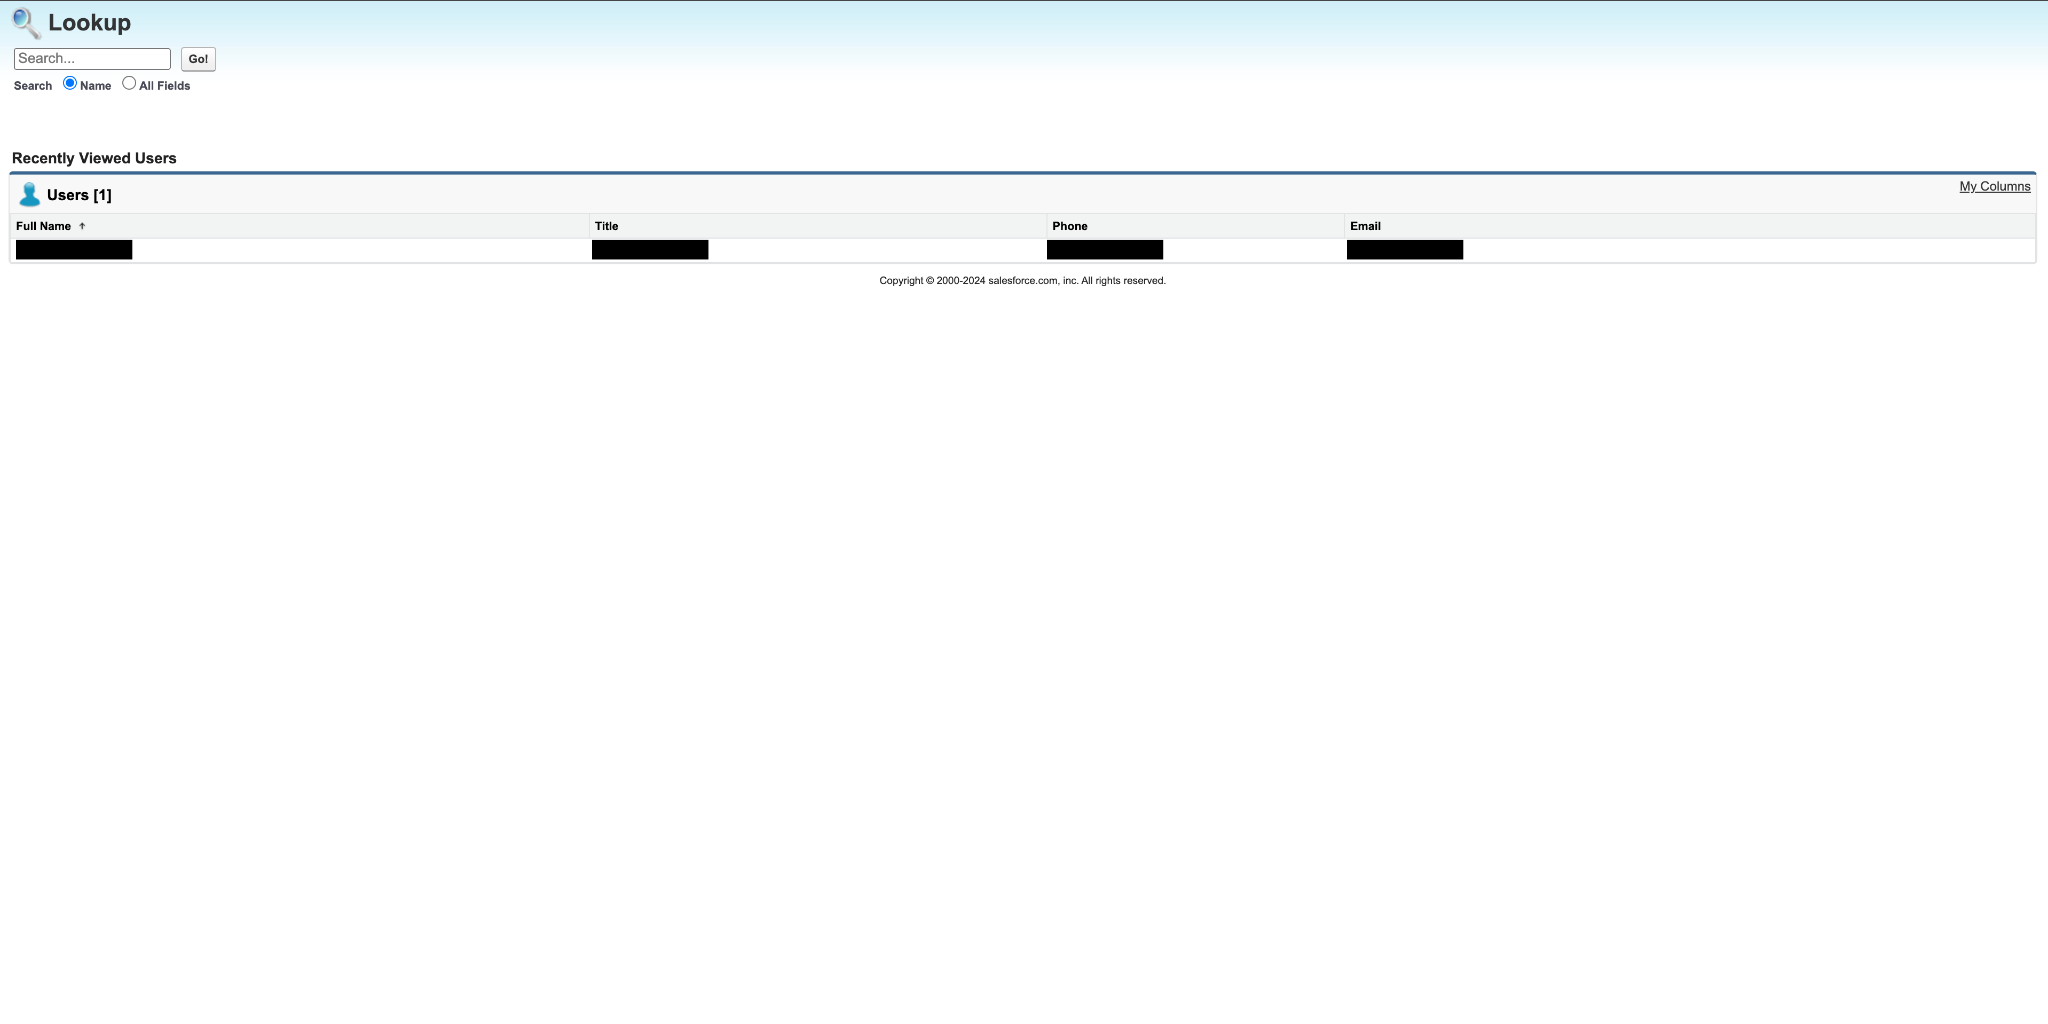
- Select a user. For Enterprise Edition, it's recommended to select a user with "API Only User" permission.
- The selected user's permissions will determine what the connected app can access in Salesforce.
- Once you've selected your user, click Save.
Step 6: Access Consumer Key and Secret
-
Retrieve Authentication Credentials
- In the left-side panel, under Platform Tools, click on Apps.
- An expanded list will appear, select App Manager from that list.
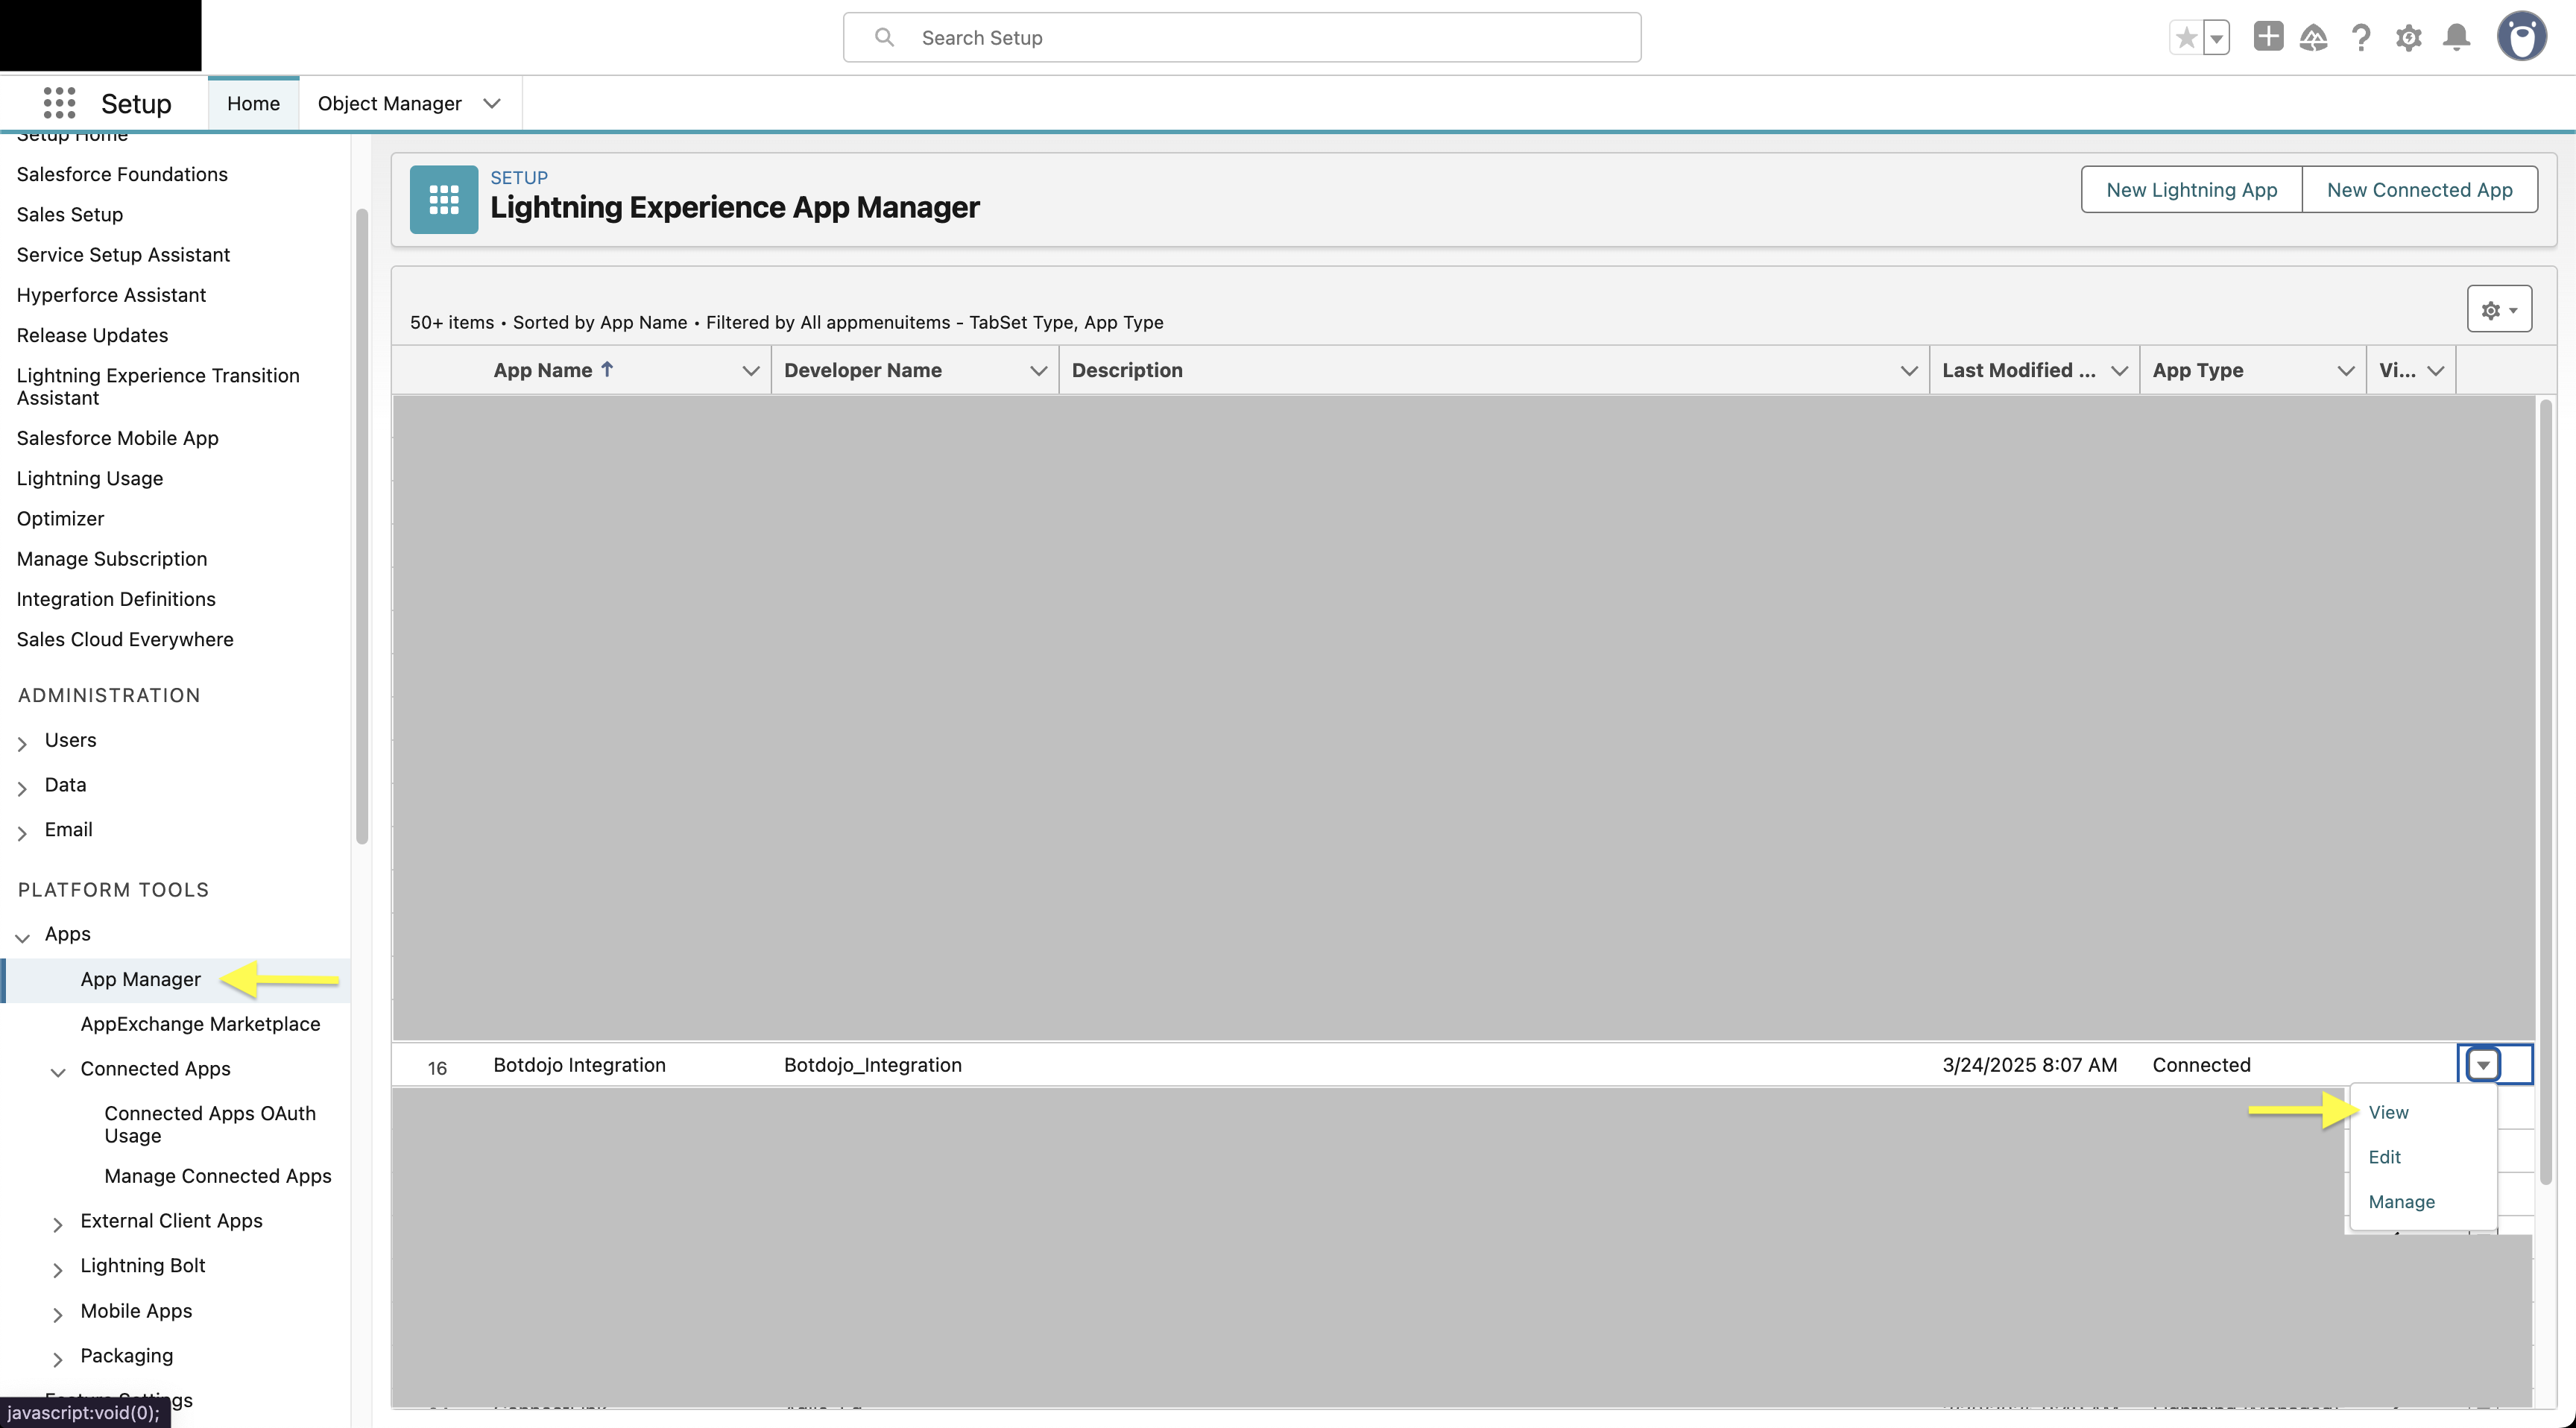
- Find the app you just created.
- On the right, click the dropdown and select View.
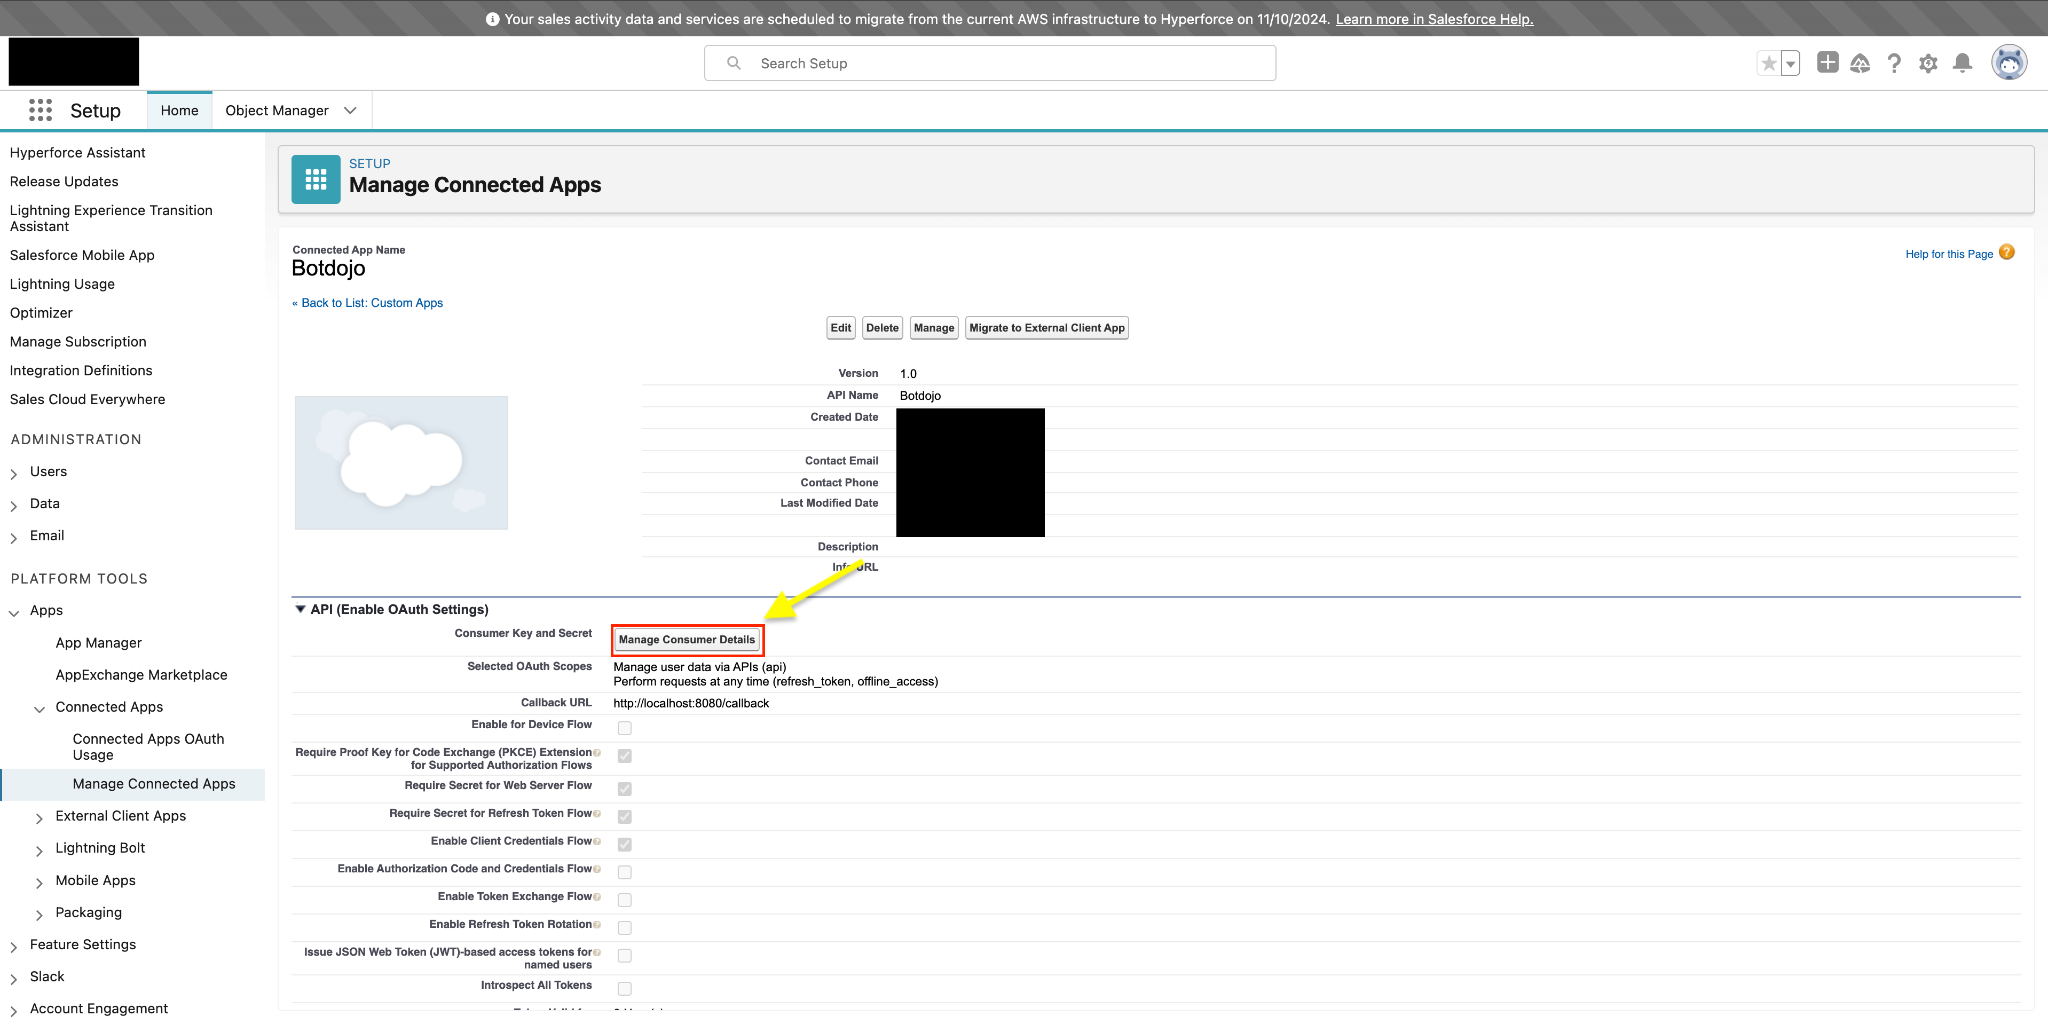
- On the next page, click on Manage Consumer Details button under API settings.
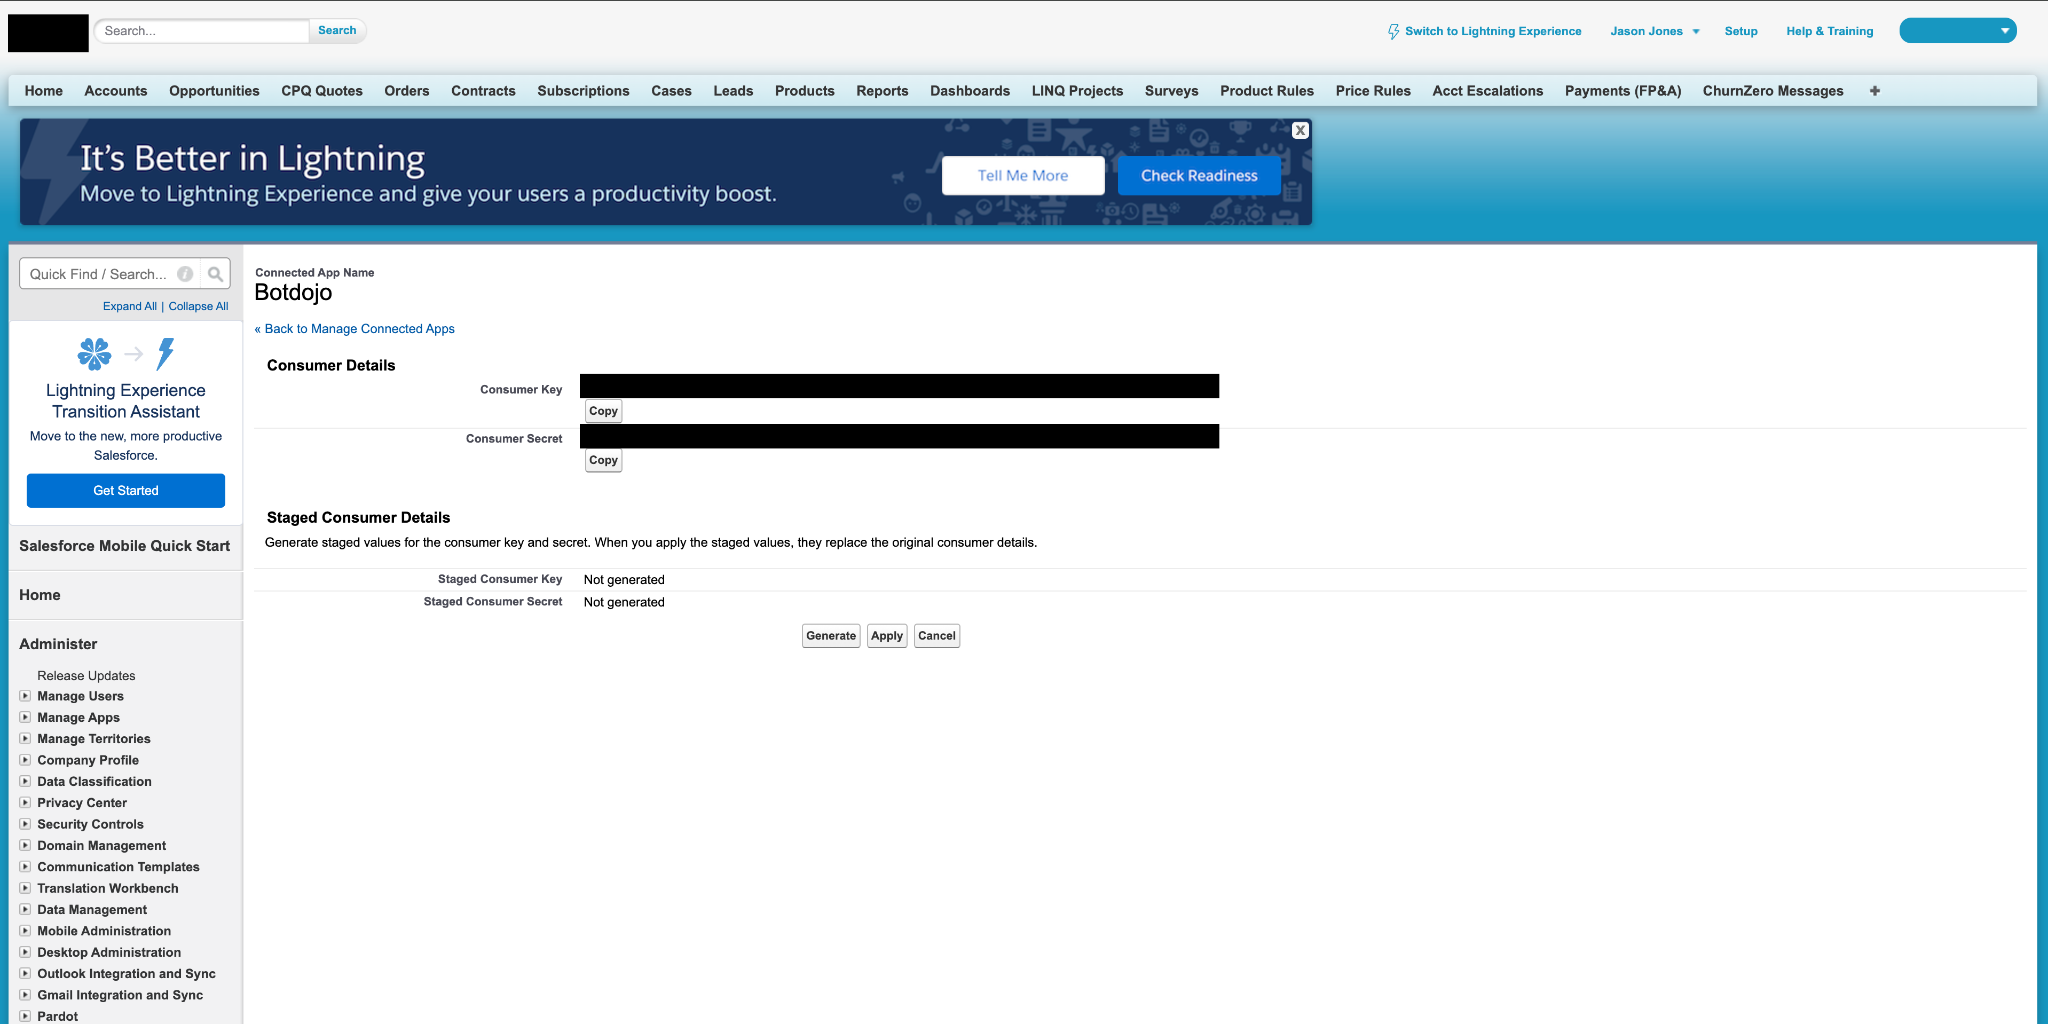
- Now you'll be able to view the Consumer Key and Consumer Secret is only shown once when first created, so be sure to copy it.
- Store these credentials securely as they will be used for authentication with BotDojo.
- If needed, you can rotate these credentials later using the "Rotate Consumer Key and Secret" option.
Step 7: Get Your Salesforce Domain
- Get Your Salesforce Domain
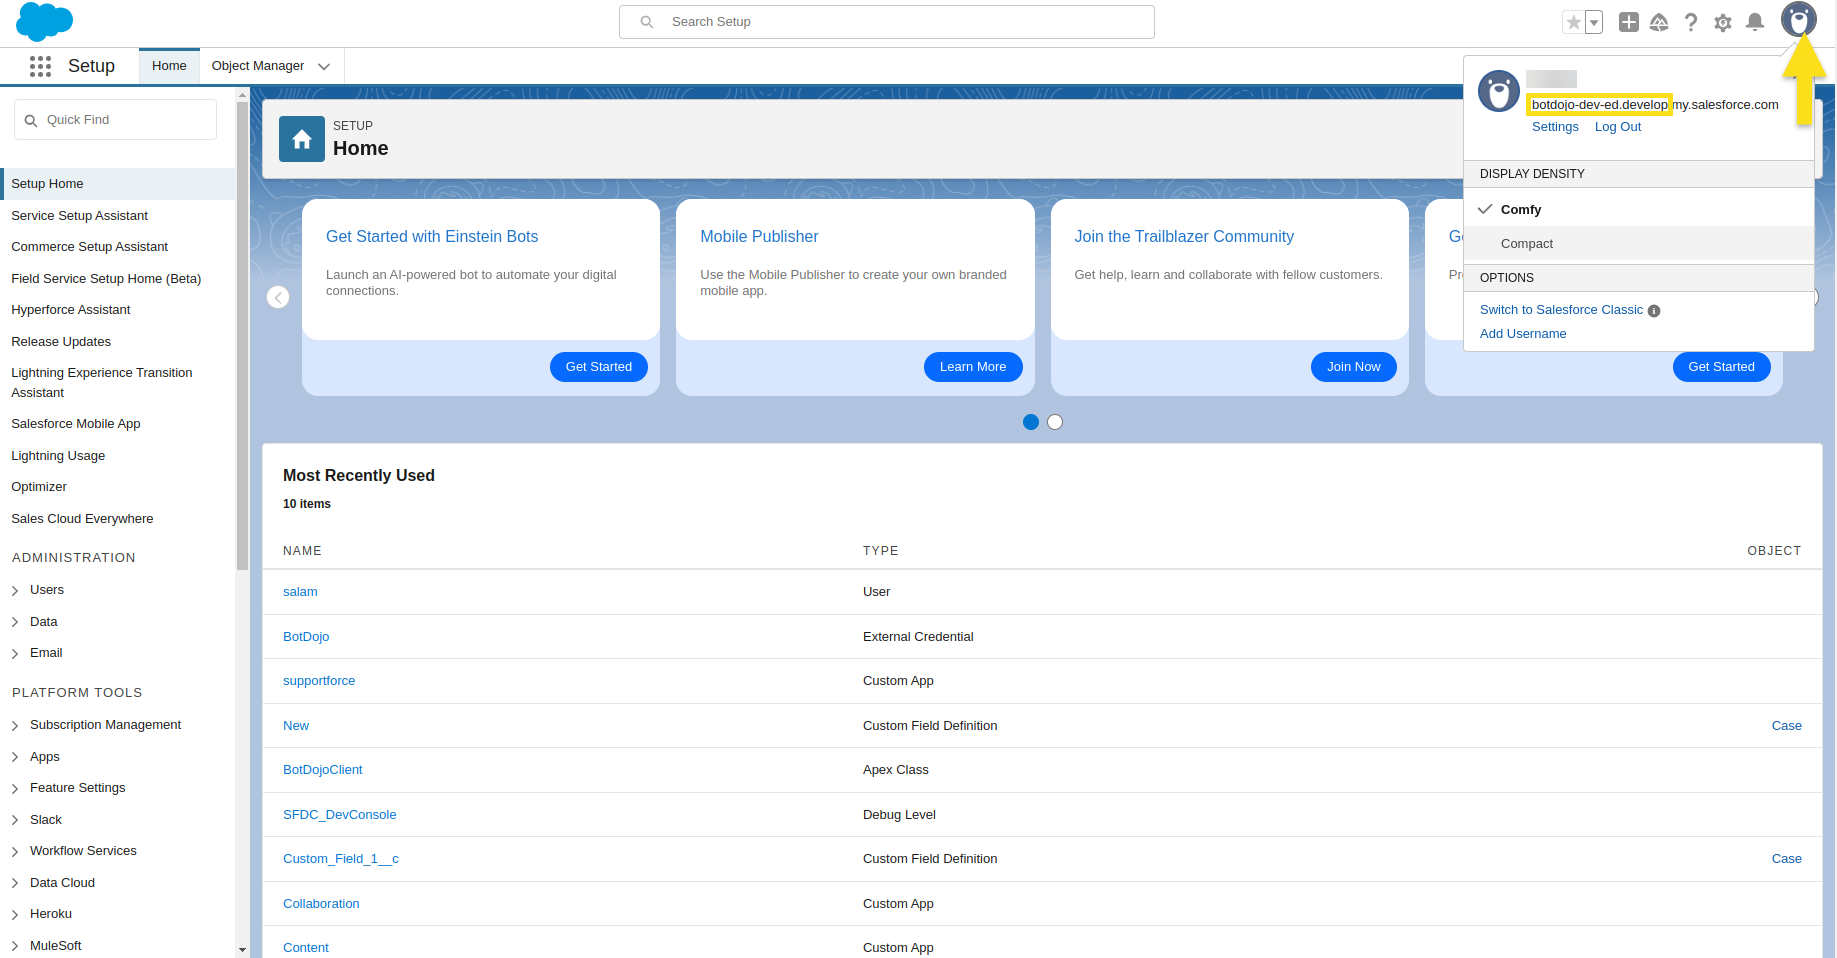
- Click on your avatar in the top-right corner of your Salesforce account.
- Copy the subdomain portion right below your username (everything before
.my.salesforce.com).
For example:
- Full URL:
botdojo-dev-ed.develop.my.salesforce.com - Subdomain to copy:
botdojo-dev-ed.develop
Note: You'll need this subdomain when connecting Salesforce to BotDojo.
Connecting Salesforce to Your BotDojo Account
Now that you have your Salesforce Connected App credentials, you can connect Salesforce to your BotDojo account.
Step 1: Access Salesforce Integration in BotDojo
-
Log in to BotDojo
- Go to your BotDojo account dashboard.
-
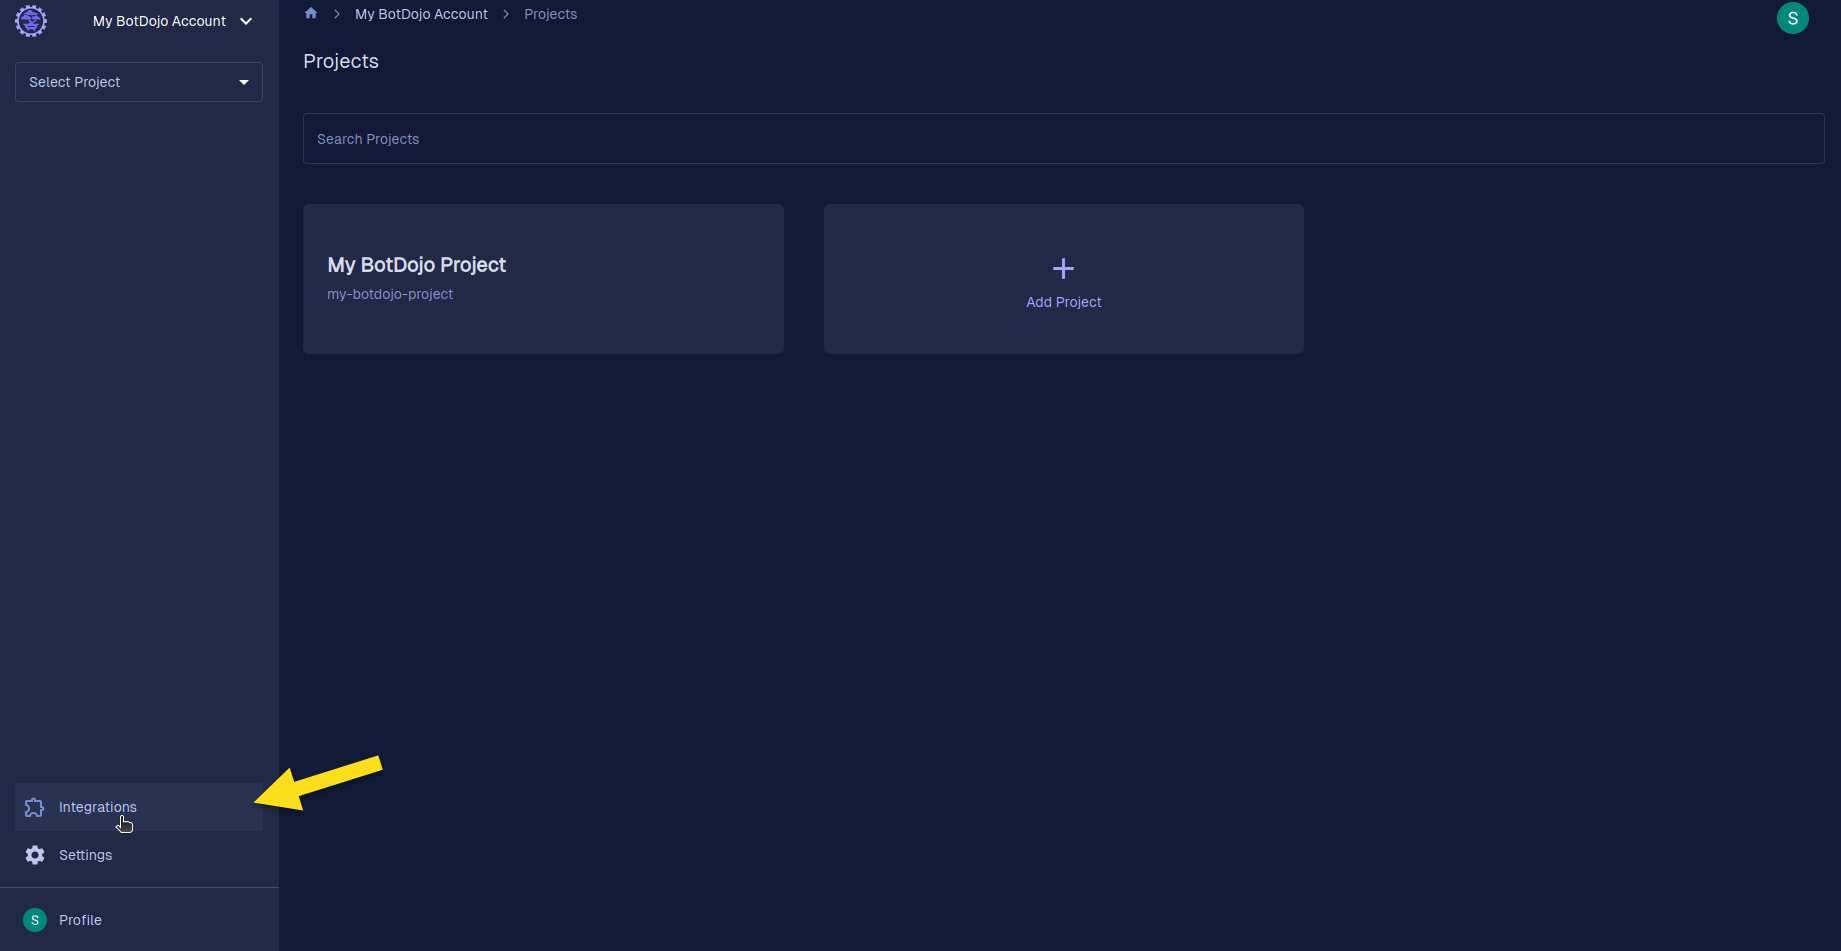
Navigate to Integrations
- On the left sidebar panel, click on the Integrations option.
Step 2: Connect Salesforce Integration
-
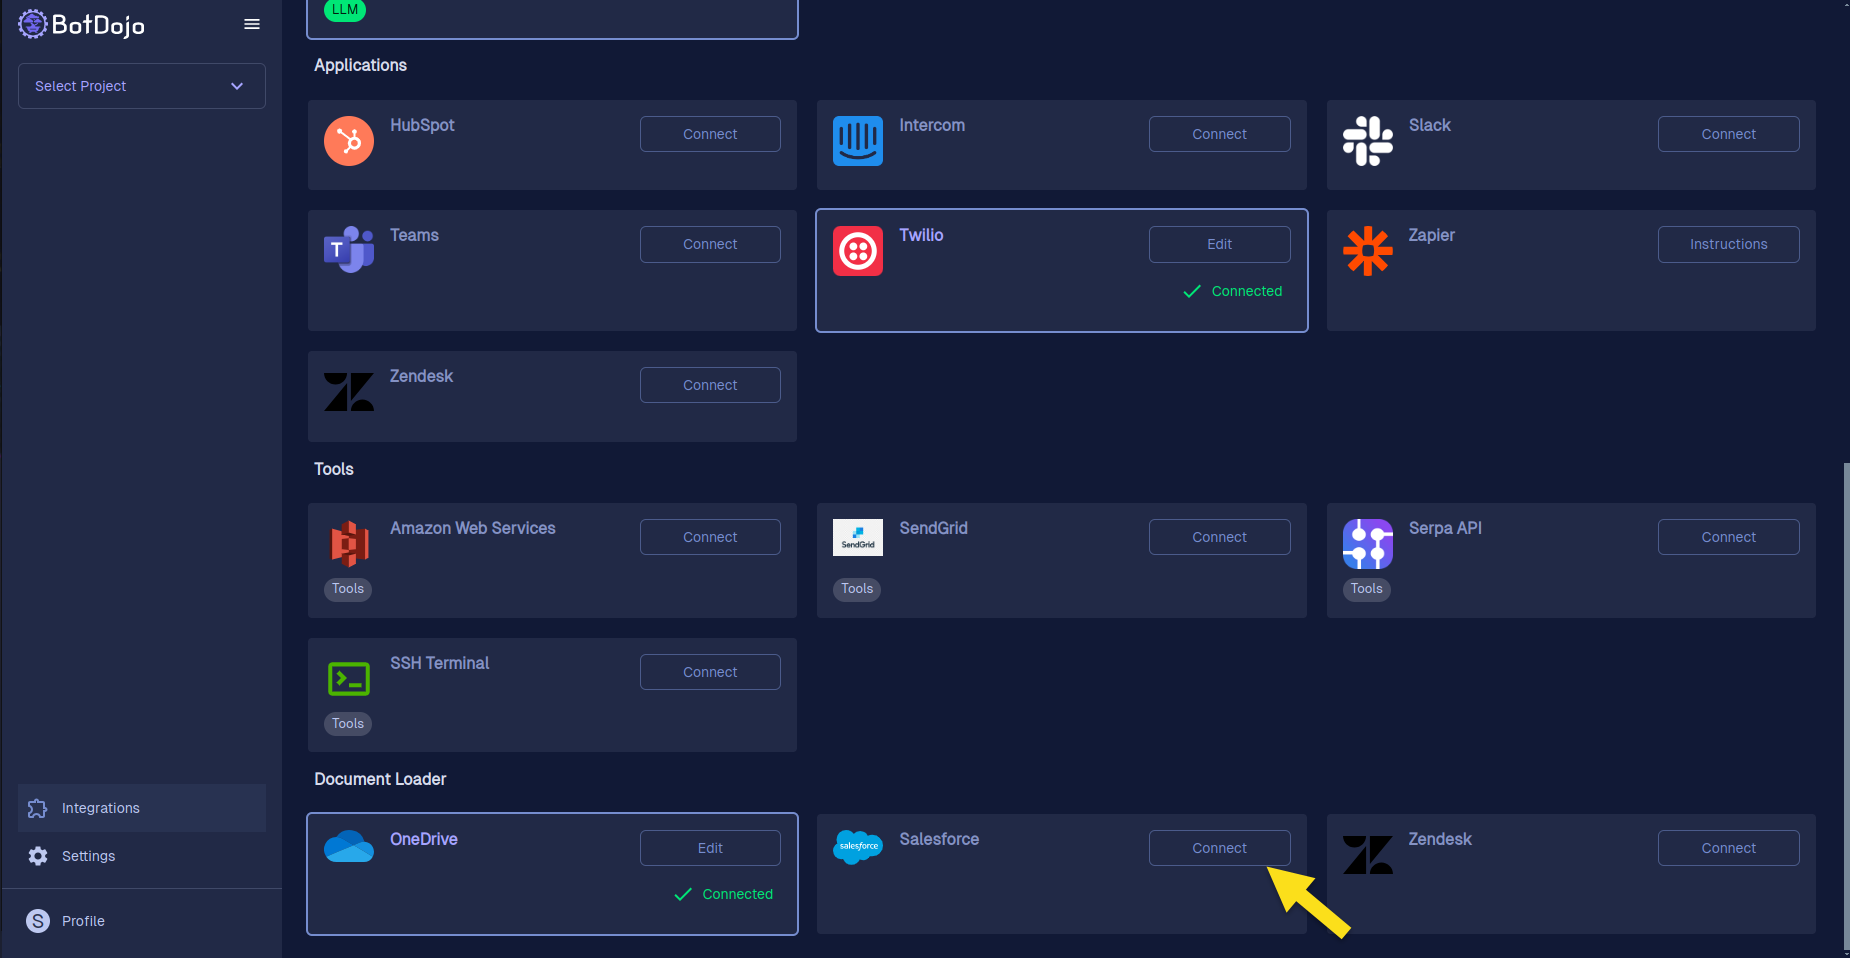
Initiate Salesforce Connection
-
In the Integrations page, locate the Salesforce integration.
-
Click on the Connect button associated with Salesforce.
-
-
Enter Salesforce Credentials
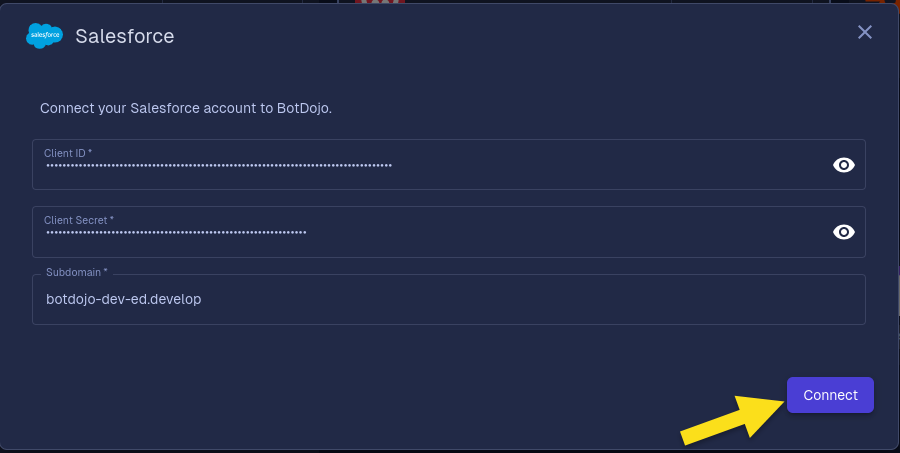
- A Salesforce Integration dialog box will appear.
- Paste your previously copied Consumer Key and Consumer Secret in place of Client ID and Client Secret respectively.
- Enter your Salesforce Domain (the portion of the URL of your Salesforce instance).
- Click the Connect button to establish the connection.
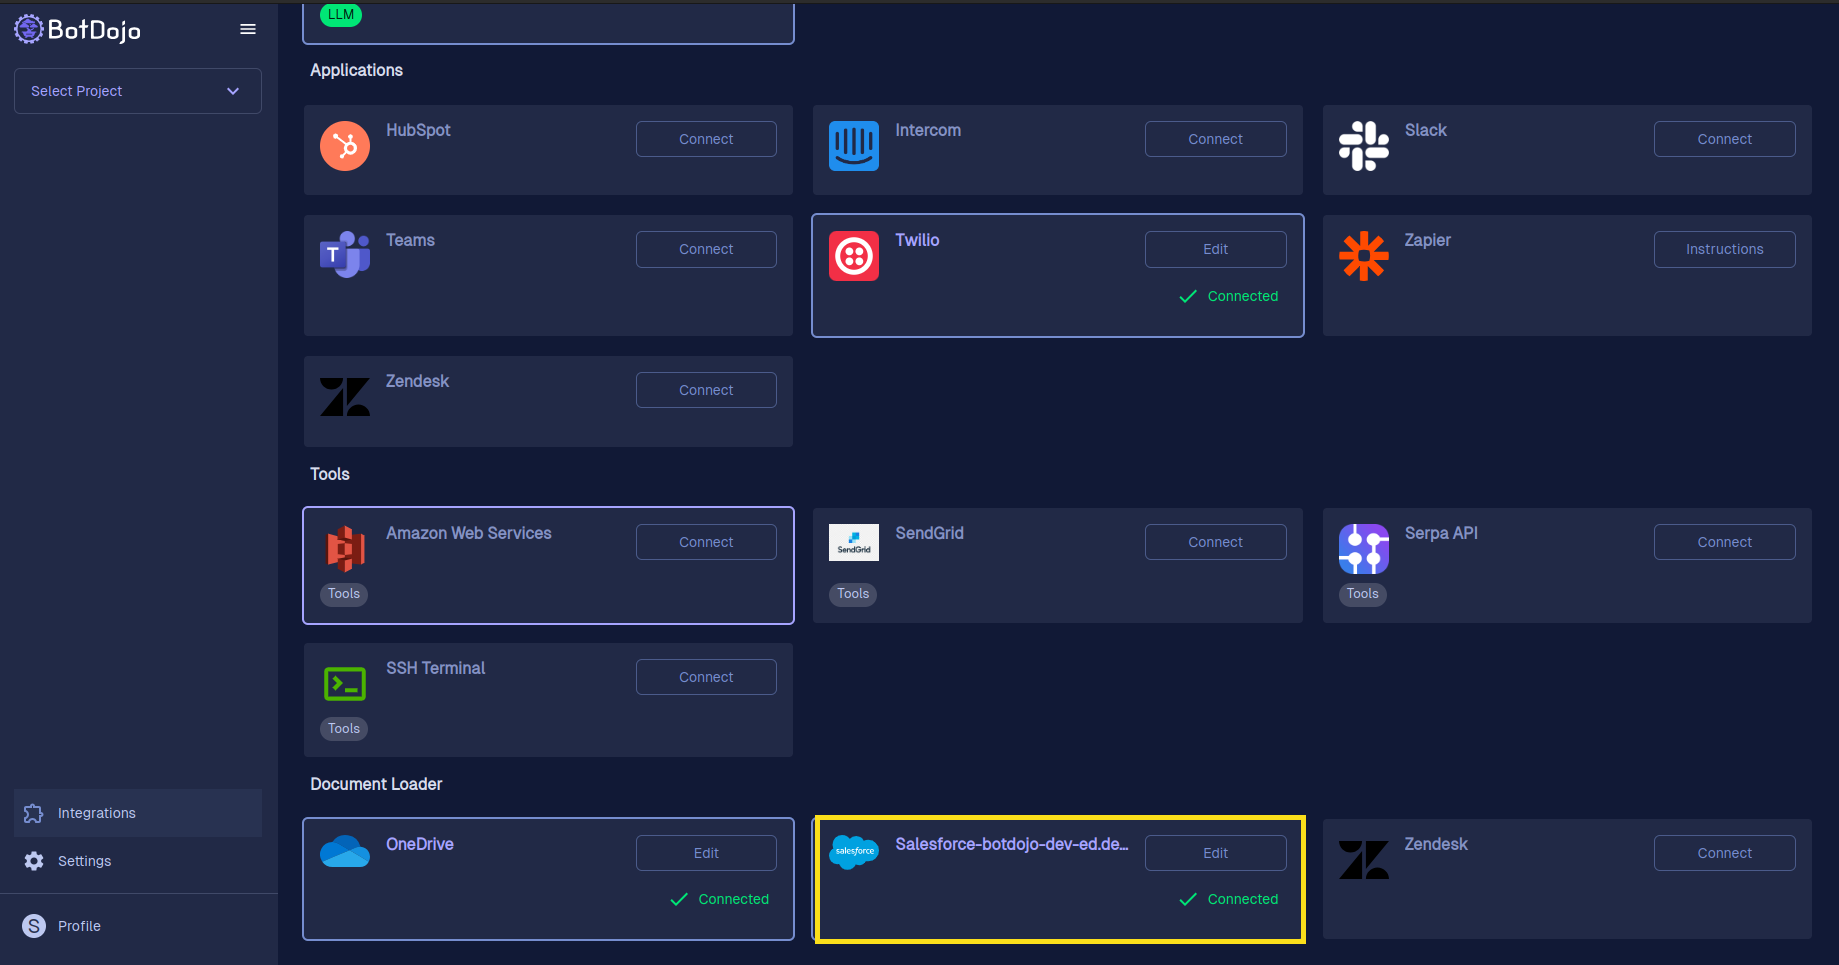
Now you have successfully connected Salesforce with your BotDojo account.
Using Salesforce in BotDojo Data Loaders
Once connected, you can use Salesforce data within your BotDojo account.
-
Navigate to Loaders
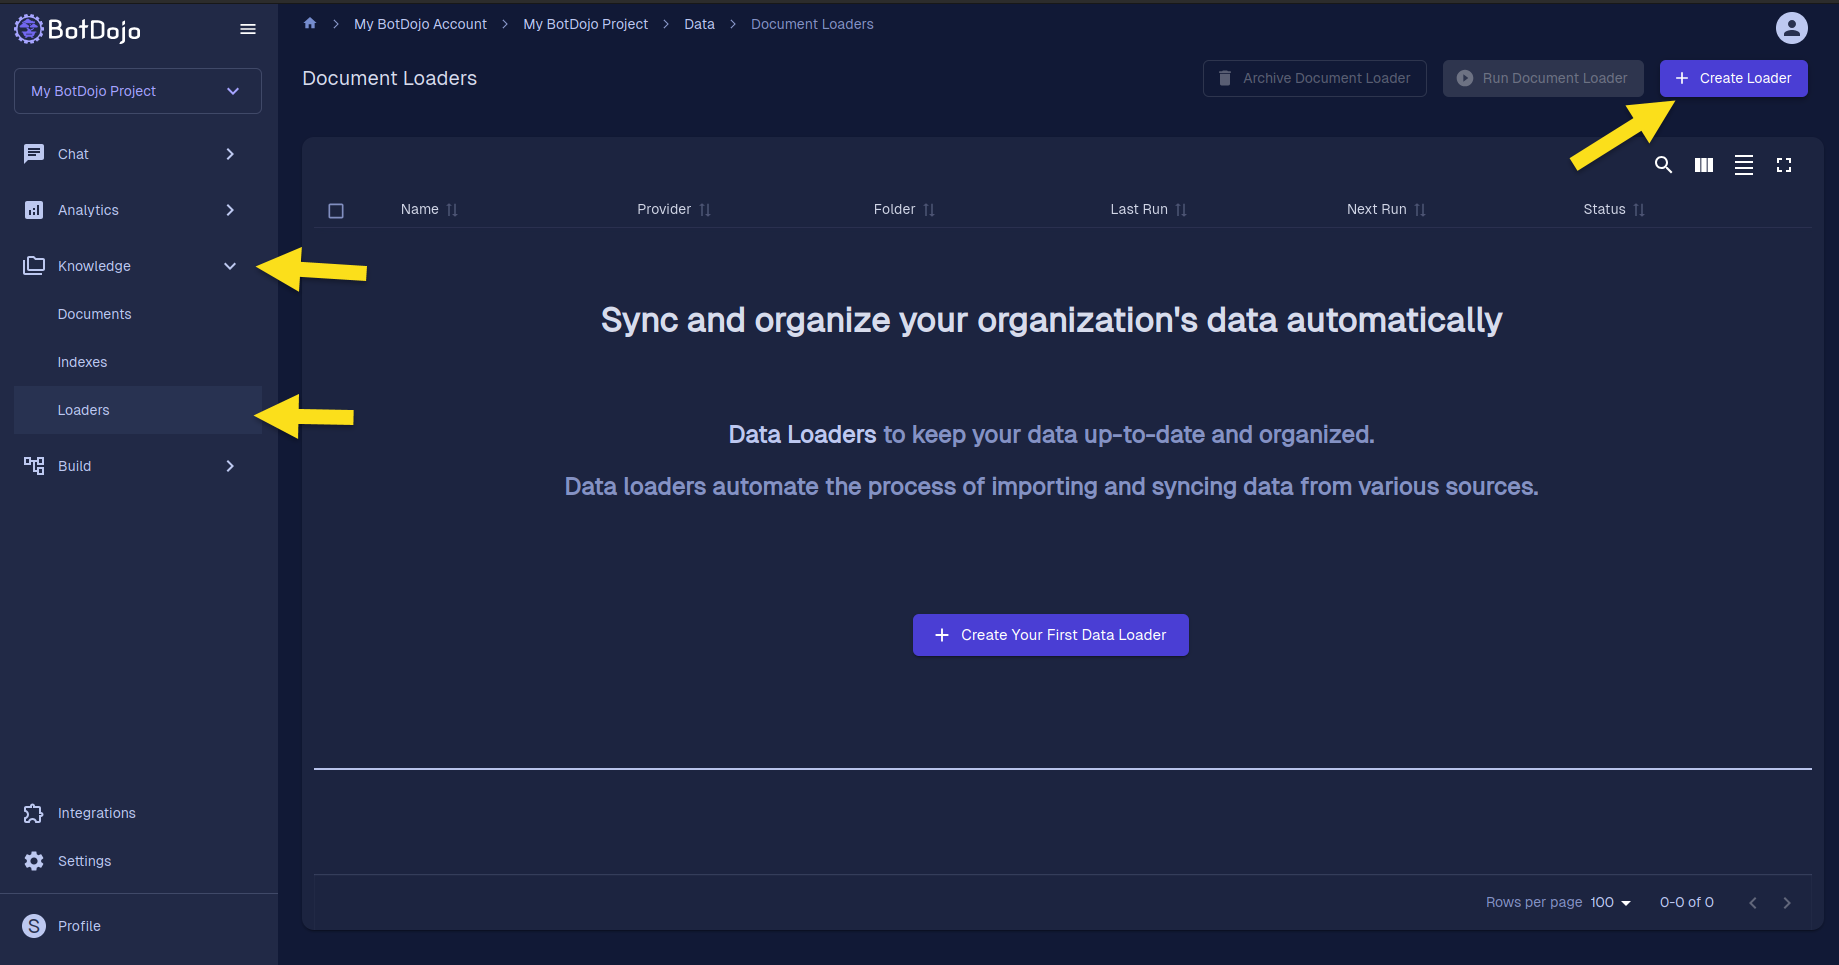
- Navigate to the Loaders section under Knowledge.
- Click on the Create Loader button
-
Create Salesforce Data Loader
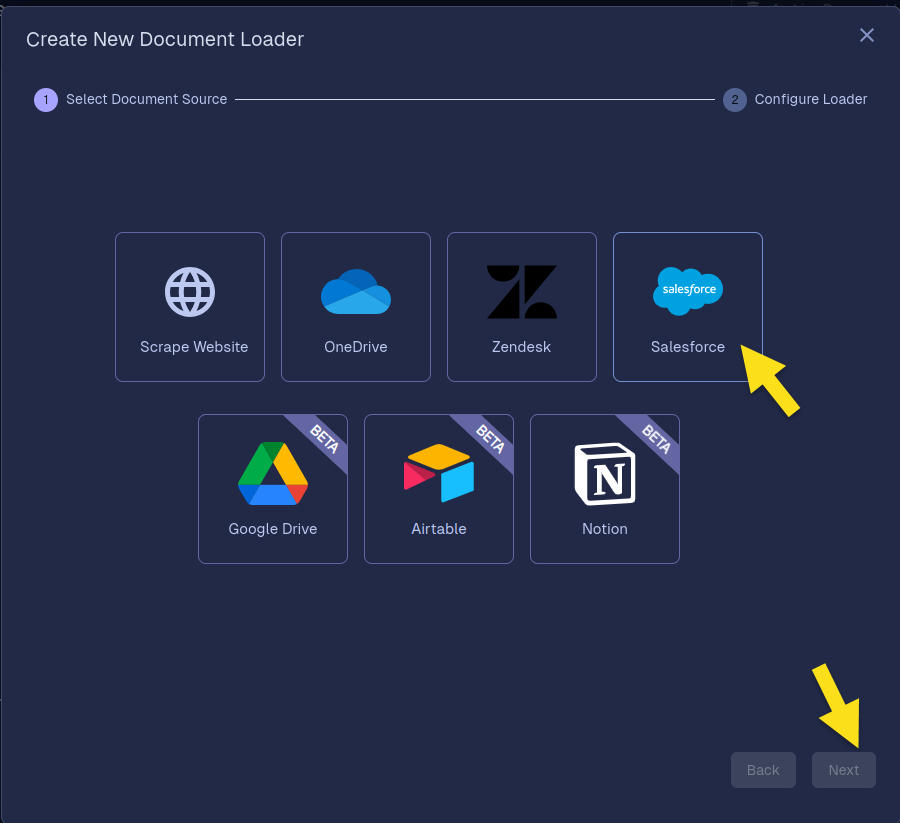
- A dialog box will appear, Select Salesforce from the document source options.
-
Configure your Salesforce Data Loader
- A dialog box will appear. Select Salesforce from the options.
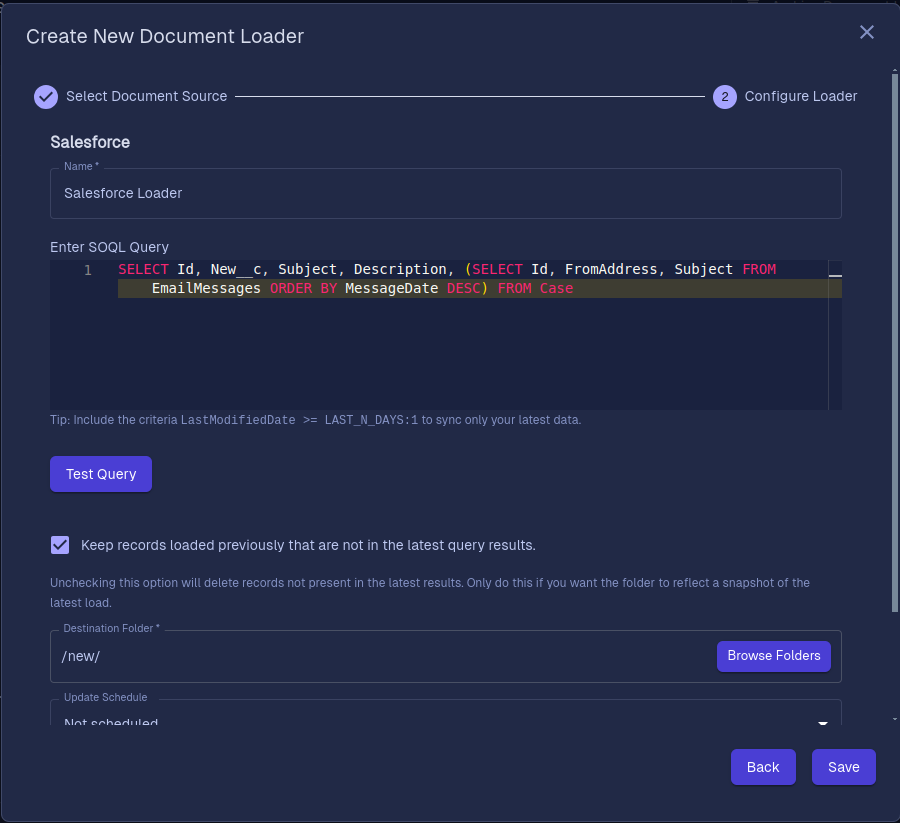
- Configure the Data Loader according to your need and fill in the required basic information:
- Name: Name for your Data Loader.
- SOQL Query:Your Salesforce SOQL that will fetch the documents from your Salesforce account.
- Keep Previous Records: This setting determines how document updates are handled:
- When checked: New records are added while existing records are preserved
- When unchecked: All existing records are replaced with the latest query results
- Destination Folder: Your BotDojo folder where you want your documents to be saved.
- Update Schedule: A dropdown that let you set a scheduler on your Data Loader for it to auto-run.
 Important
After typing your SOQL, click on the "Test Query" button to verify if your query is correct or not.
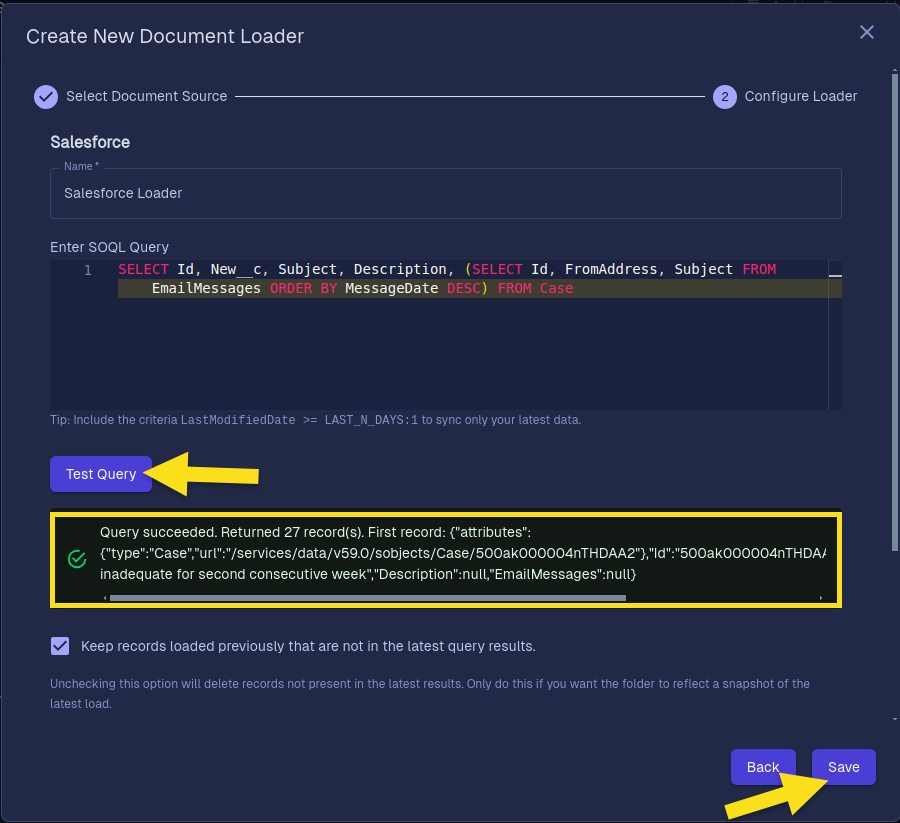
Finally, Click on the Save button.
Conclusion
Congratulations! You've successfully integrated Salesforce with your BotDojo account. Now BotDojo can securely access and manipulate Salesforce data in you, enabling powerful automation workflows between the two platforms.